How to Mute Email Conversation Threads in iOS 13's Mail App to Stop Annoying Notifications « iOS & iPhone :: Gadget Hacks
You may not want to disable notifications for the Mail app entirely on your iPhone since you could miss essential emails when they come in. But you can at least silence conversation threads on an individual basis. Doing so won’t mute all conversations from the same sender, only the thread you select. Plus, it works for group email threads where things can get chaotic.
Muting a conversation in Mail works for any thread, but you’ll see the most benefit when muting a particularly chatty group email conversation where you’d typically get alert after alert after alert. Silencing threads will not move them anywhere in your Mail app — they’ll remain in the inbox marked unread just like usual — you just won’t get notifications from the Notification Center.
- Don’t Miss: 200+ Exciting New iOS 13 Features for iPhone
To start muting email conversations, you need to be running iOS 13. If you have other iOS devices running an older iOS version, they will not be muted. Same thing if you sync with iCloud to Mail on macOS — you need macOS 10.15 or higher. However, if all of your devices are up to date, the silenced thread will be muted across your iCloud account, meaning no notifications on any devices.
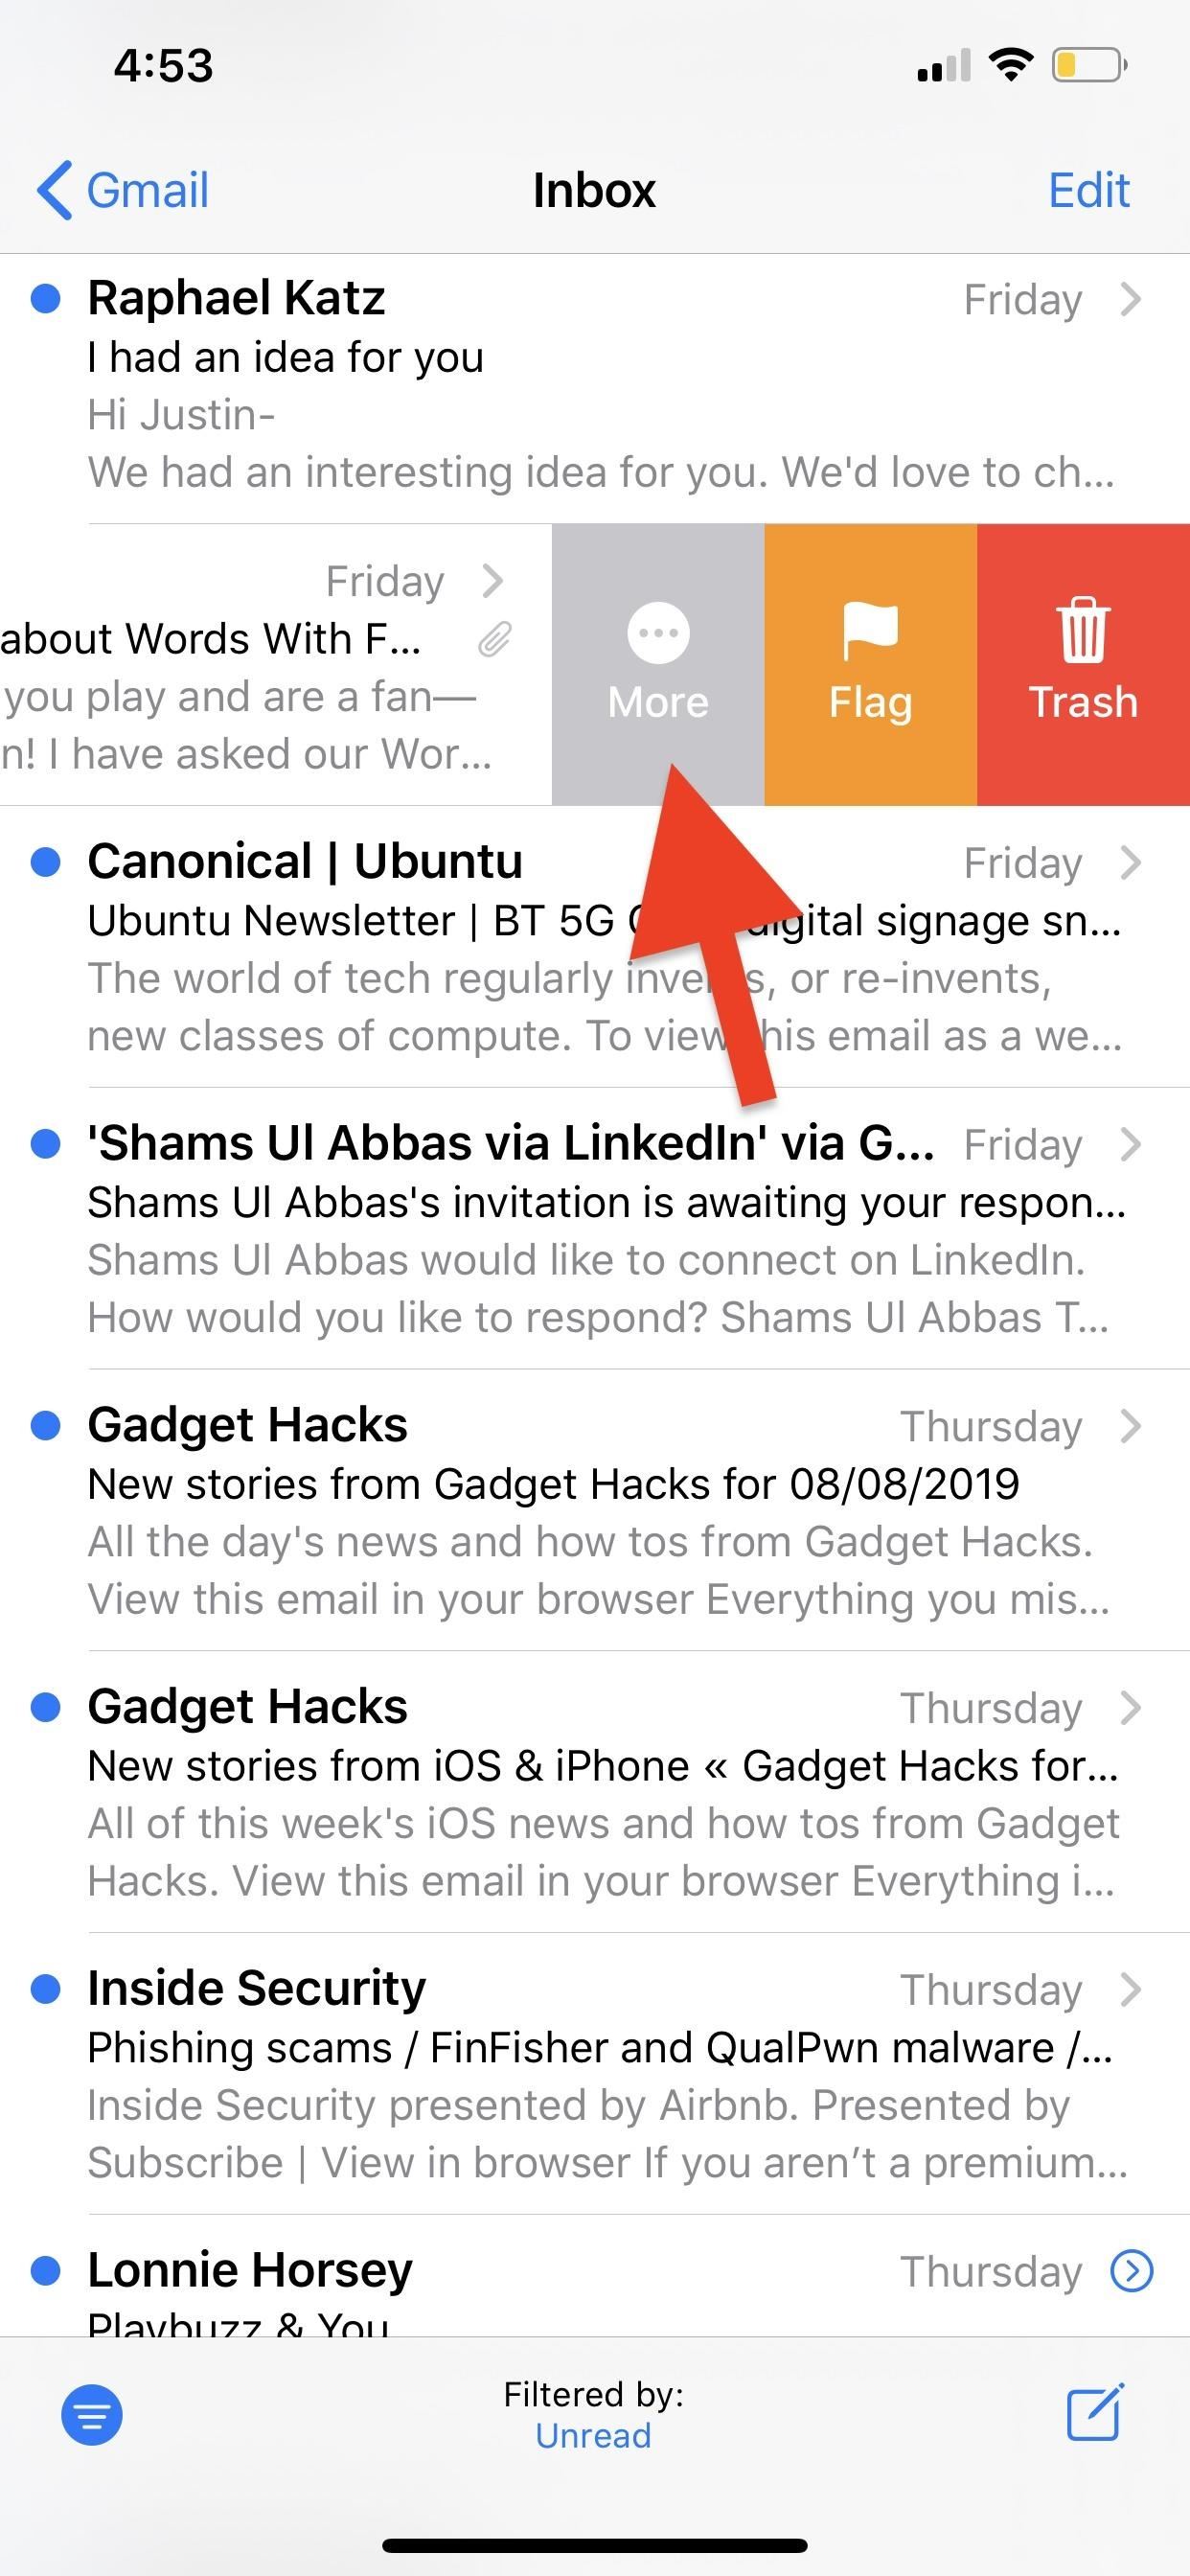
There are two ways to mute an email conversation thread in iOS 13 — a swipe gesture from any folder’s list, and a tap from within the email thread itself.
To use the swipe gesture, open up your Inbox or another folder where the conversation is. Next, short-swipe left on the email thread you want to silence, to bring up the available options. If you swipe too far, you may end up deleting, flagging, or moving the message automatically. Last, tap the gray “More” button, then select “Mute” from the action sheet.
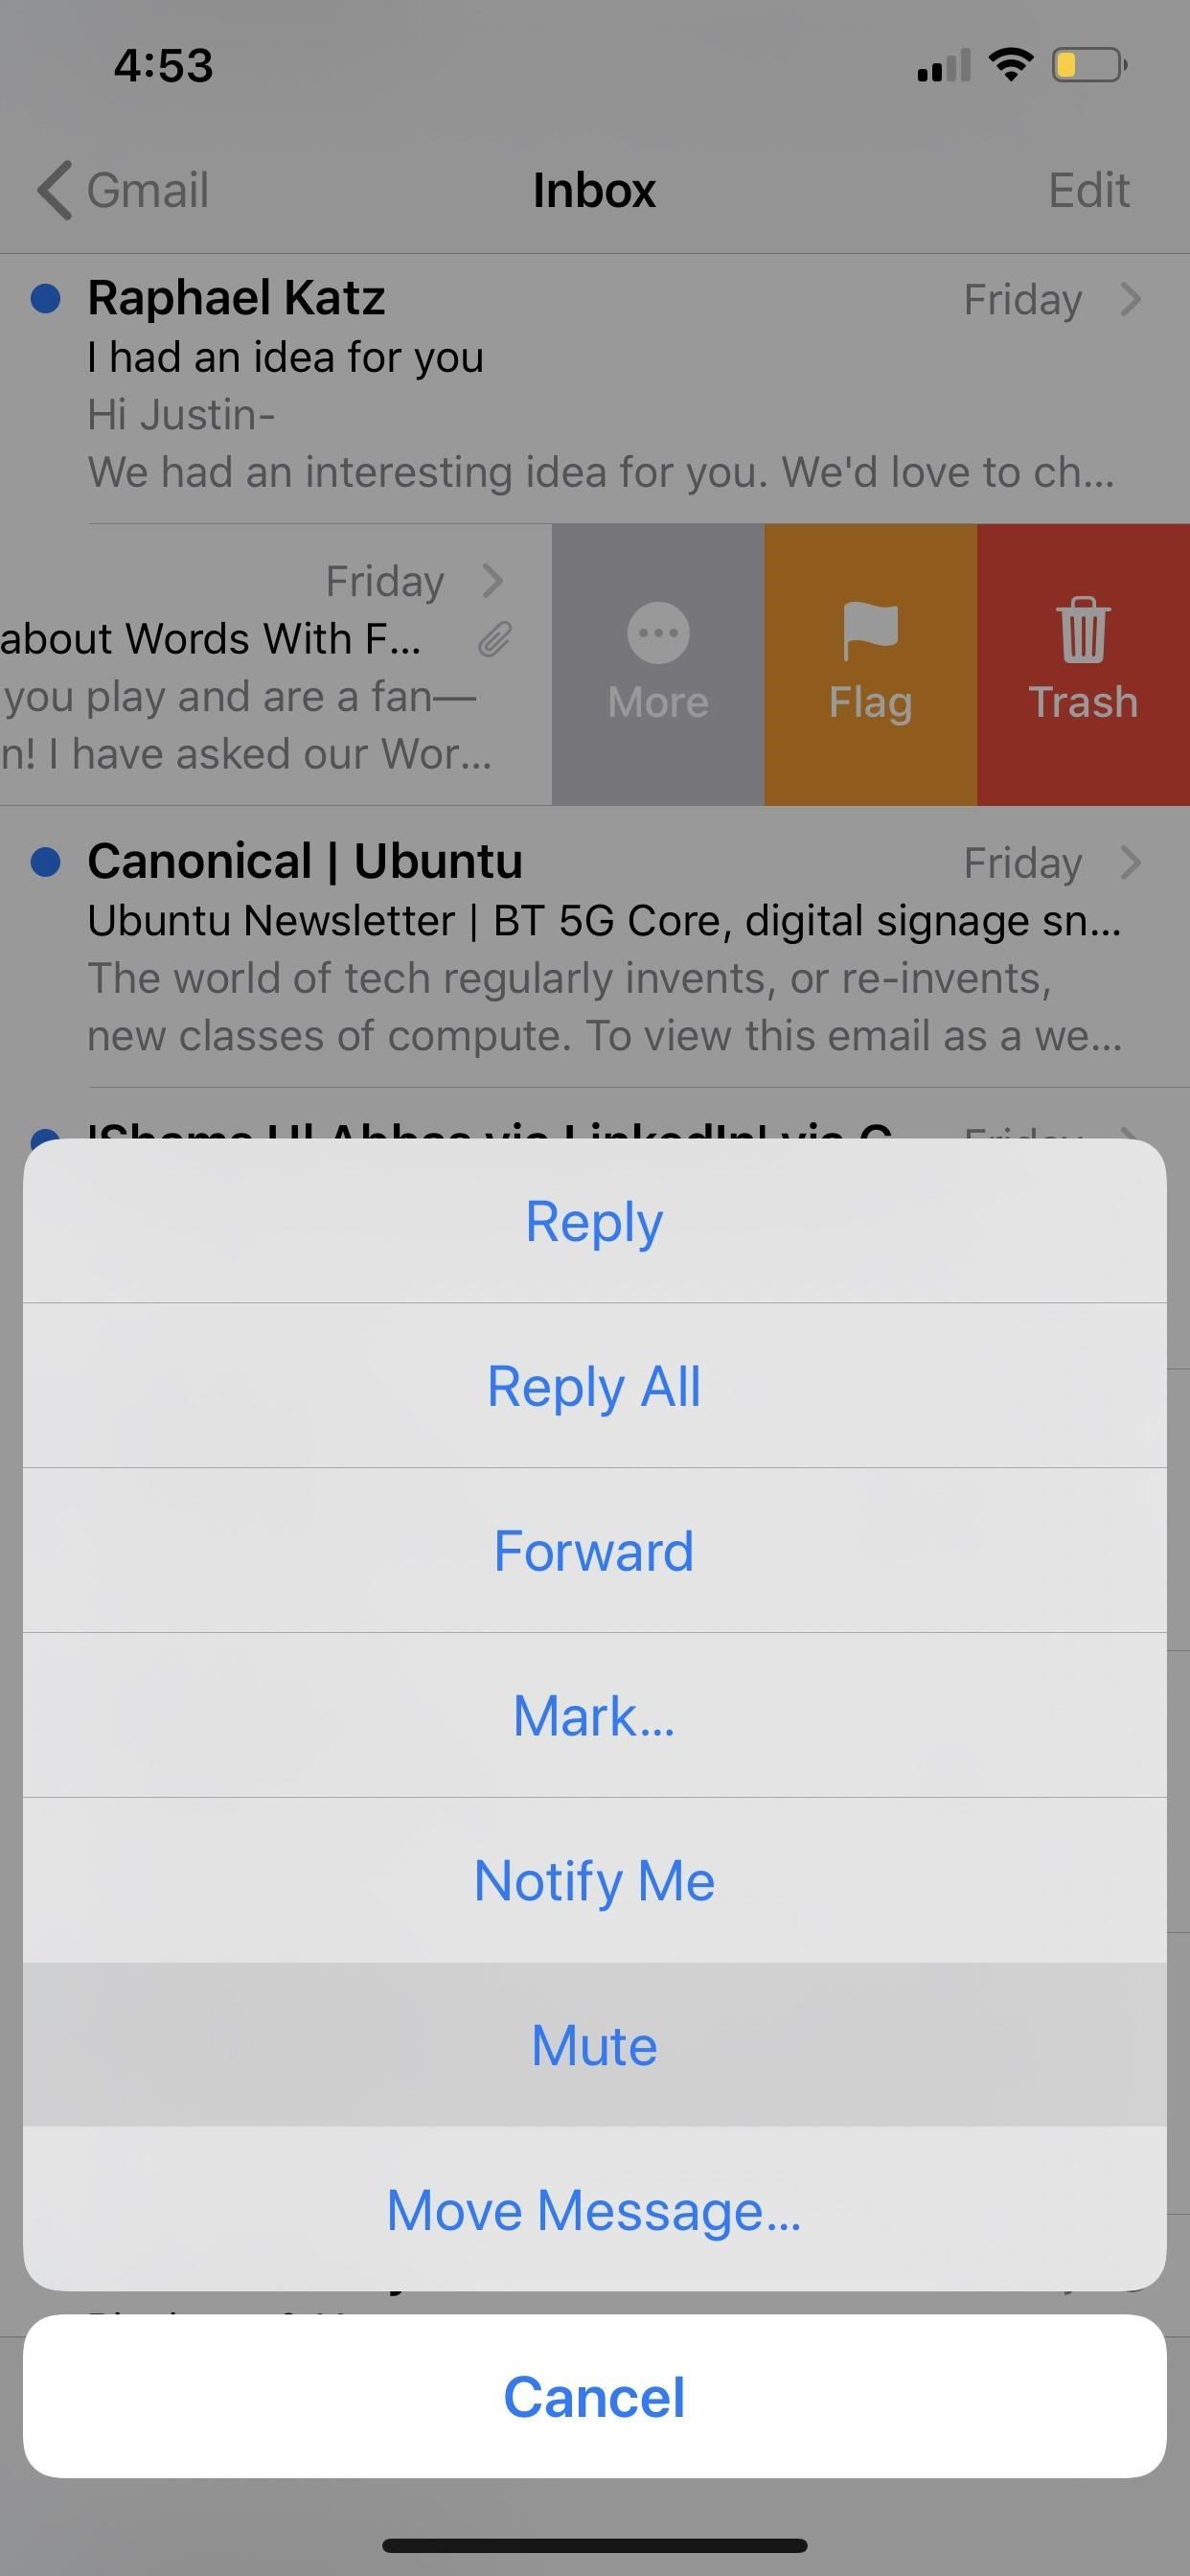
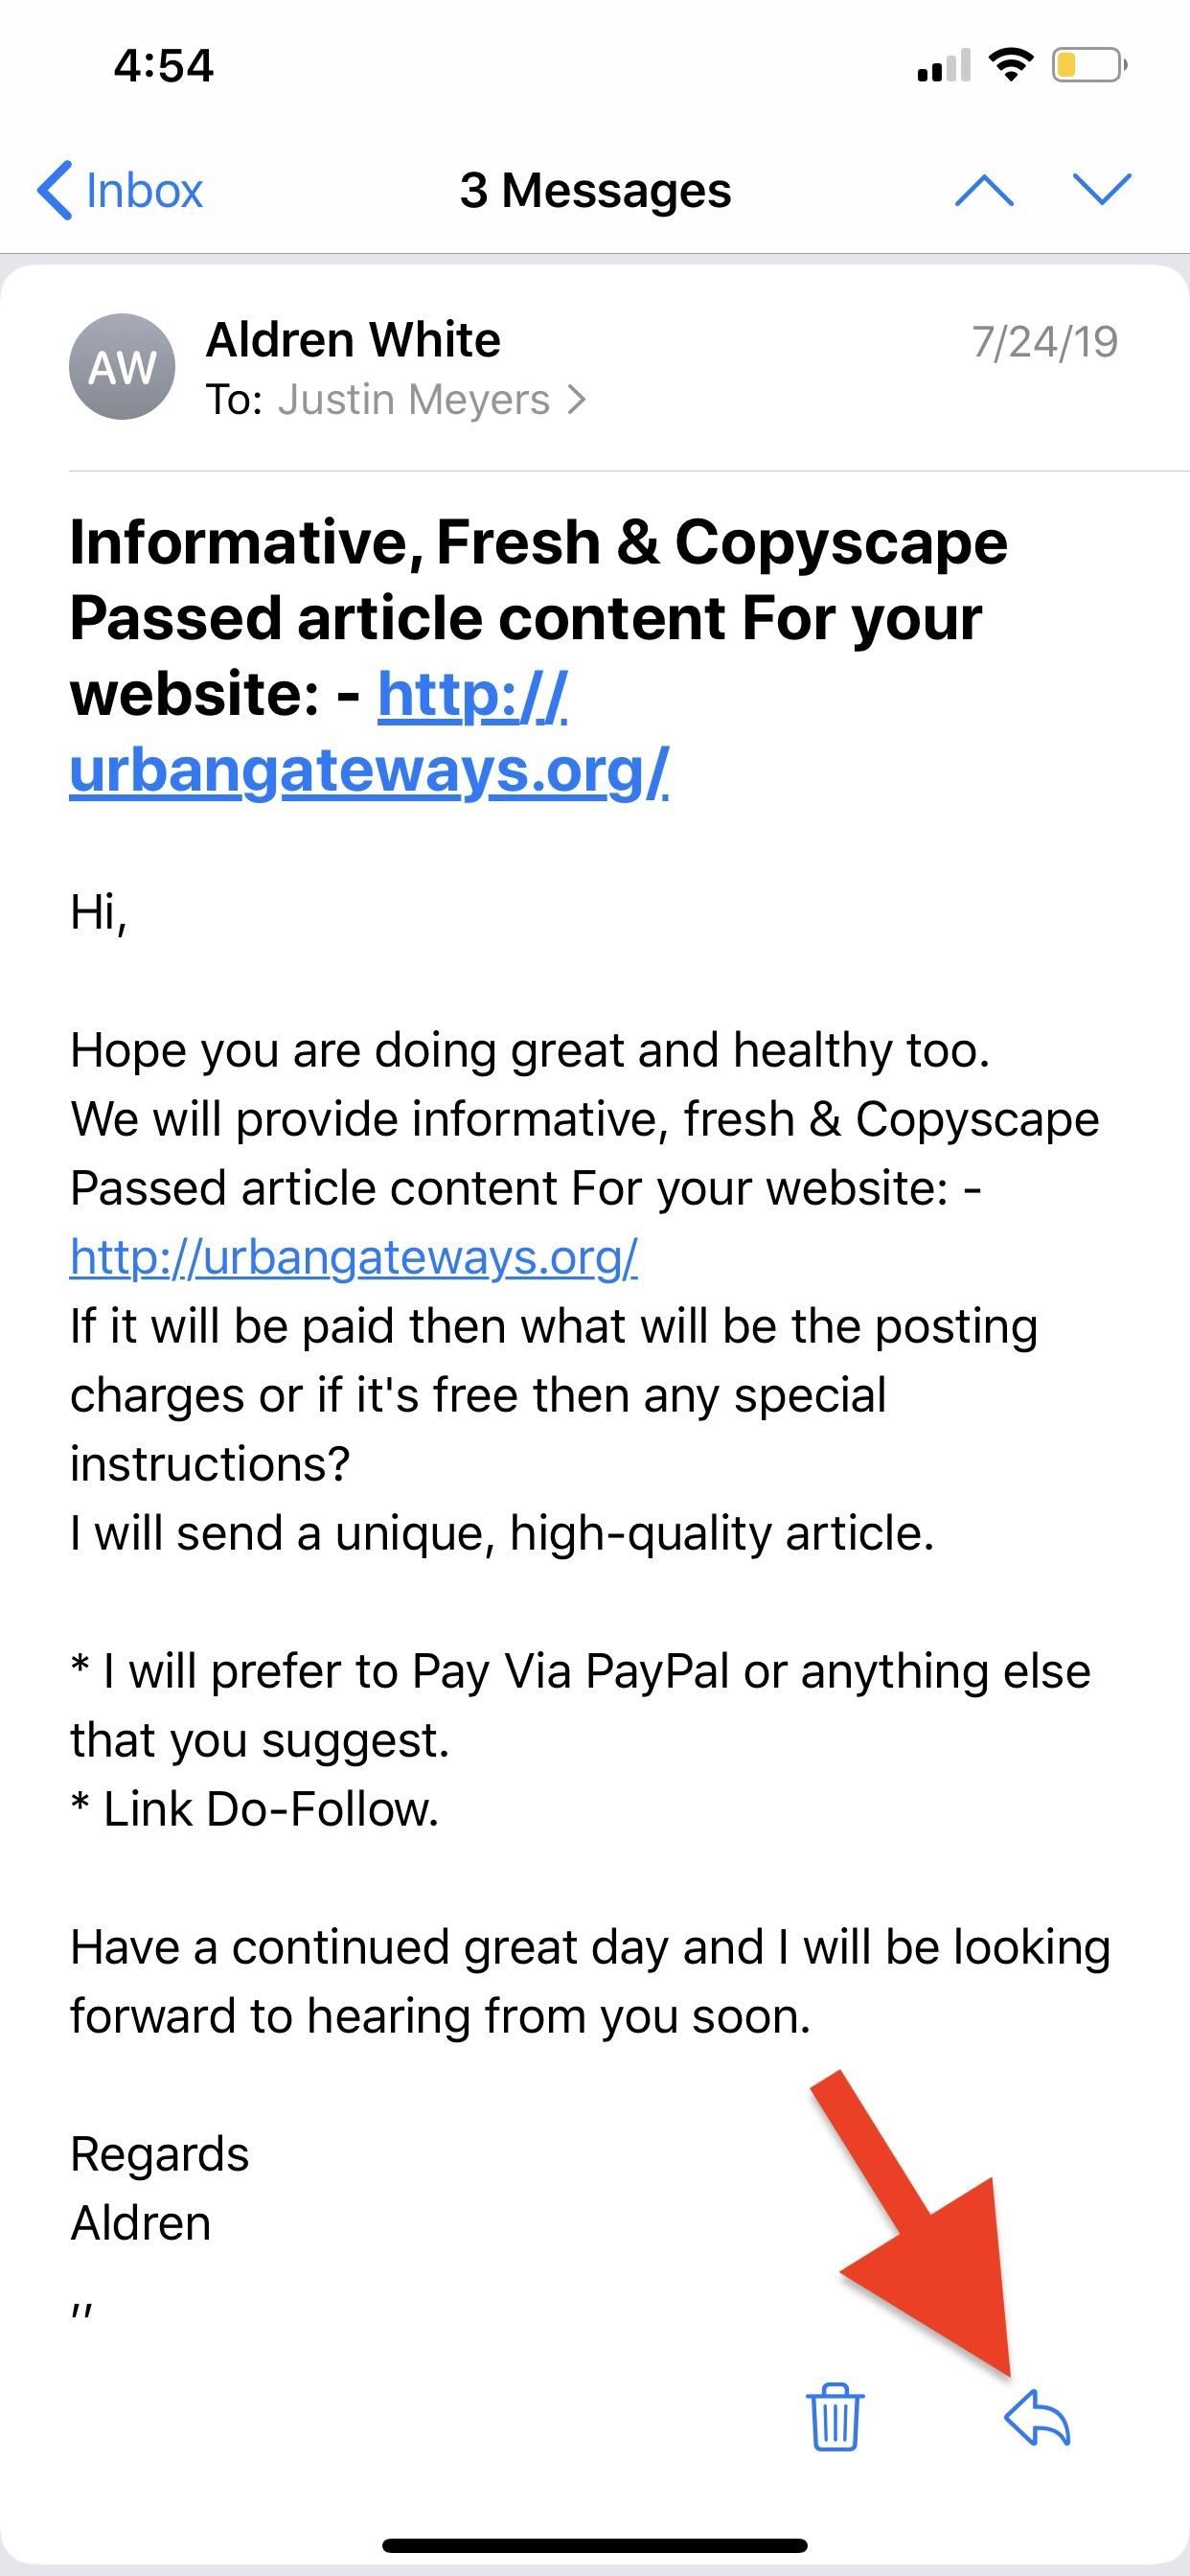
If you’re already inside the email you want to silence notifications for, tap the reply button in the bottom right. In the action sheet that pops up, tap “Mute,” and that’s it.
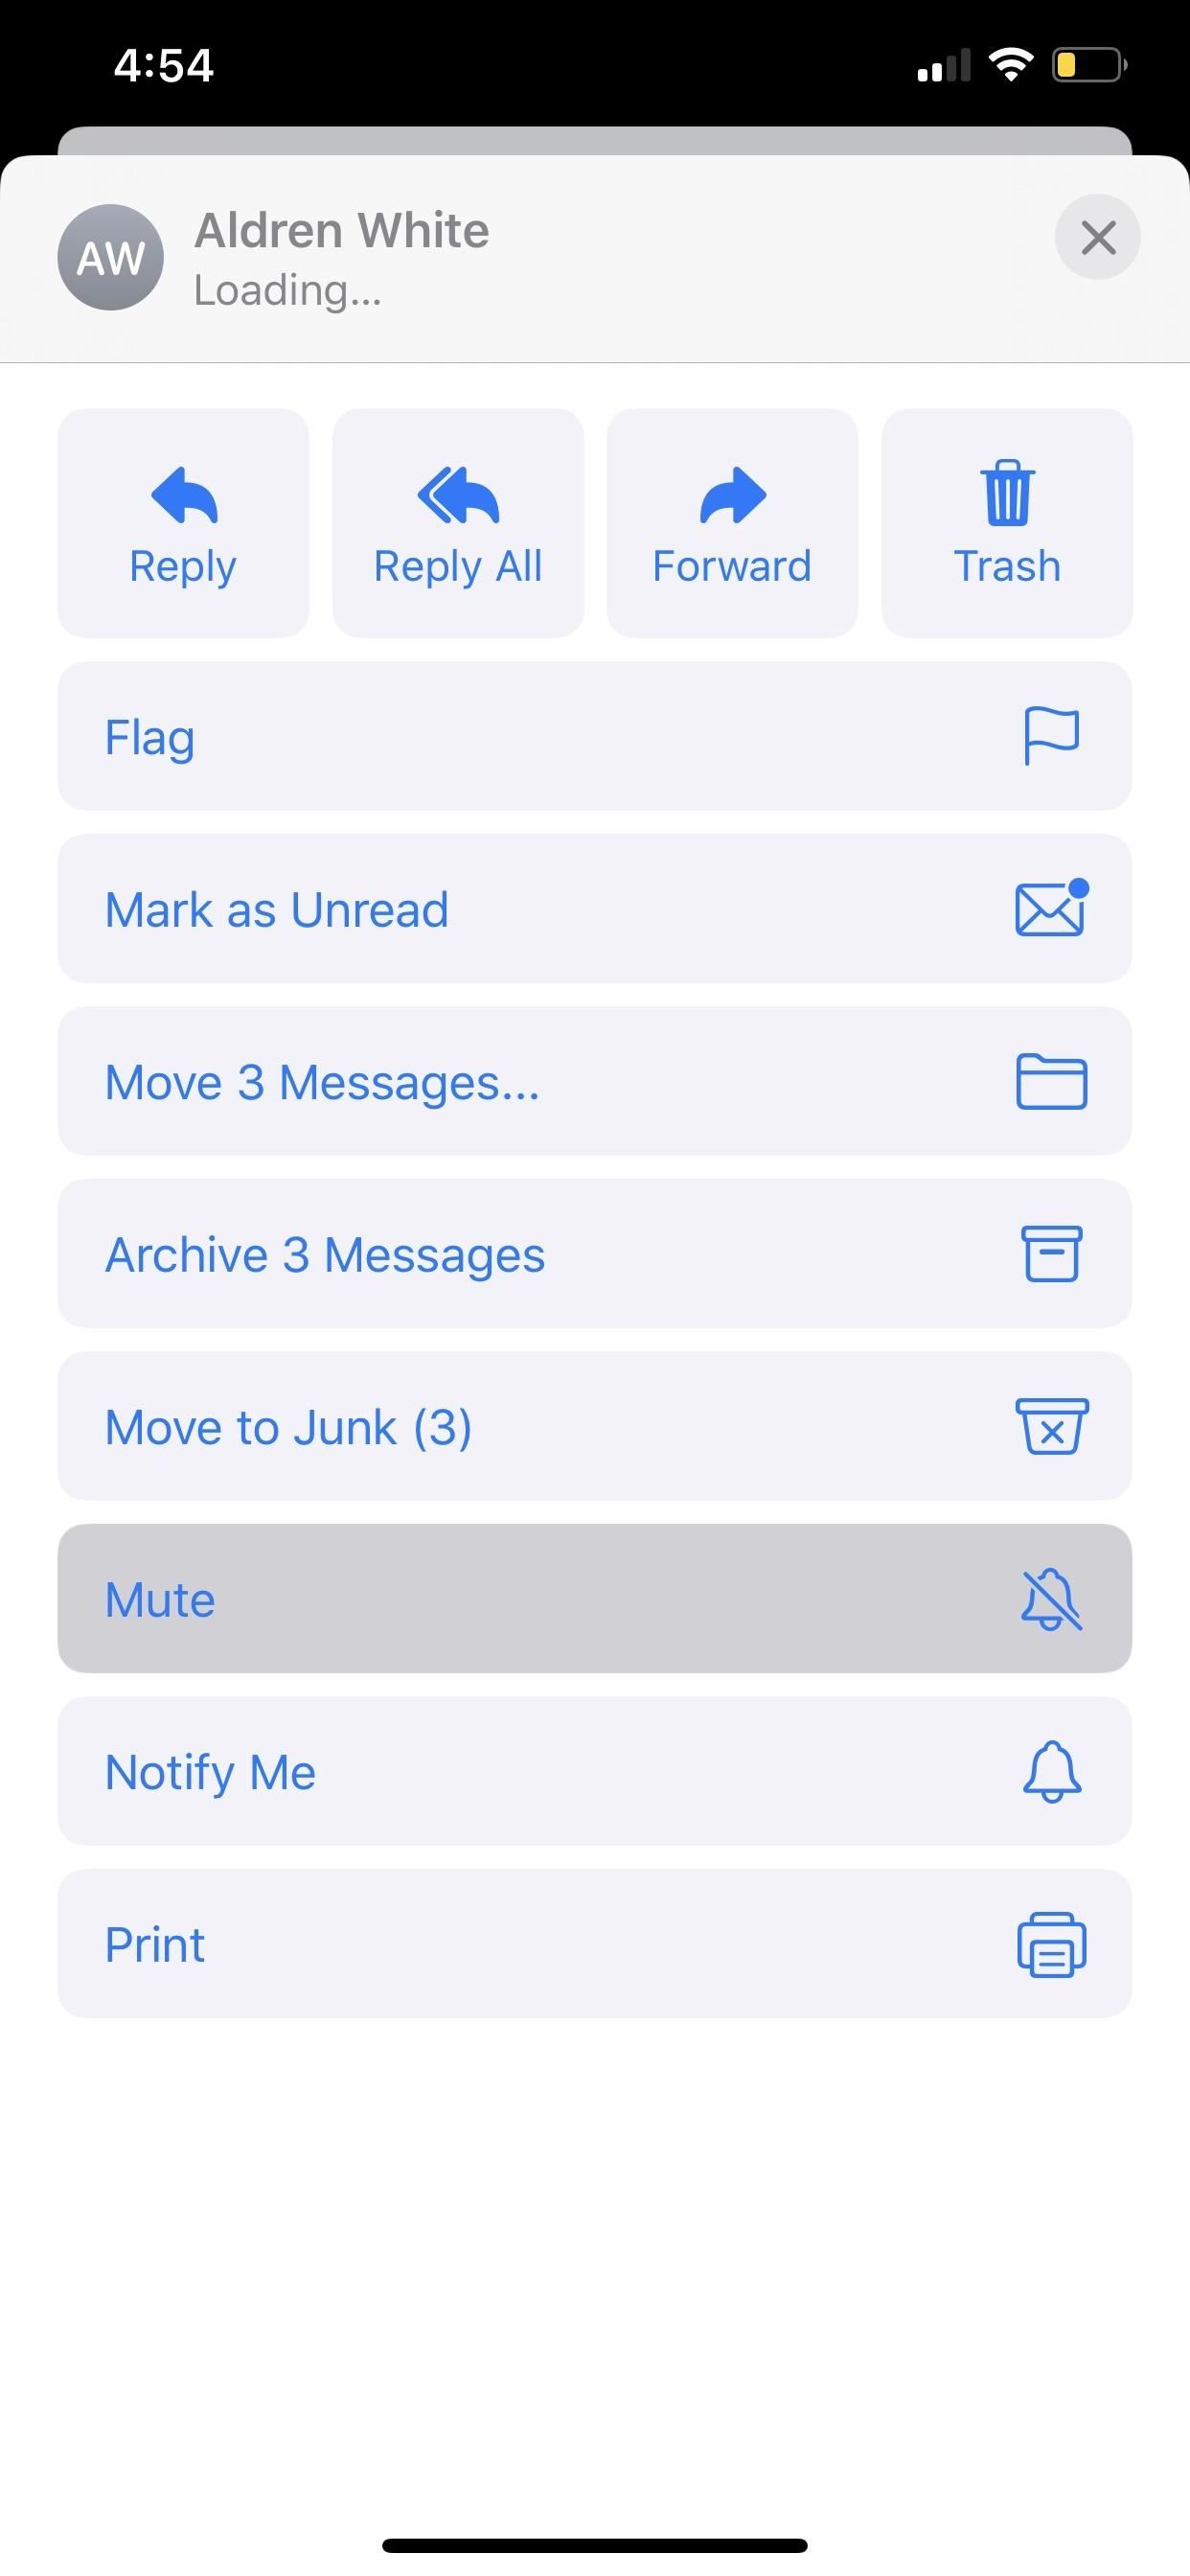
No matter which way you muted it, you will no longer receive notifications for that email thread. A muted email will have a mute icon (bell with a slash through it) by the time of each message. That applies to both inside of the email thread and in the list view of any mailbox or folder.

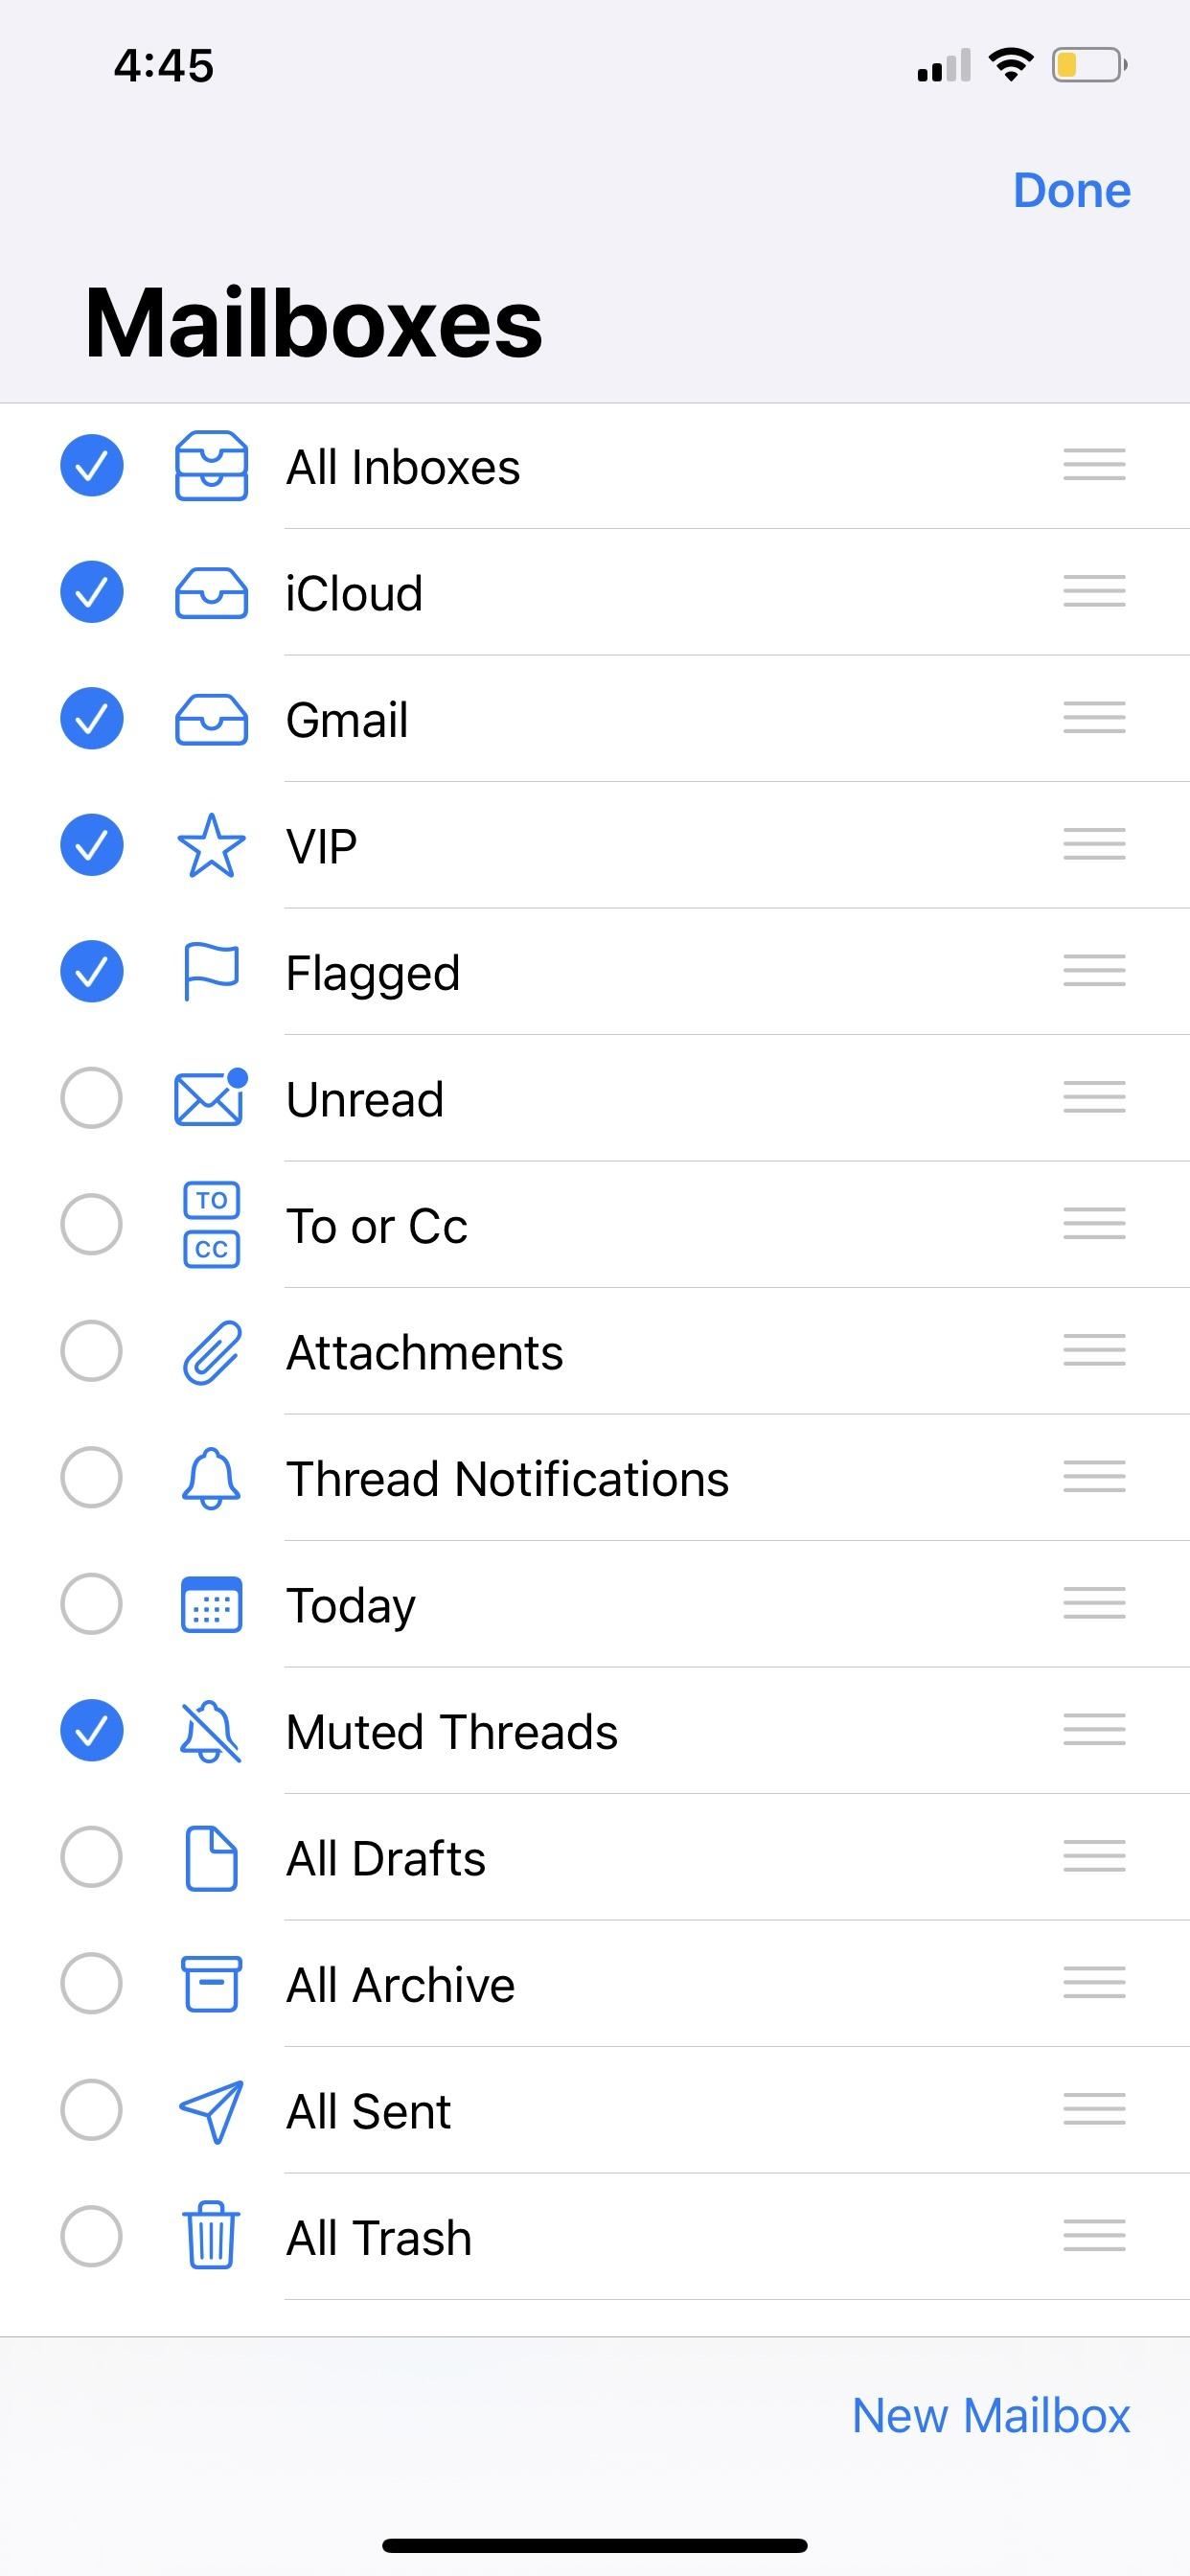
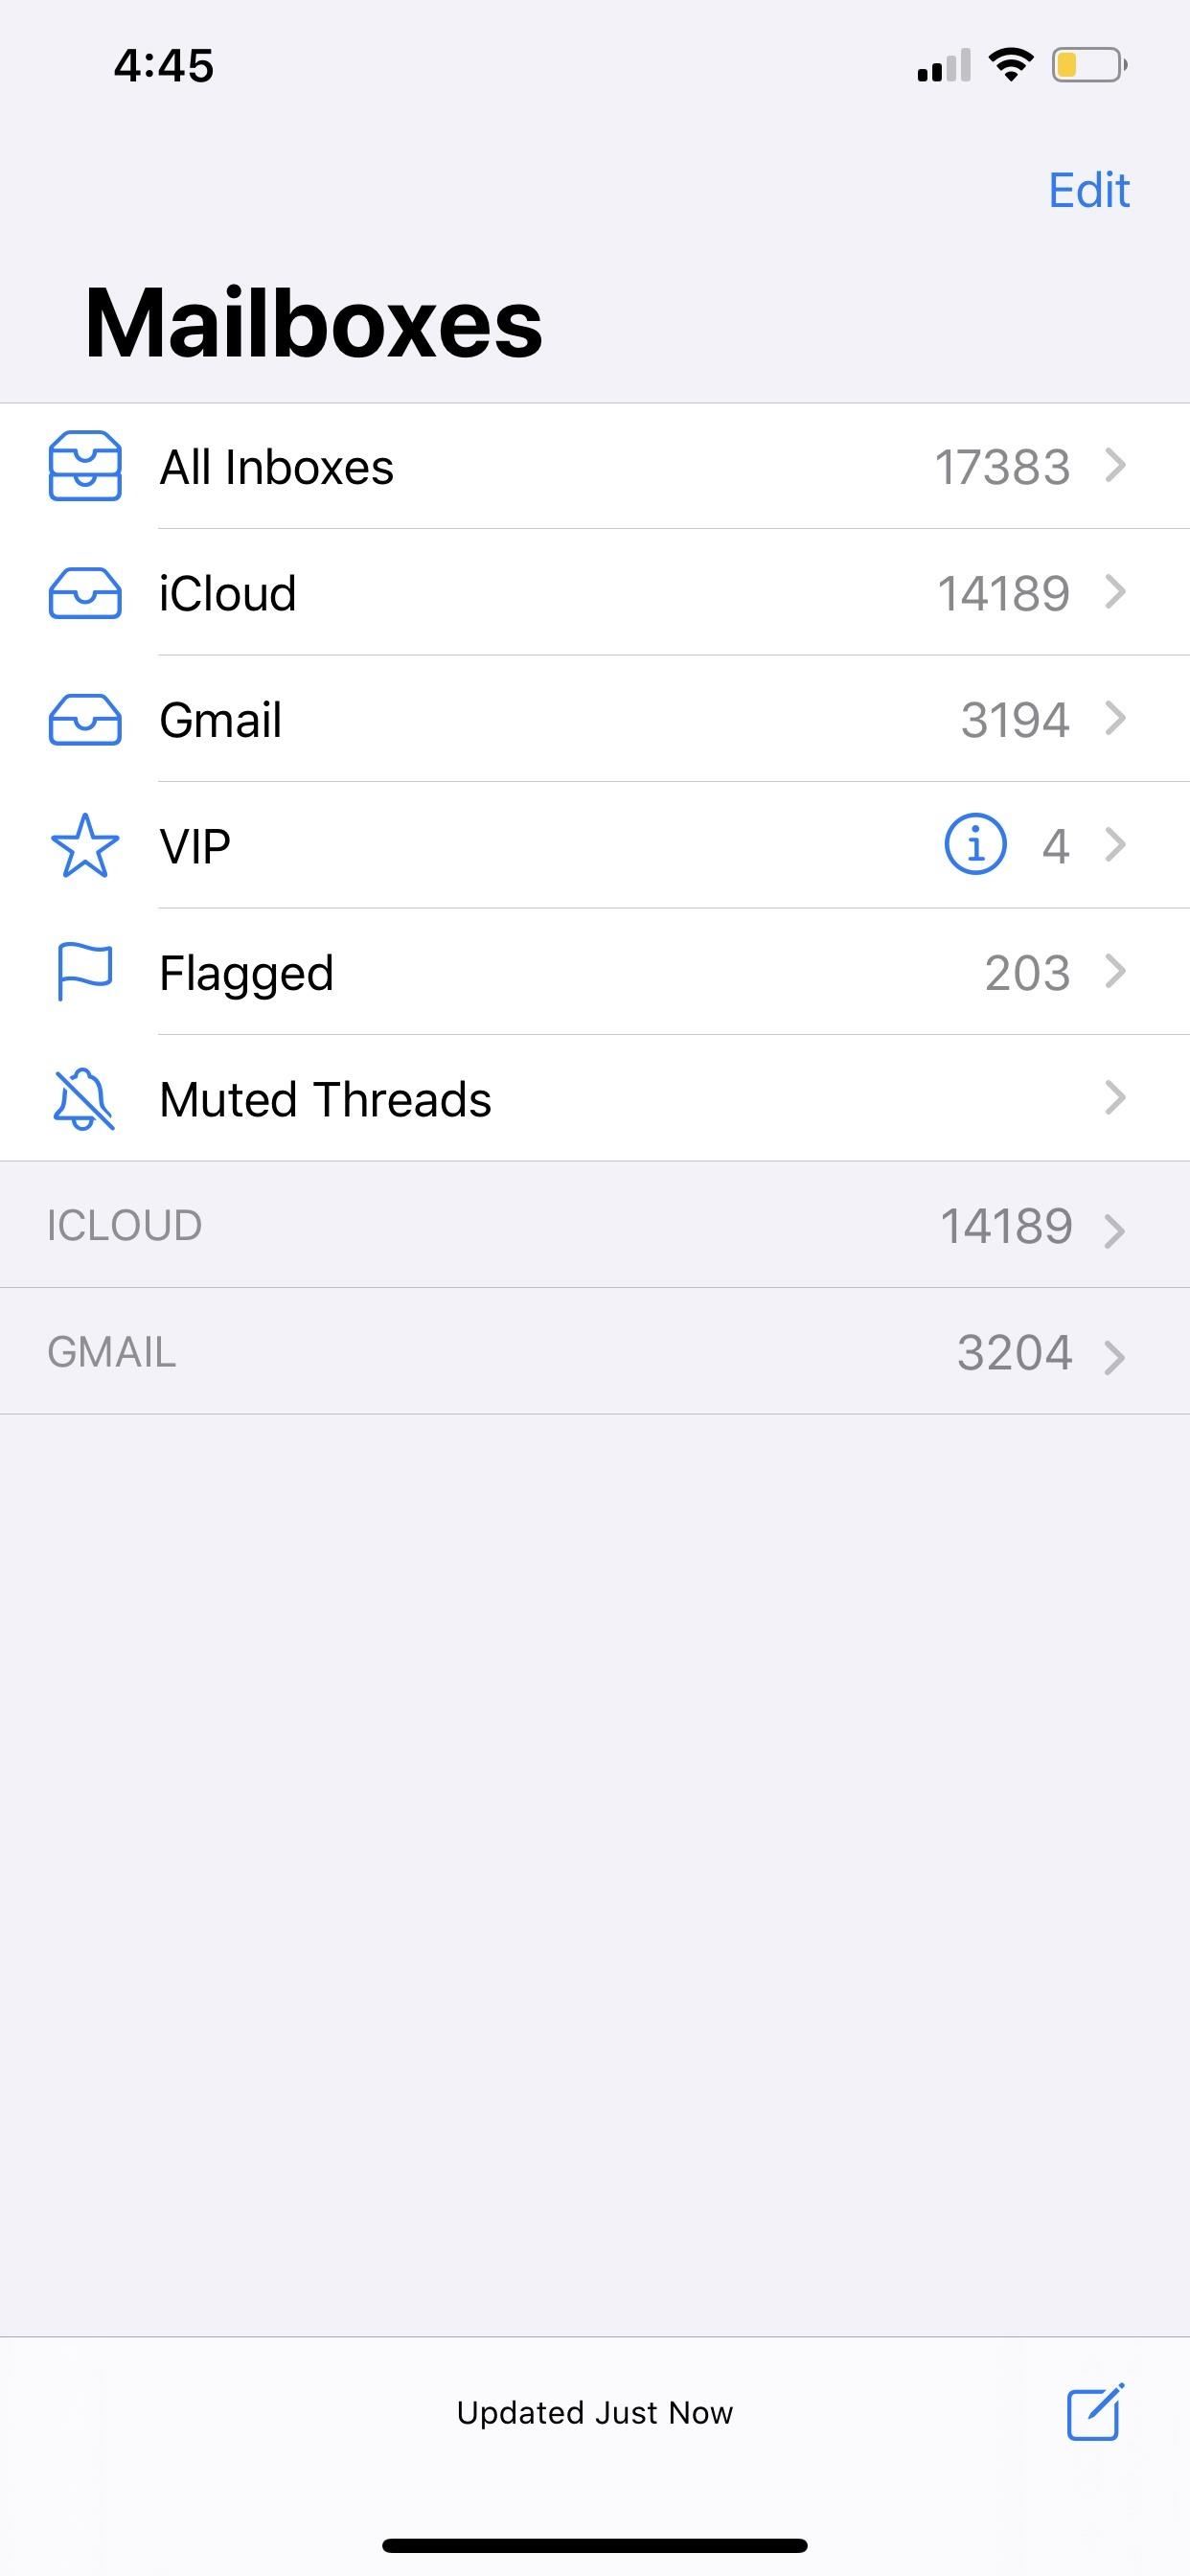
If you want to unmute the email and get notifications again, perform either option above again, but this time, tap “Unmute” to reverse the alert restraint. If you’re not sure where the email thread is you want to unmute, you can add a folder for them all on the main Mailboxes screen. Tap “Edit” in the top right, then make sure the “Muted Threads” option is toggled on and hit “Done.” From now on, any threads you mute can be found in the new “Muted Threads” folder.
Don’t Miss: How to Mute or Leave Group Chats in WhatsApp, So You Never Get Annoyed by Notifications
Just updated your iPhone? You’ll find new features for TV, Messages, News, and Shortcuts, as well as important bug fixes and security patches. Find out what’s new and changed on your iPhone with the iOS 17.6 update.
Cover photo by Nelson Aguilar/Gadget Hacks; Screenshots by Justin Meyers/Gadget Hacks
But if you delete all messages you have marked as “mute” it is impossible to turn it off, since there is now nowhere to open a message and use the unmute option.
Similar for the thread notifications. Nowhere can you list which threads the phone is waiting on, neither can you therefore clear them.