Recently, I decided that instead of copying video files from one computer to another when I wanted to watch something on my TV, I would setup my network to stream the videos. I had previously tried NFS and UPnP, both without very impressive results. Therefore, I decided to try Samba, even though my perception of it was that it was mainly for sharing between Linux and Windows, and I had a Linux-only house.
Much to my surprise, setting up Samba in KDE was a cinch, and Boxee, the media center application on my TV, recognized the shares immediately.
To get started with Samba, you need to install two packages: samba and kdenetwork-filesharing. In most distributions, all other necessary packages will be installed along with those.
To install in Kubuntu, use your graphical package installer of choice or type the following from within Konsole:
sudo apt-get install samba kdenetwork-filesharing
To configure Samba shares in KDE:

1. Right click on any folder
2. Select “Properties” from the menu
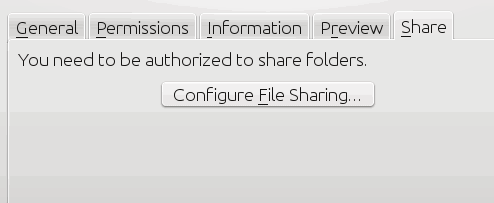
3. Choose the “Share” tab in the properties window
4. Click the “Configure File Sharing…” button
5. When prompted for your root password, enter it.
Alternatively you can quickly access the configuration module by pressing “Alt+F2” and typing “kdesudo kcmshell4 fileshare“.

If all you need is basic read-only access on the client computer, leave “Simple Sharing” selected. If you want the client to be able to change, upload, and remove files, you will need to choose “Advanced Sharing”.
By default, Samba will have a share setup for any printers connected to your system. To add folders:
1. Click the “Add…” button
2. Type in the path to the folder or click the folder icon to browse for it
3. Check the “Share with Samba (Microsoft(R) Windows(R))” box
4. Optionally, change the name of the share to whatever you want
5. Click OK.
Next, configure the Samba server for easy browsing:
1. Press “Alt+F2”
2. Type kdesudo kcmshell4 sambaconf
3. For “Workgroup” enter the same name on both computers
4. For “NETBIOS name”, choose a name for your computer’s network identity
5. In “Security Level”, select “Share”, which will allow immediate read access
6. Click “OK”.

You should now be able to view your samba shares on the client computer. In KDE, you can check this by doing the following:
1. Start Dolphin
2. Click “Network”
3. Click “Samba Shares”.
4. You should then see your workgroup. Click it.
5. Select the machine you want to view
6. Choose the shared folder.
For other applications, such as Boxee, the Samba shares should be visible when you attempt to add sources. When playing media using Samba, the files will behave like local files, allowing you to rewind and fast forward with ease. You should also be able to view and play media on a Windows computer or a Samba-enabled Mac.
KDE offers an extensive list of configuration options for Samba, so you can tweak it to your heart’s content. If, however, all you need is basic sharing, the setup is quite easy and will only take a few minutes.


