Whenever you want to view or kill a running process or task in Windows, the obvious thing to do is open Windows Task Manager. Then look for what you want to kill and click End Process or End Task. Even if you are not a fan of the Windows version, there are plenty of alternative task management utilities around that can do the basics while offering more features and more advanced functionality
A limitation with Windows Task Manager is its inability to kill more than one process at the same time. This is sometimes required if there are malicious or potentially unwanted programs on the system because often they consist of more than one process. It’s also similar when trying to kill processes that are controlled by services because the background service can simply re-launch the program.
By terminating all processes that are causing the issue at once, it doesn’t give anything the chance to respawn and hopefully stops things running that you don’t want running. As Windows Task Manager can’t do it, you will need another method, here are ten for you to try out.
1. Ultimate Process Detail and Killer
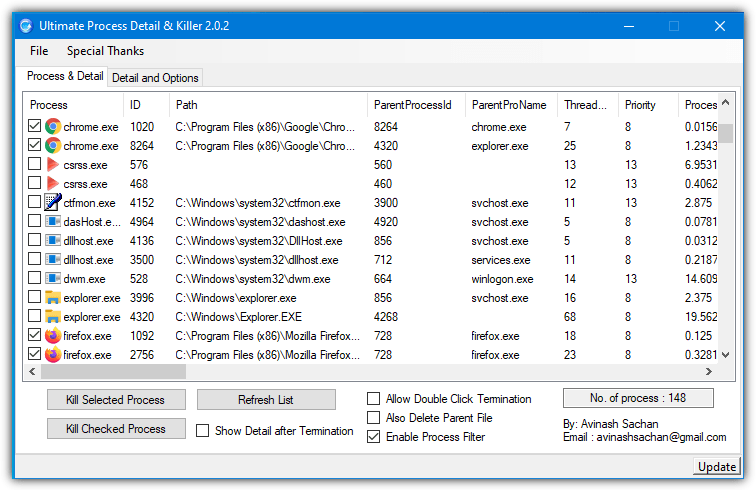
Ultimate Process Killer is a standalone portable program of only 153KB that shows you all running processes and allows you to kill them in batches. As the name suggests, it does also show a good amount of detail of all running processes in the main window.
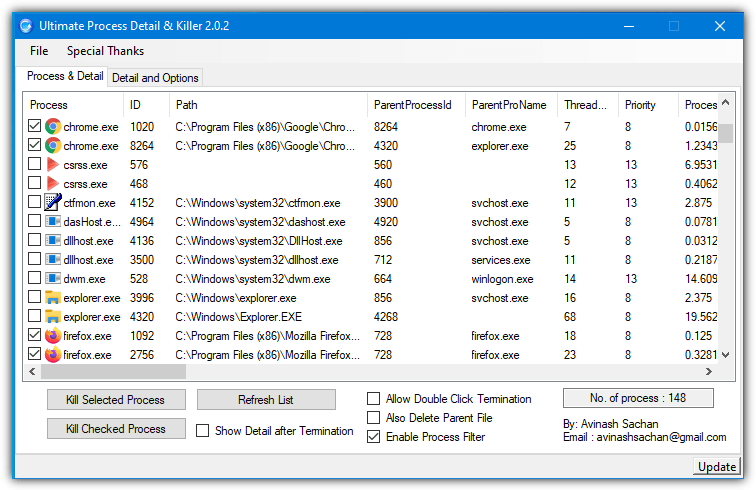
Run the program or refresh the list if it’s already open, check the process boxes you want to kill and then press Kill Checked Process. The procedure is immediate and has no confirmation dialogs. An option is also available to terminate any single process on double click. A useful function is the logging in the Details and Options tab that tells you how the procedure went.
Download Ultimate Process Killer
2. Killer
Killer is one of the newer tools on our list and it’s designed specifically to end multiple tasks and nothing more, as noted by the developer. It’s quite a visually appealing program with a clear and easy to understand interface. There’s even a dark UI mode for users that prefer the dark Windows app mode. The option is found in the Settings menu (three horizontal lines) at the bottom right.
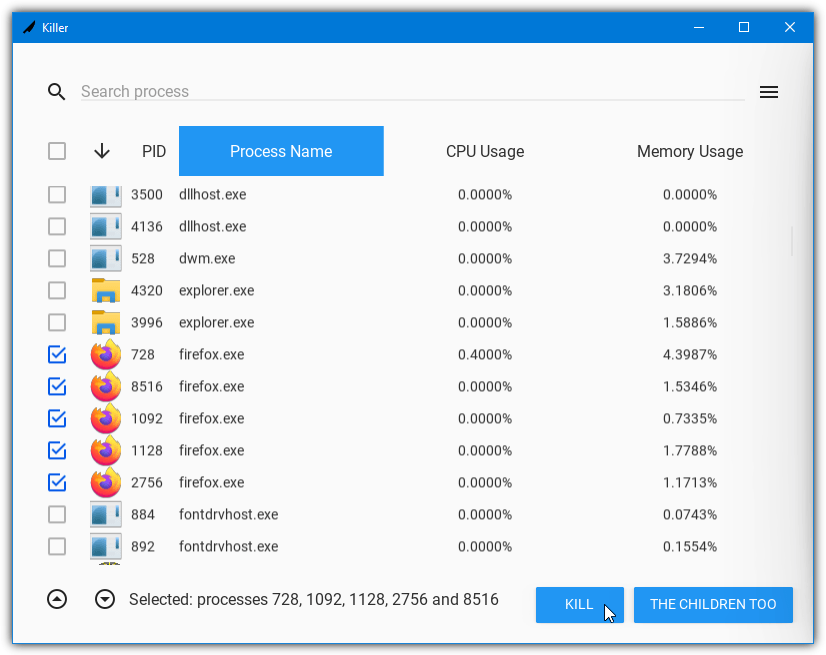
Just check the boxes you want and press the Kill button to terminate the selected processes. The Children Too button will also kill processes that have been launched by those checked entries. There is a “Select all” check box but it’s something that should be avoided as it will try to close Windows processes that should not be closed. A portable or installer version is available.
Download Killer
3. Auto Kill Any Process
Auto Kill Any Process is interesting because it has the ability to create lists that can then be used to batch terminate processes. Running processes can be added to a Hitlist and batch terminated every time you execute the list or killed immediately. Unless you use something like Universal Extractor to unpack the MSI installer, it will have to be installed. The .NET Framework 3.5 is required for Windows 10/11.
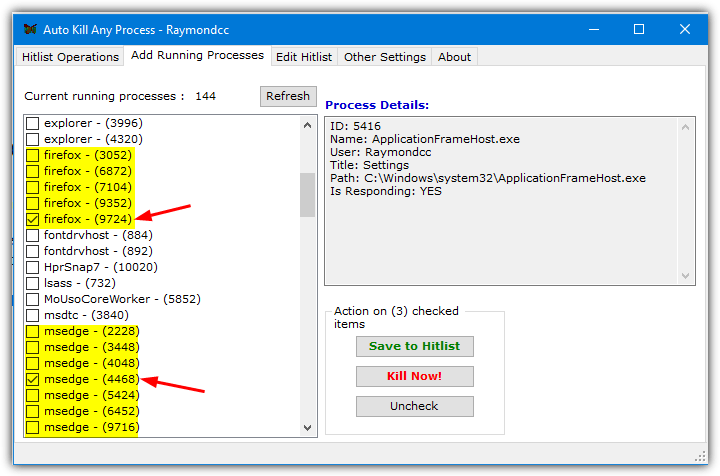
Go to the “Add Running Processes” tab in the program and check each running process to be killed from the list, and then click Save to Hitlist or Kill Now! For saving a list, it should be fine to select one process if there are multiples. You can create, edit, and run a custom Hitlist when you like. Another useful option in Other Settings is the timer that will execute the chosen Hitlist’s every set number of minutes from the system tray.
Download Auto Kill Any Process
4. Multi-Process Killer
As far as ease of use goes, Multi-Process Killer is about as simple as you could wish for. Although it’s a portable executable, the Java Runtime Environment is required for Multi-Process Killer to work so it will need to be downloaded and installed separately if not already on your system.
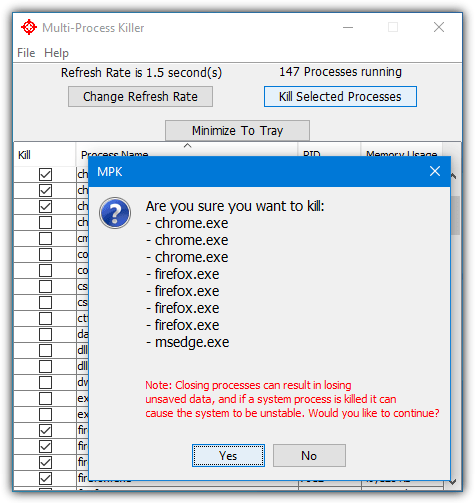
Run the program, select the processes that you would like to terminate by checking their boxes. Then click the Kill Selected Processes button. After a confirmation box, everything you asked for should be terminated. The only option to speak of is changing the refresh rate of the process list from the default 1.5 seconds.
Download Multi-Process Killer
5. Process Hacker
There are many good task management tools out there that are better than Windows Task Manager. However, a number of them cannot kill more than a single process at a time. Process Explorer is probably the most famous example. The popular Proces Hacker is one of those that can select multiple entries for termination.
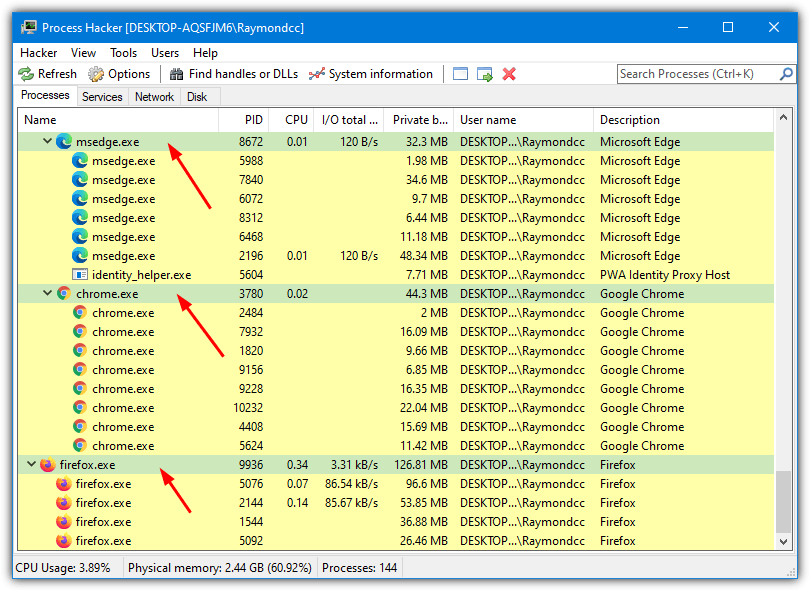
Selection is done via the standard windows combinations of Shift+click to select a continuous range and CTRL+click to select individual entries. Then press the Del key to terminate those entries. If you are selecting a program with multiple active processes, such as a web browser, make sure to select the parent process instead of all the individual processes or all entries might not get removed.
Download Process Hacker
6. DTaskManager
DTaskManager is another Windows Task Manager tool quite similar to Process Hacker listed above. It does have a few features not usually found in similar tools, like auto manage process priorities, CPU throttling, trim RAM usage, and the option to set the program as the default task manager.
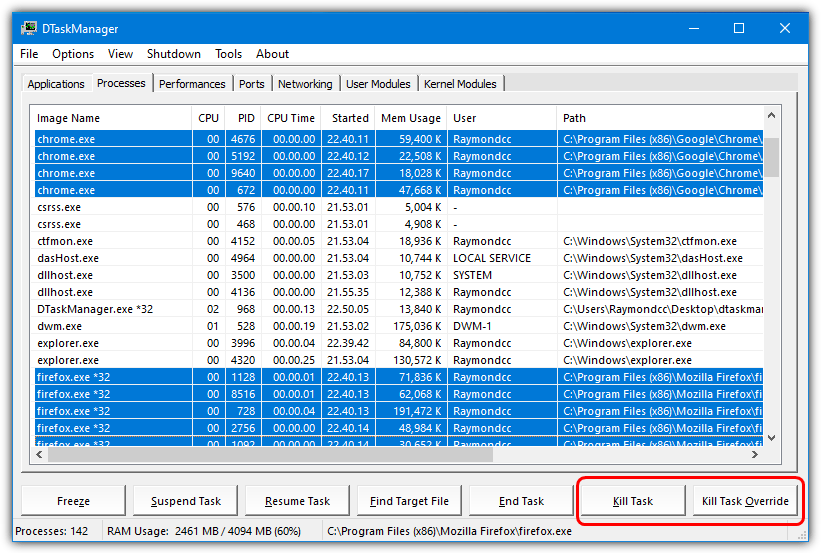
Making multiple selections is done through the customary key combinations of Shift+click and CTRL+click. Press the Kill Task button or use the more powerful “Kill Task Override” option if the processes are stubborn and do not want to close. DTaskManager can also close system processes which is a powerful and also potentially dangerous ability if used incorrectly.
Download DTaskManager
7. KillProcess
This KillProcess tool is one of the easiest tools here to use. However, there is a potentially powerful built in feature that could prove useful. A drop target button allows you to drag the button over an open window on the Desktop and it will highlight its running process. This is handy if a program has an obscure or unrelated process name.
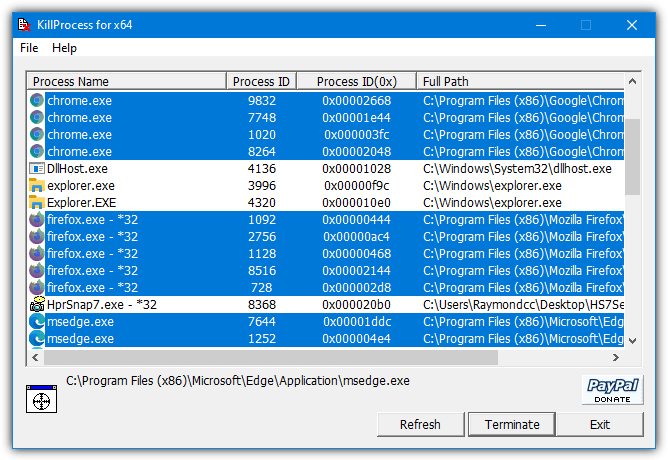
The standard combinations of Shift+click and CTRL+click are used to multi-select entries from the process list. Then press the Terminate button. To use the find target option, drag the icon in the bottom left over another program’s window and it will highlight one or more related processes. Make sure to use the 64-bit version on a 64-bit bit system, using the 32-bit version will show nothing in the process list.
Download KillProcess
8. SpaceTornado Killer
This is actually an old tool dating back to 2006 but it still works on the latest operating systems. What makes SpaceTornado Killer useful is it has a simple to use albeit antiquated interface and minimal information but enough to make it effective. The .NET Framework 2/3.5 is required for Windows 8/10/11 users, the tool is a standalone portable executable.
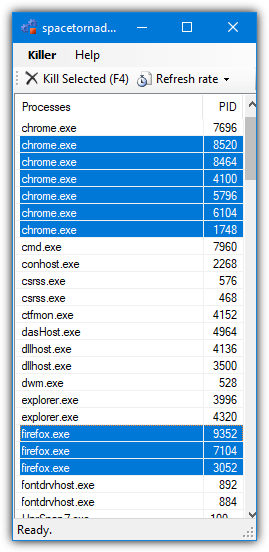
All you have to do is open the program and use Shift+click and/or CTRL+click to select multiple processes. Then click on the Kill selected button or press the F4 key. The only option to speak of is the refresh rate at which the list updates. One quirk we encountered during testing was an access denied error while killing processes. However, it did seem to kill those processes it complained about.
Download SpaceTornado Killer
9. KillProcess
Do not confuse this with the program above with the same name. It’s similar to Auto Kill Any Process by being able to make use of predefined process lists. The Kill Lists can then be loaded on any computer and all the running processes in the list will be killed (or inverted and not killed). Sadly, the included lists are badly outdated but you can easily make your own.
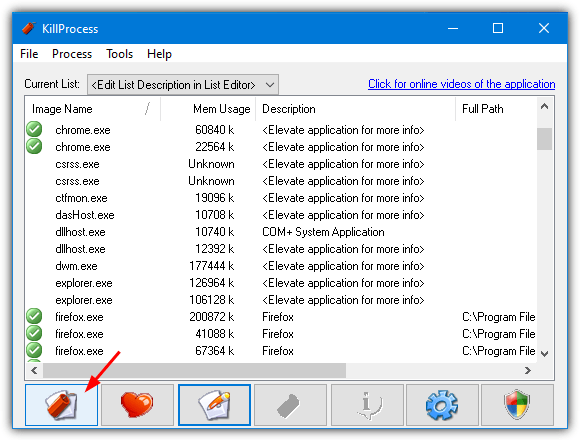
To create a list, go to File > New Kill List, give it a name and location. Click on a process in the window and press the Insert key (or right click > “Add to list”). Press the bottom left button to execute the list and kill the selected processes. Alternatively, add other executable files to the list manually in the edit list window. Kill Lists can be inverted and turned into lists of processes to keep by checking the box in Edit Kill List > List Information.
A useful feature worth mentioning is the ability for KillProcess to sit in the tray actively watching the running process list and killing specific processes in the Kill List as soon as they run. To do that, select the process while editing the list and check the “Scan for process” box. As soon as the program appears in the list of running processes, KillProcess will automatically kill it again.
Download KillProcess
10. Kill Multiple Processes From The Command Line Or Scripts
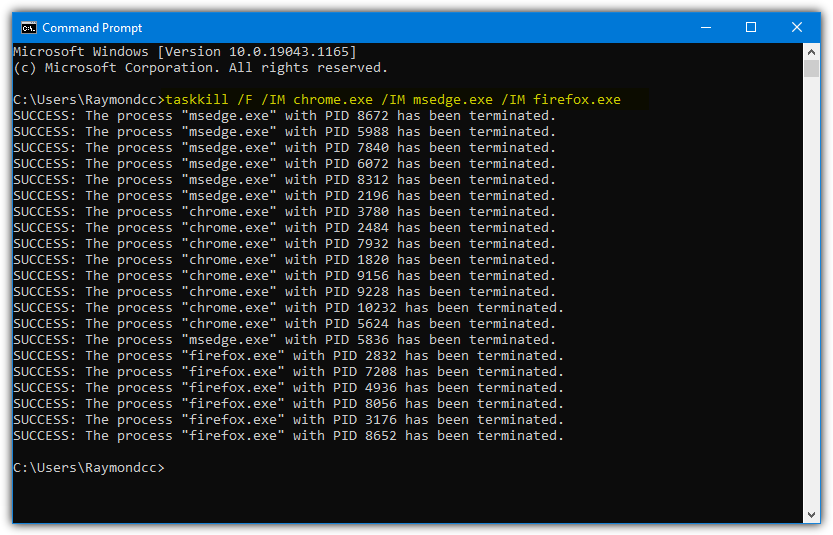
In addition to Task Manager, Windows has a built in command line tool that is able to kill running processes from a Command Prompt window or script file. Taskkill is available on all recent versions of Windows and can easily kill several processes at once by either supplying their image (executable) name or process identifier (PID), both can be found in Task Manager. The syntax is quite simple:
Taskkill /F /IM Firefox.exe /IM MSEdge.exe /IM Chrome.exe [/IM processname.exe]
With the addition of /F, the above command will force kill all instances of Firefox, Microsoft Edge, and Chrome. Use /PID {number} instead of /IM {name} if you wish to kill a process by PID. This option will not kill multiple process instances with the same name. For example, all Chrome.exe’s won’t be killed because they will have different PIDs.
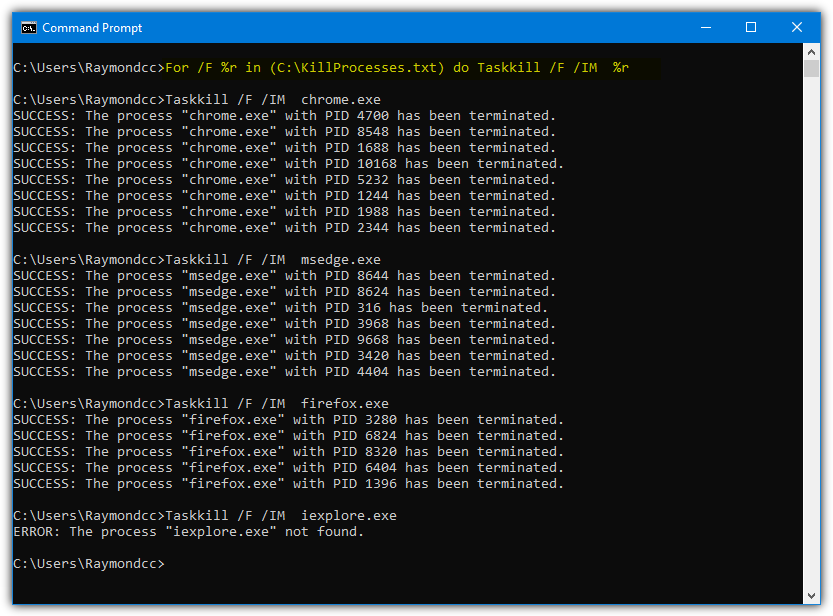
This next command will use a text file to supply a list of process names to kill:
For /F %r in (C:\KillProcesses.txt) do Taskkill /F /IM %r
All you have to do is add process names like chrome.exe or firefox.exe to a plain text file, one per line. Then call the text file with the argument and it will try to kill all the listed tasks.
Tip: You can also add a command similar to those above in the location box when creating a desktop shortcut, this will automatically kill all selected processes with a double click.
