Apple Maps has had a rocky history since its introduction, which included limited features and questionable data, earning it a reputation as a lesser alternative to Google Maps. Since then, Apple has worked to close the gap, and in iOS 13, they’re introducing Collections, which allow you to create groups of locations on your iPhone that you can then quickly access and share with others.
Collections can come in handy when planning a trip. For instance, you can create a list of places to visit, then quickly view and get directions to them. Alternatively, if you have friends visiting and they ask for some must-see spots, you can create a collection and share it with them. Or if you just want to make a list of memorable places you’ve visited, collections will work for that, too.
- Don’t Miss: The 200+ Best, Hidden & Most Exciting New Changes in iOS 13
Step 1: Make a New Collection
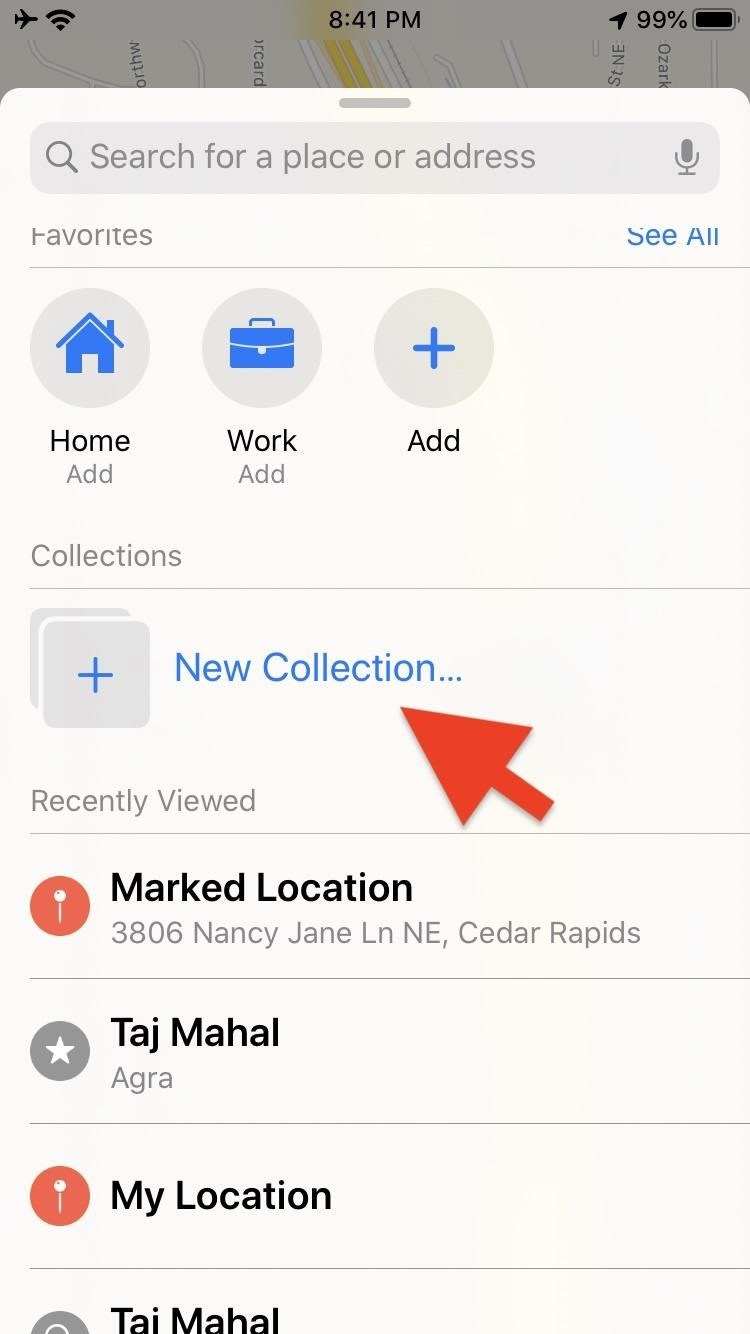
After opening the Maps app, you’ll see a search bar and your list of favorites at the bottom of the screen. It’ll be on the left side if you’re in landscape orientation. Your list of collections is right below the favorites, so swipe up to view them.
When you do, you won’t see any existing collections if its the first time using collections on the device. However, you may see some if you created them on another device that uses the same Apple ID. To make a new collection, tap the “New Collection” button, give the group a name, then tap the “Create” button in the upper right. Now you’re ready to start filling your collection.


After you’ve created three or more collections, a “See All” button will appear in the upper right of the Collections section. You’ll need to tap that, then tap the plus (+) button in the lower right to create new collections from then on.
Step 2: Add Locations to the Collection
There are a couple of different ways to add new locations to a collection. You can either add a place from within the collection itself or, if you are already viewing a site, you can choose which collection to add that location to.
Start by tapping the collection you’d like to add a location to. If there aren’t any locations in the collection yet, an “+ Add a Place” button will be there. Otherwise, you can scroll up to reveal a toolbar at the bottom of the card, then tap the plus (+) button from there. (If you’re in landscape view, the toolbar should already be shown.)
Tapping the button will open a search field that will let you search for locations, and it will also show you locations you’ve recently viewed. After performing your search, tap any of the places to add them to your collection.


You can also add locations that you’re currently viewing to your collections. After you’ve searched for a place, swipe up on the location’s information card, and you’ll see an “Add to” button underneath any user images available. Tap it, then you can add it to an existing collection or create a new collection to add it to.
You can also add your current location to a collection. To do so, tap the location arrow icon in the upper right to center the map on your coordinates. Then, tap the blue dot on the map showing your location and select the “Mark My Location” button. Like locations you’ve searched for, the marked area will have an “Add to” button you can use to add your current location to a collection.


Step 3: Edit the Collection (Optional)
If you need to, you can remove locations from a collection or even add them to other collections. Start by selecting the group you’d like to edit.
To remove an individual item, short-swipe left on it to reveal a “Remove” button. Tap it, and the location will be removed from the collection. There are also options here to “Edit Name” and “Share.”
Alternatively, you can long-swipe left on the location to delete it automatically. You can also swipe up to reveal the bottom toolbar in the full card view, then press the “Edit” button in the lower-left. That will allow you to select multiple items at once and either remove them from the collection with “Delete” or add them to other ones with “Add To.”


You can also tap the camera icon over top the collection’s image to upload a custom image from Photos that better fits your list.
Step 4: Share Your Collections (Optional)
Sharing a collection can occasionally come in handy, especially when traveling with a group to several different locations. To share a collection, select it, scroll up to reveal the bottom toolbar, then press the share icon. You can send a collection using the standard methods in iOS, such as AirDrop, Messages, and Mail.

Though not a groundbreaking feature, collections can help keep maps a little more organized and make planning a trip or sharing your favorite spots with friends a little easier.
Don’t Miss: Use ‘Look Around’ in Apple Maps to Tour High-Resolution Street Views of Cities
Just updated your iPhone? You’ll find new features for TV, Messages, News, and Shortcuts, as well as important bug fixes and security patches. Find out what’s new and changed on your iPhone with the iOS 17.6 update.
Cover image, screenshots, and GIFs by Mike Goril/Gadget Hacks


