How to Use a Wireless or USB Mouse on Your iPhone in iOS 13 « iOS & iPhone :: Gadget Hacks
For the first time, you can officially use a computer mouse with your iPhone, thanks to Apple’s new Accessibility settings in iOS 13. It works for all types of Bluetooth mice, so if you have one, it’ll already work. Plus, those with wireless receivers and even wired mice are supported by using a USB to Lightning adapter.
There are many benefits to using a mouse pointer, and the most significant one is because of difficulty using a touchscreen device with your fingers. It’s particularly tricky using touch when it’s hard to accurately tell what you’re tapping or if your fingers are relatively large. With a mouse, there is no obscurement of the display.
Additionally, you can hover a pointer on the screen to highlight something for someone or to help follow along when reading. It can be faster to perform actions in some scenarios. There’s more precision. It’s great to have when your display isn’t registering touches correctly. And you’ll likely be able to play games faster and better.
- Don’t Miss: 200+ Exciting New iOS 13 Features for iPhone
Step 1: Open the Pointing Options
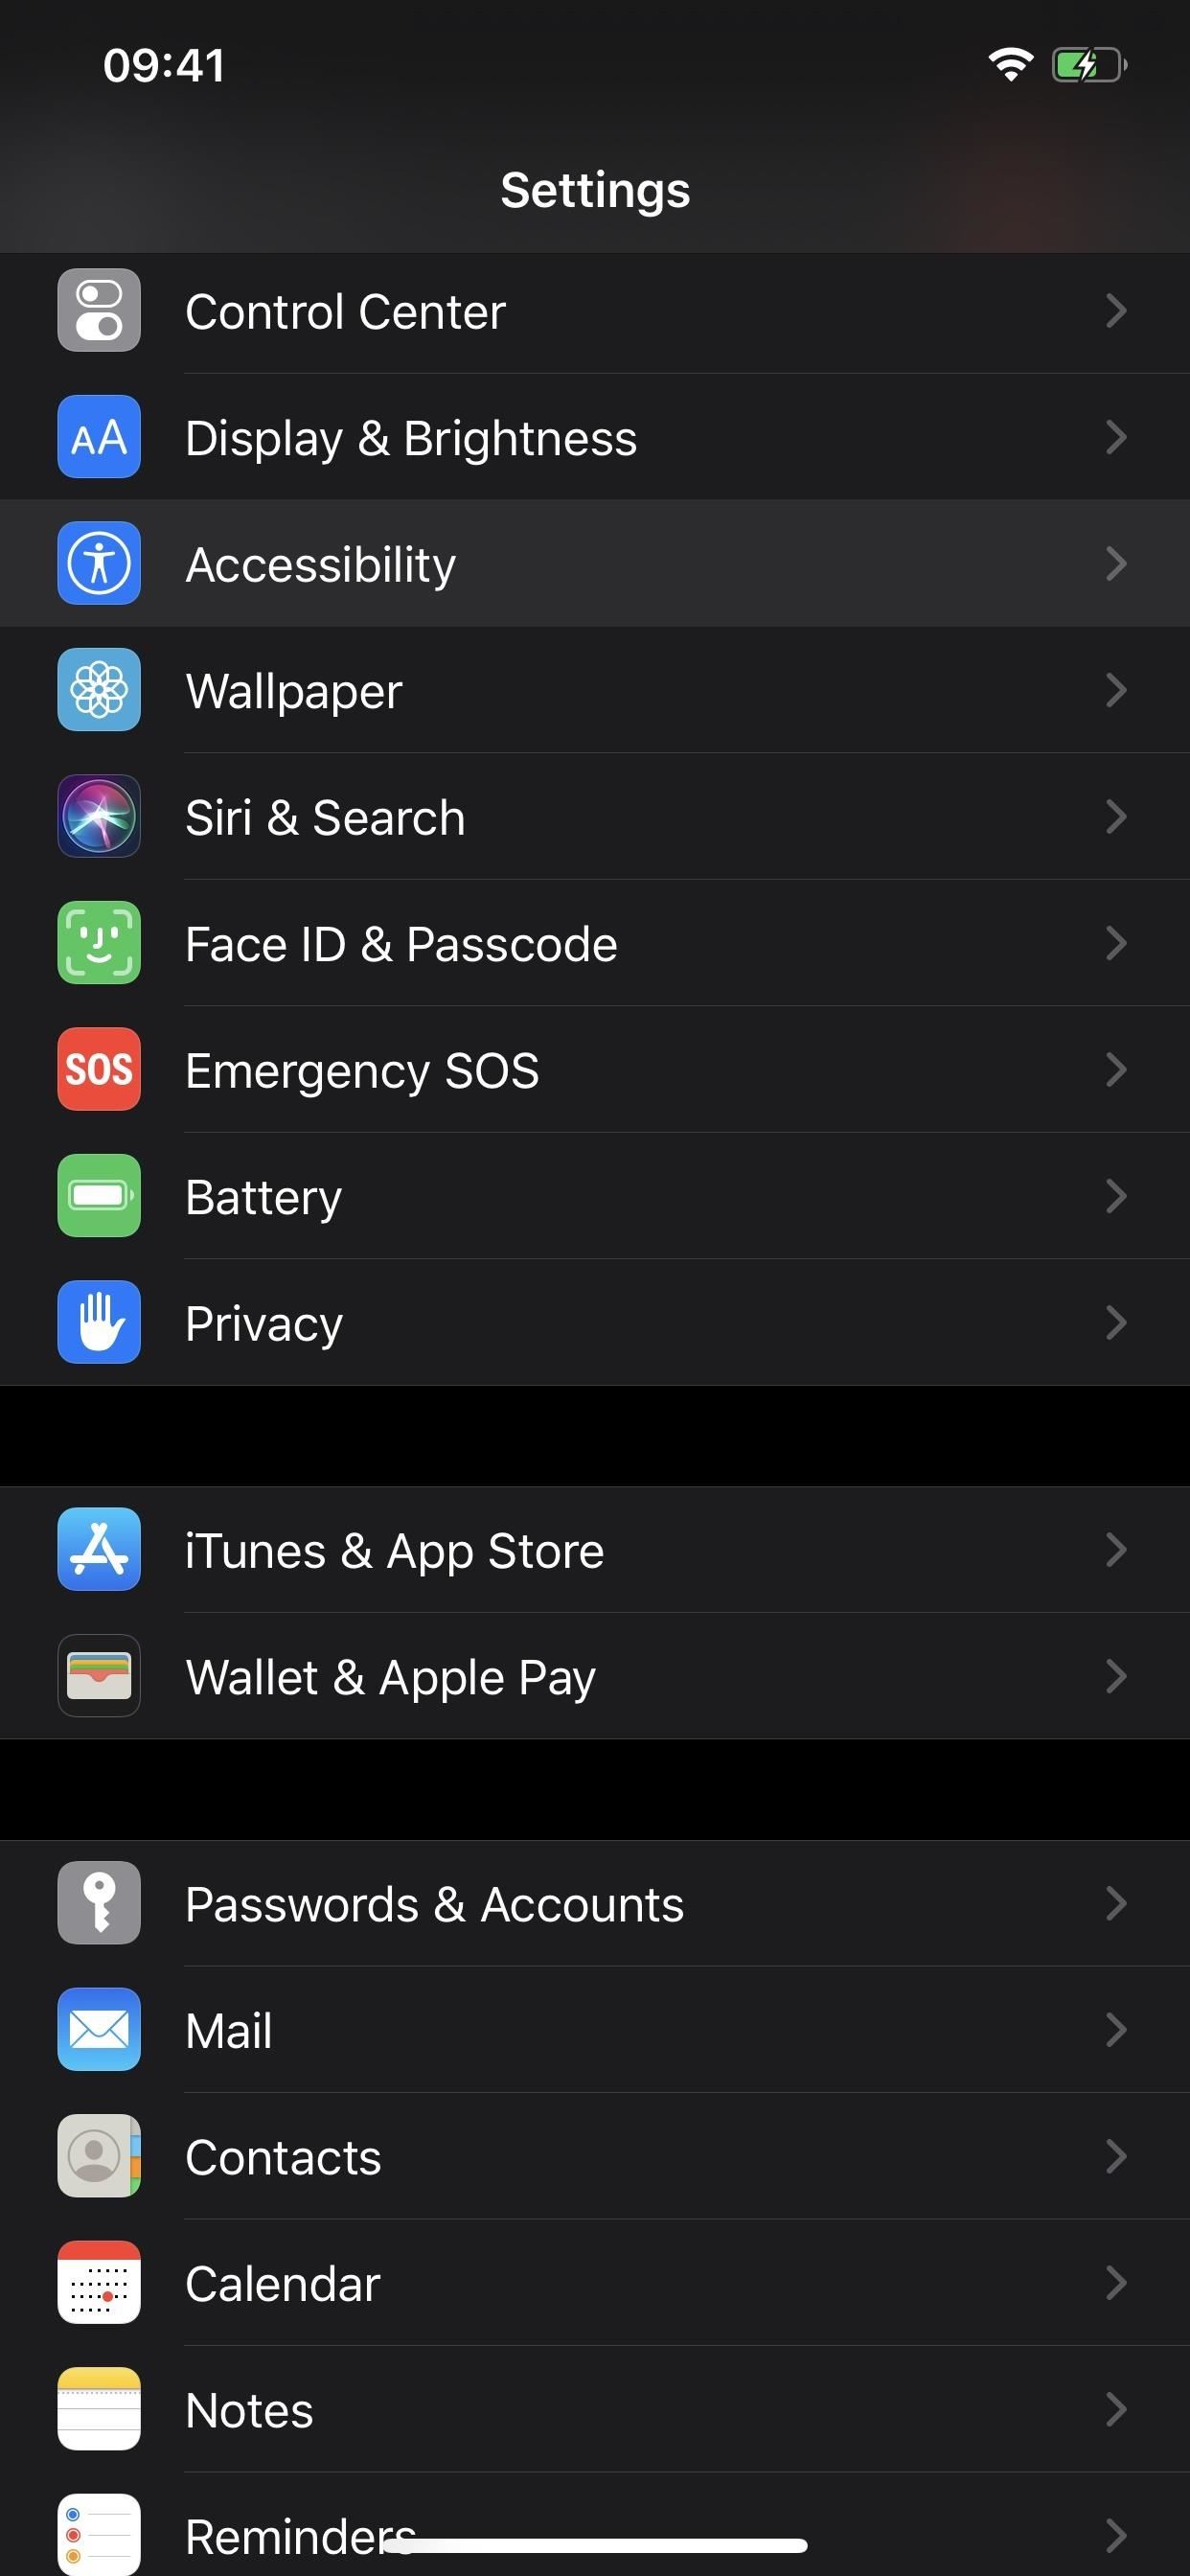
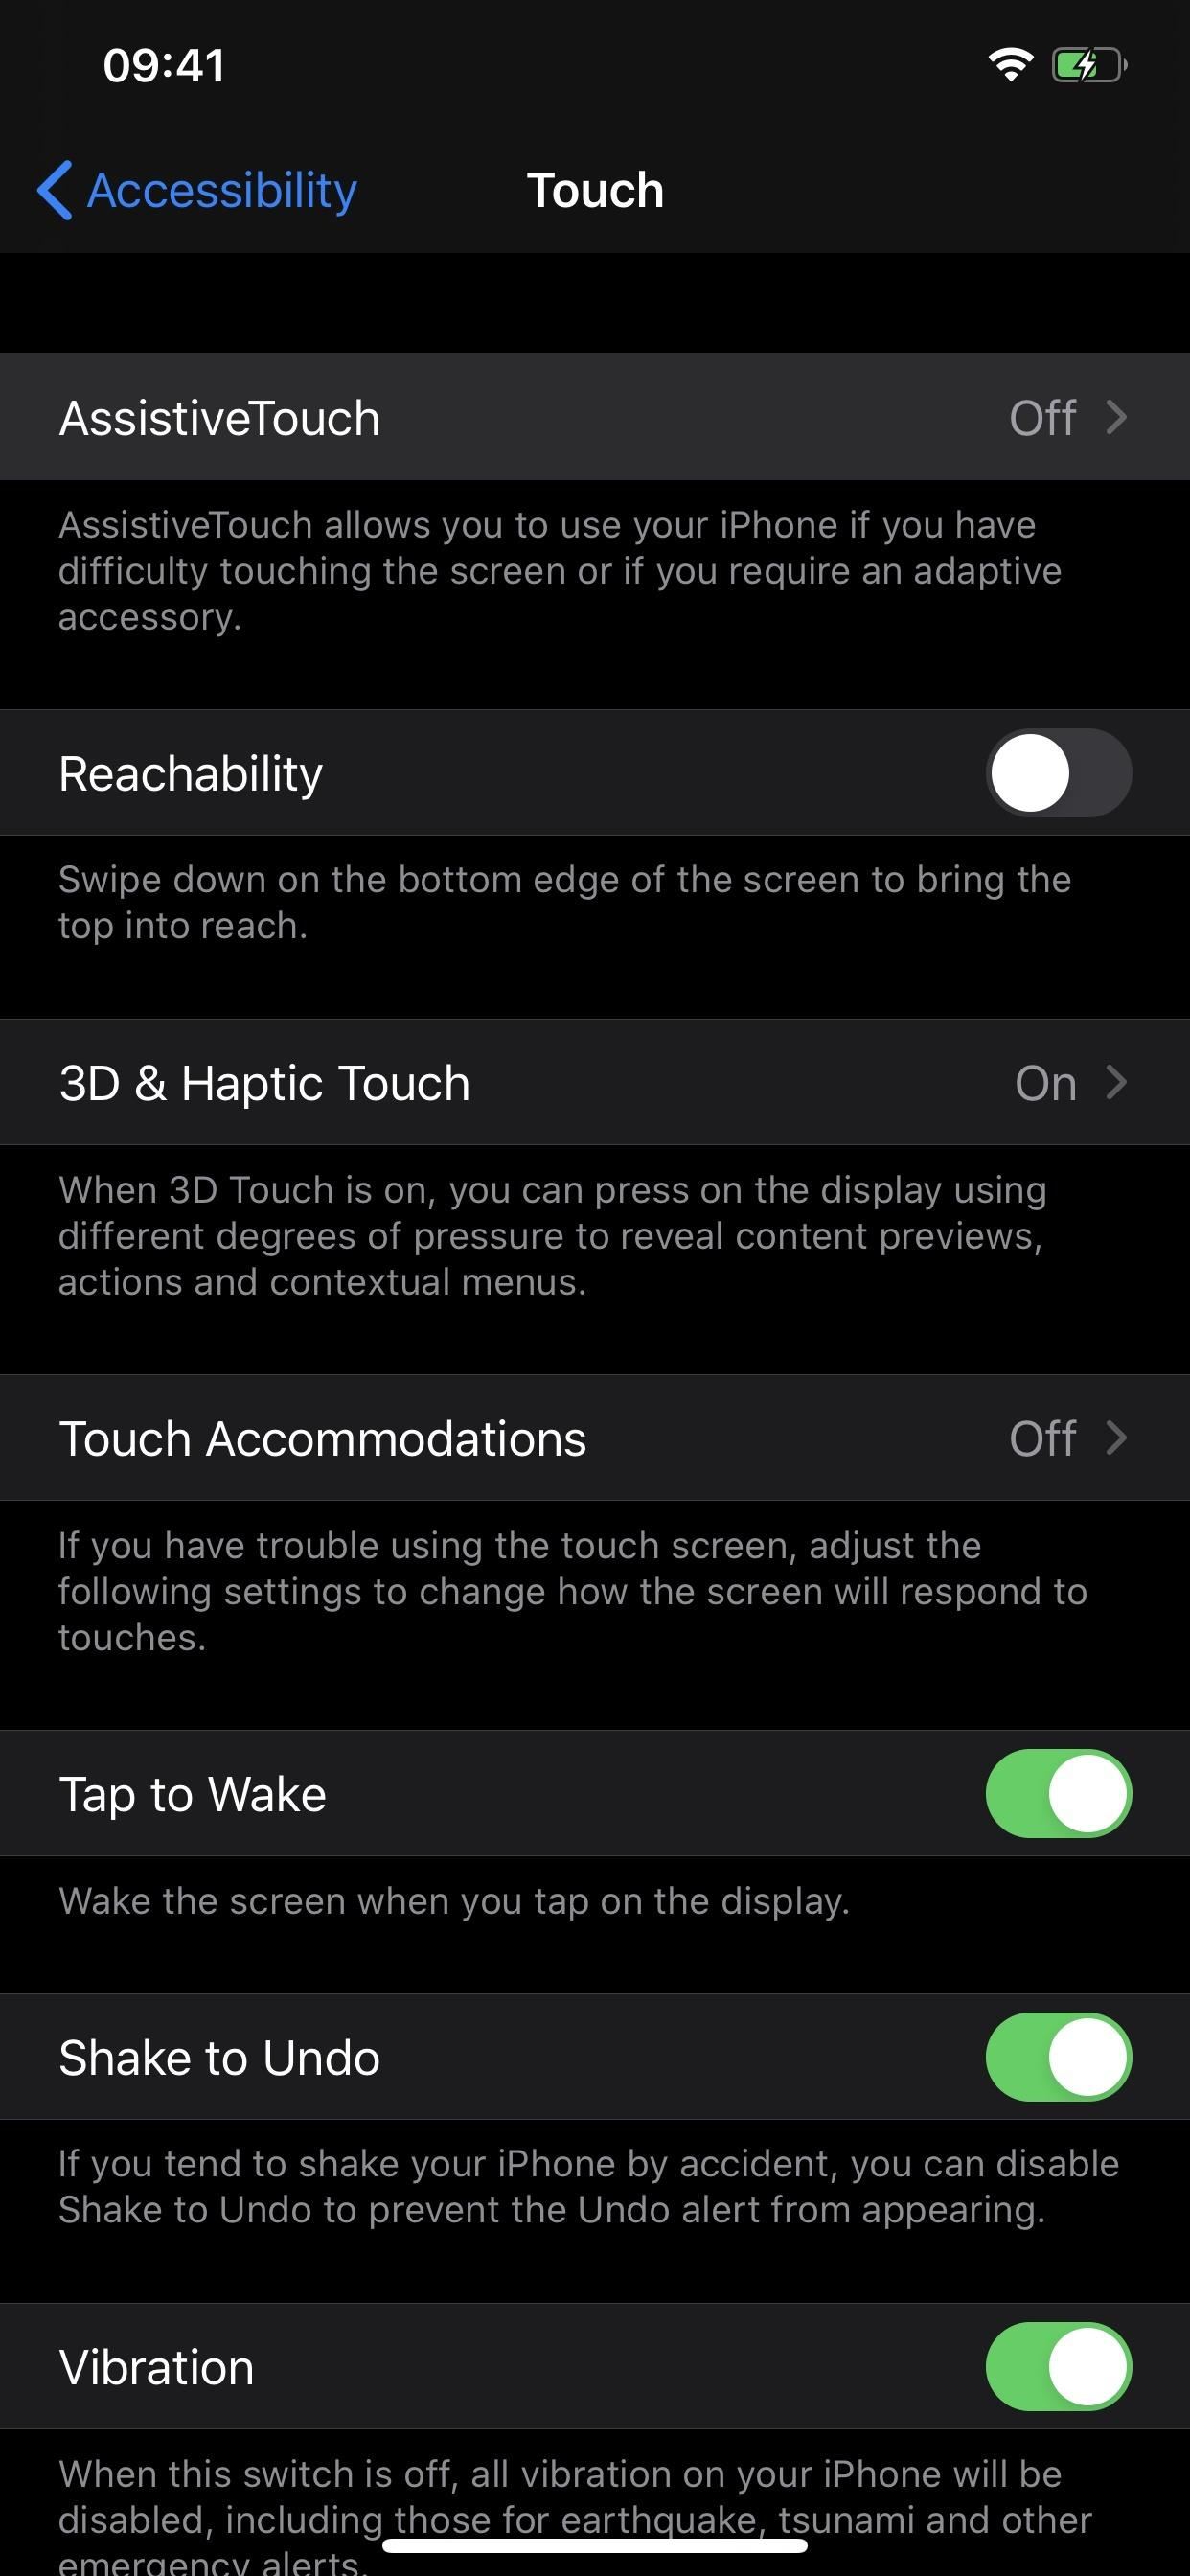
The feature in iOS 13 is hiding in the Accessibility menu, which has changed places since iOS 12. To access it and the mouse settings, open the Settings app, tap „Accessibility,“ then „Touch“ under Physical and Motor.

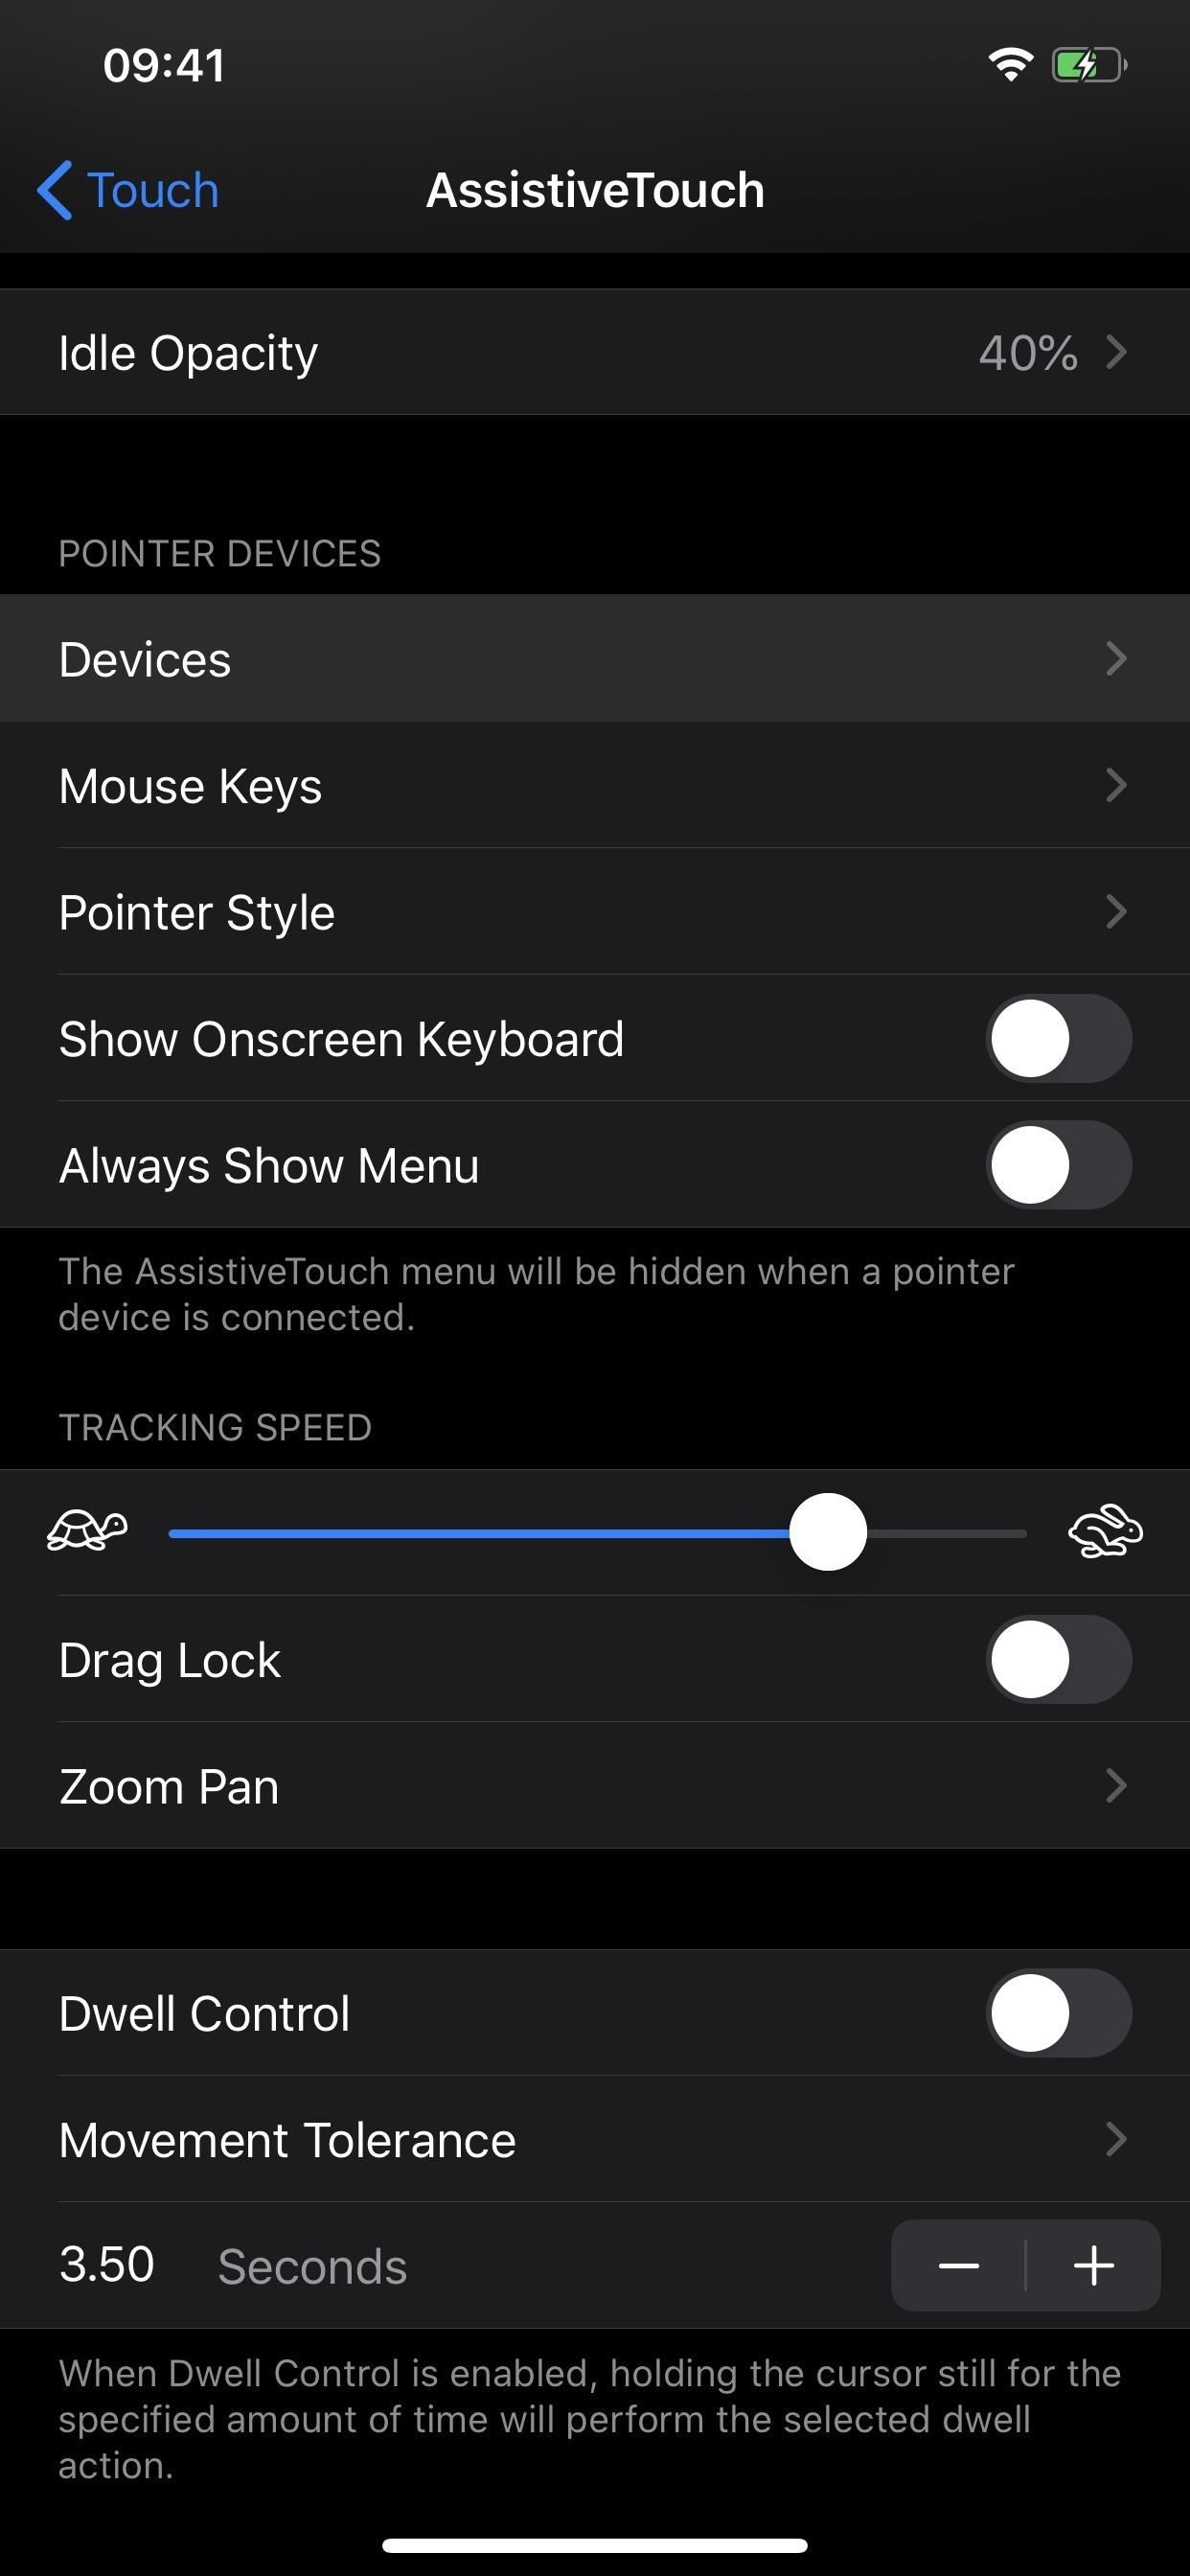
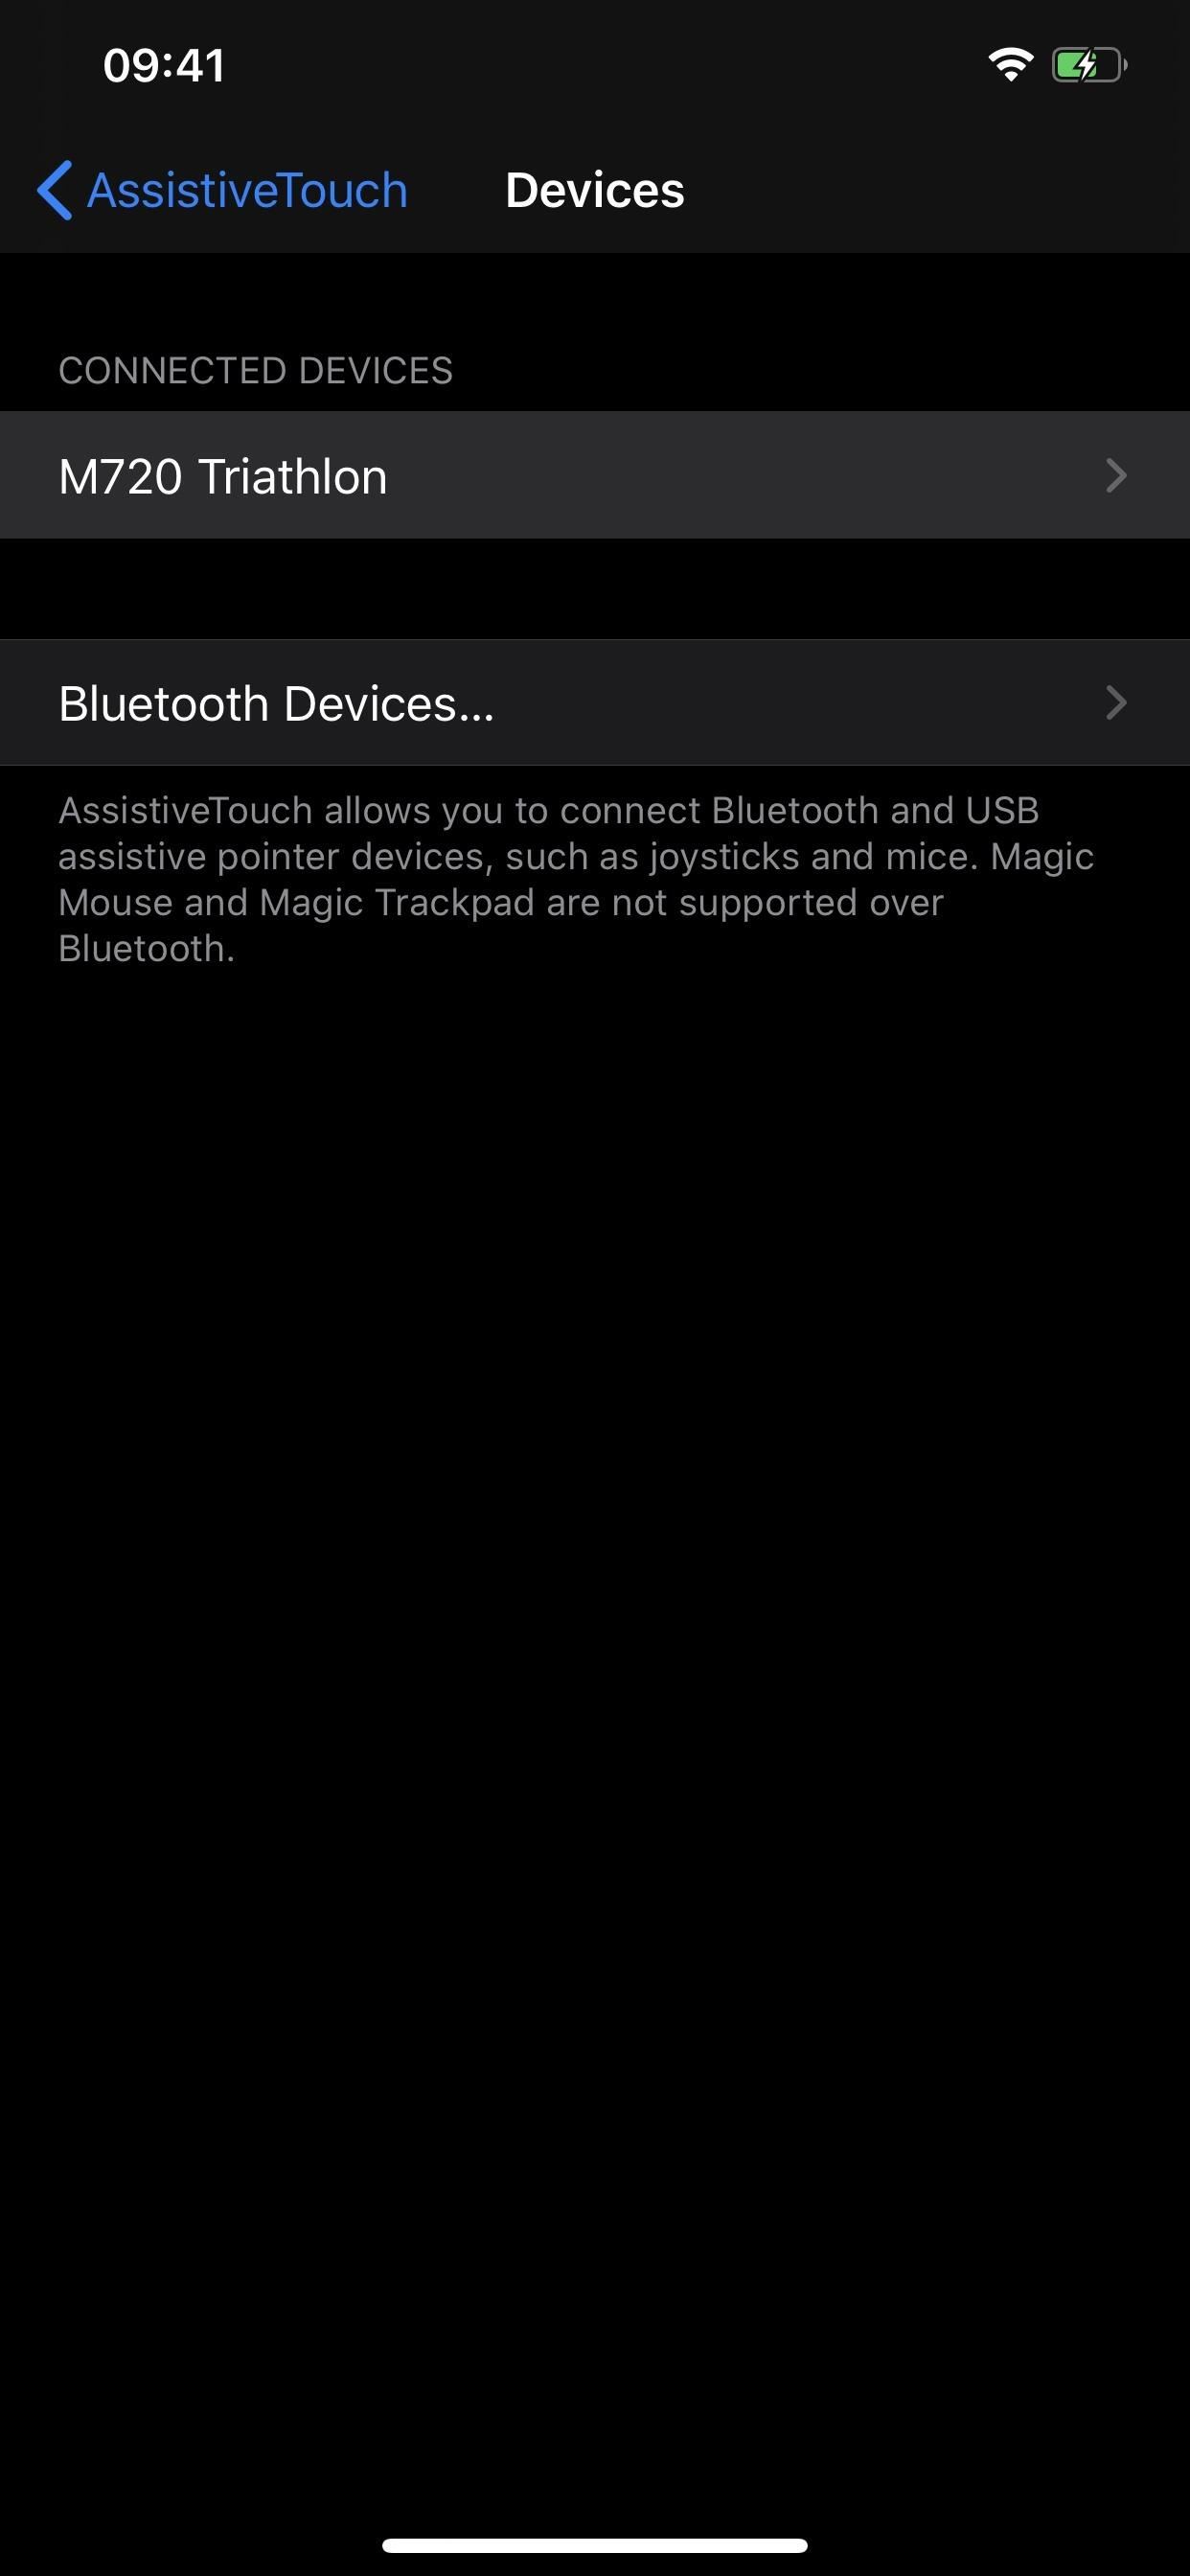
Next, tap „AssistiveTouch“ up top, then „Devices“ under Pointer Devices.
Step 2: Pair Your Computer Mouse
The type of wireless computer mouse you have will determine how you set it up, but both ways are easy. However, if you have a Bluetooth mouse without any dongles, you may have an easier time using the mouse since we’ve found that mice with USB dongle receivers are forgotten relatively quickly by the iPhone.
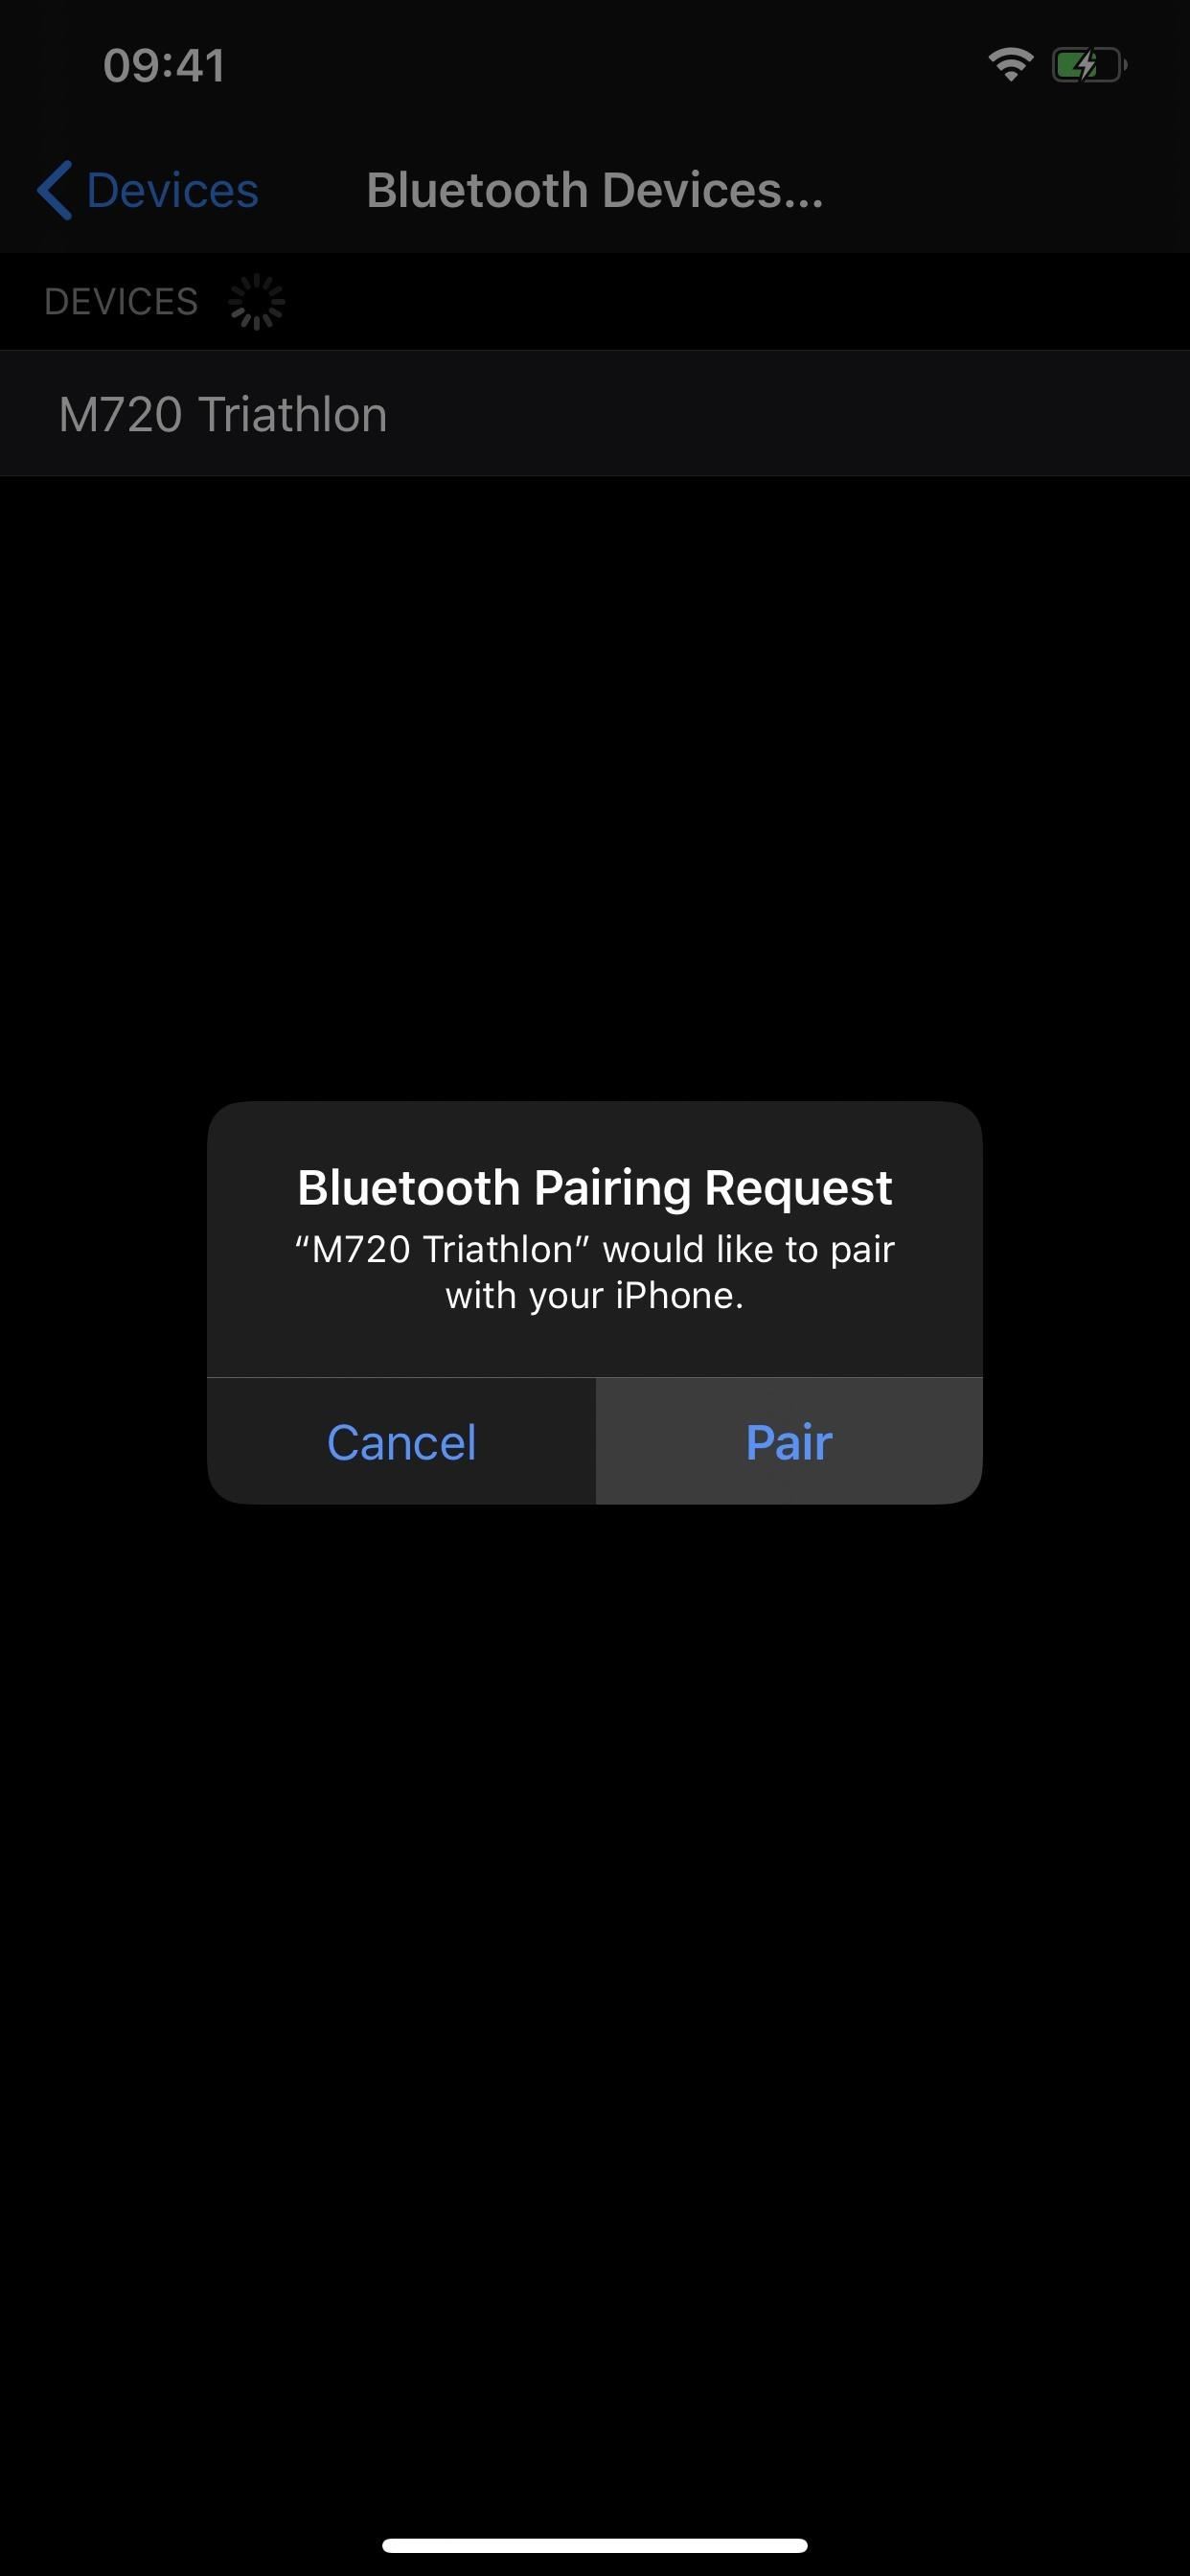
Make sure Bluetooth is enabled on your iPhone, as well as your Bluetooth mouse. If this is your first time pairing a mouse with your iPhone, the „Devices“ menu’s only option will be „Bluetooth Devices.“ Tap that, then on the name of your discovered mouse once it appears.


Then, just tap „Pair“ on the Bluetooth Pairing Request pop-up, and you’re done. Go back a screen, and you’ll see your mouse listed under the new Connected Devices section. Once connected, move on to Step 3 below.
Recommended Dongle-Less Bluetooth Mice: Logitech M535 Gray | M557 Gray | M535 Blue | M720 Black
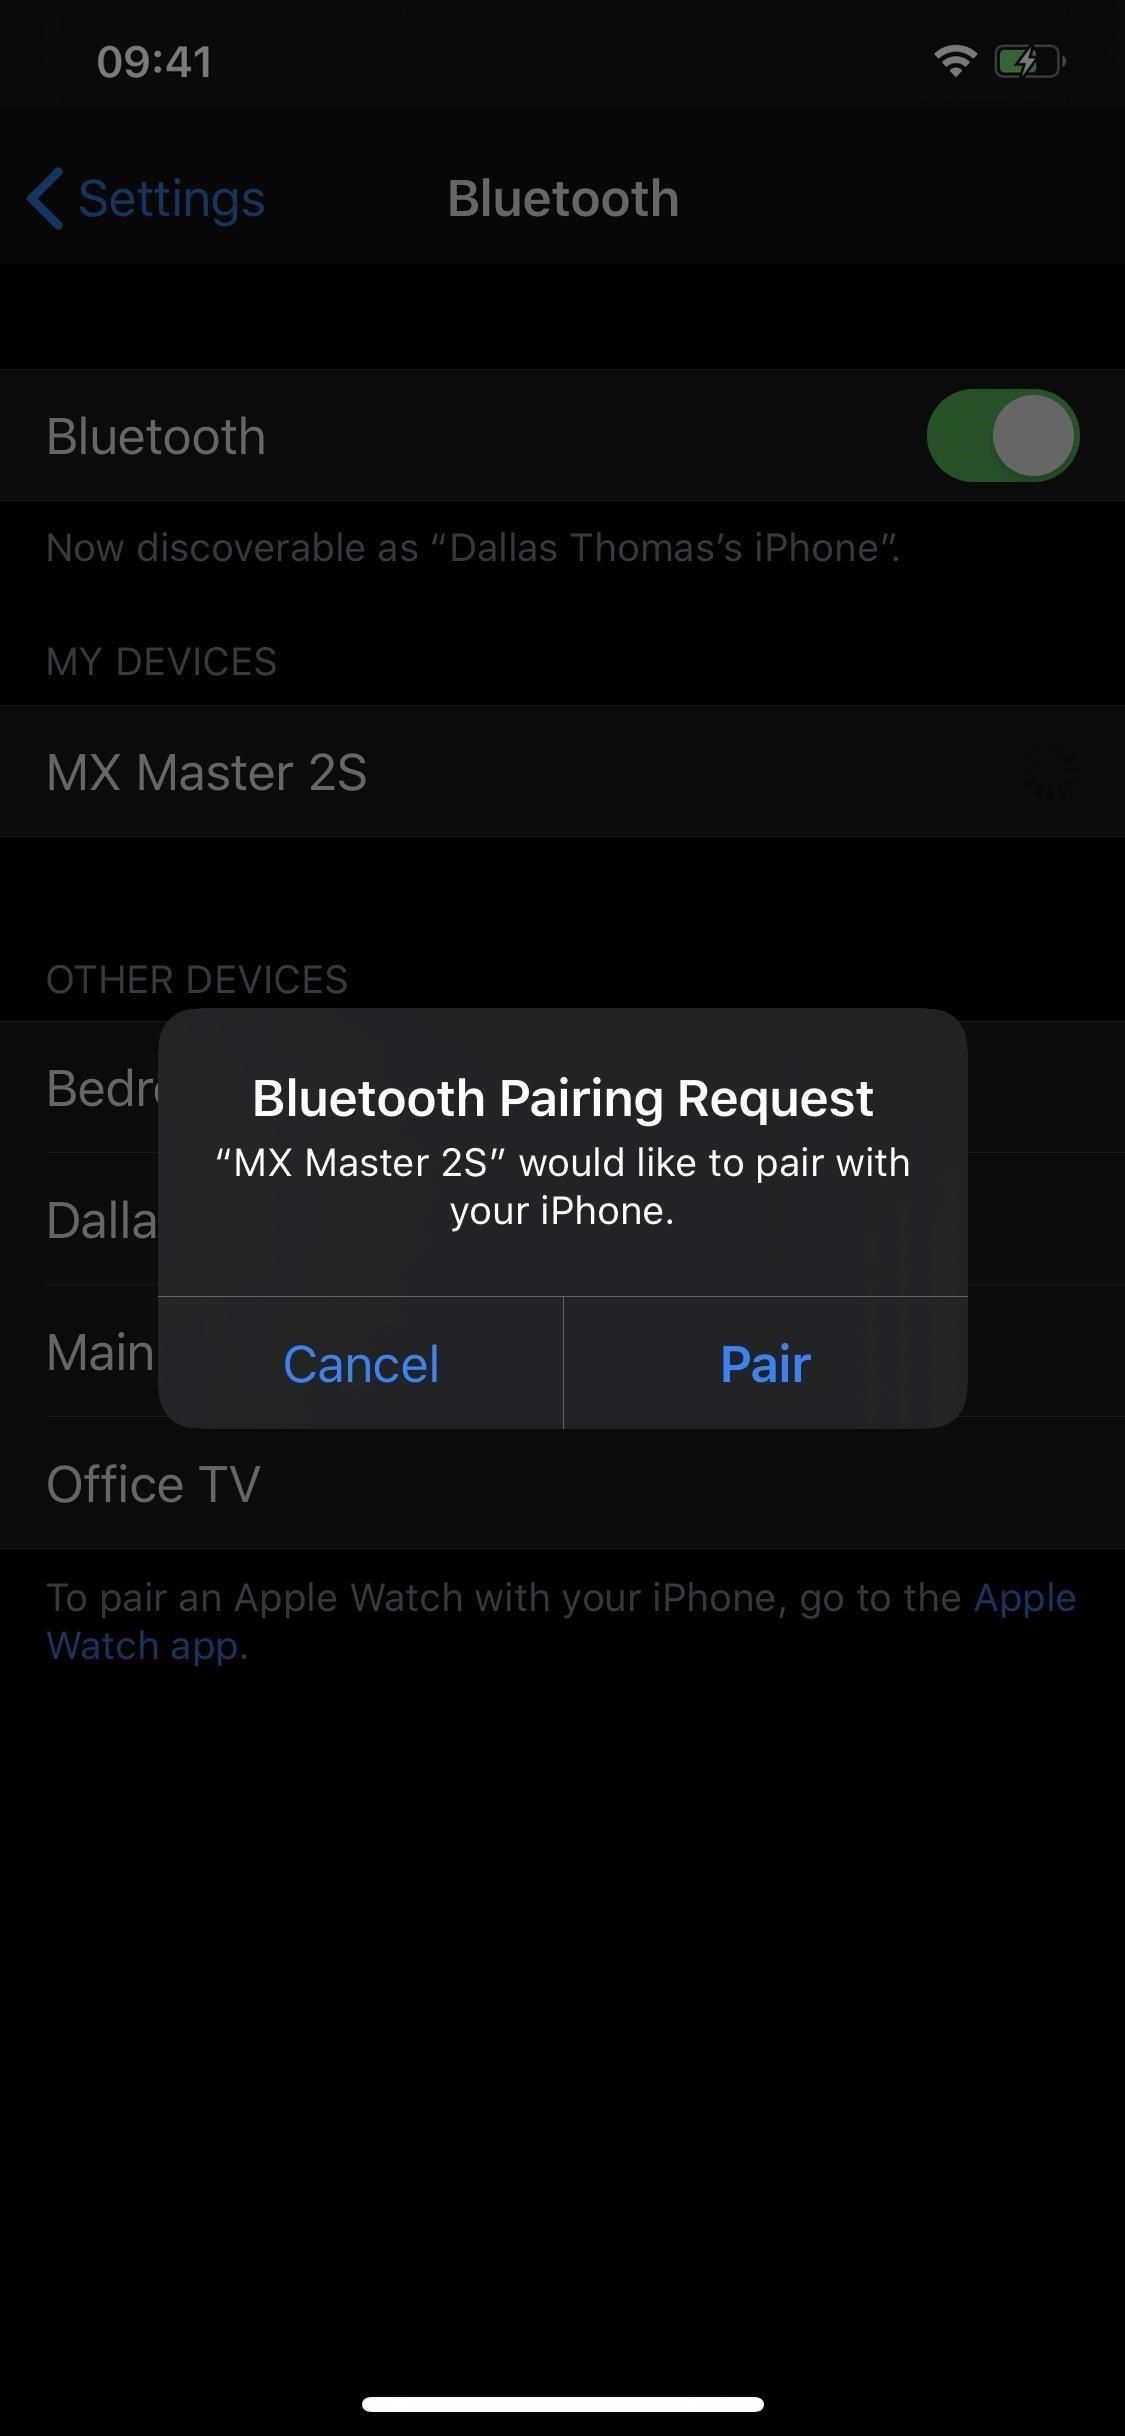
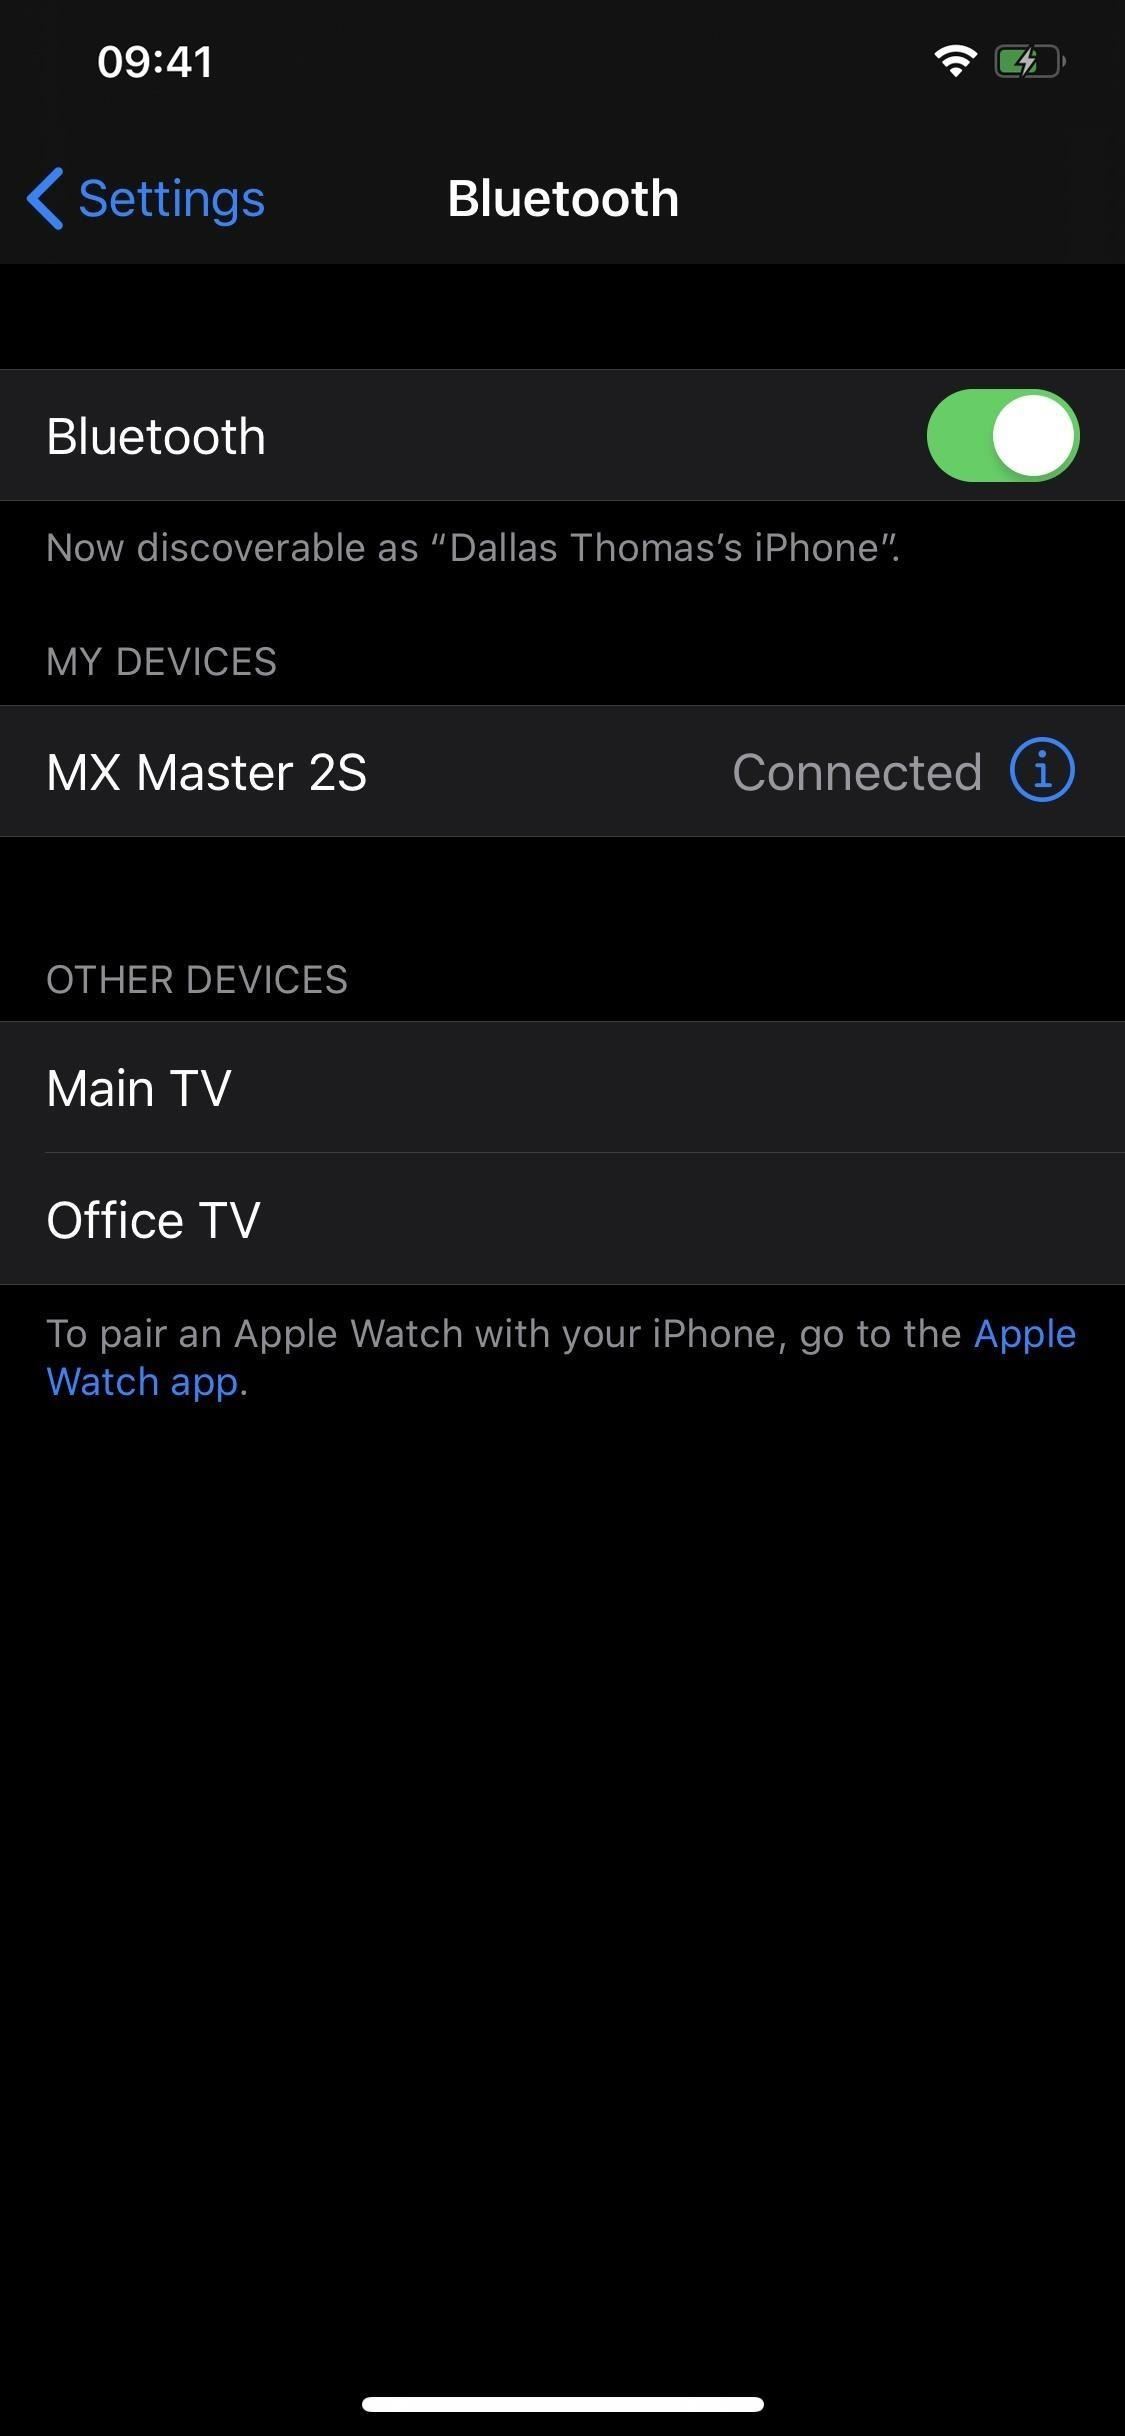
Alternatively, you can navigate away to the „Bluetooth“ options in the Settings app (you’ll be going back to the AssistiveTouch settings later). Look for the mouse in the My Devices section. Tap on it to „Pair“ it with your iPhone. Once connected, move on to Step 3 below.
On the „Devices“ page, you will see the „Bluetooth Devices“ option, but that’s not what you want. That’s only for mice that connect via Bluetooth. For the ones with USB-based receivers or wired ones, you’ll need to have a USB to Lightning adapter. If you’ve used our guide on transferring photos and videos from a DSLR camera to your iPhone, you likely have one ready to go.
If you don’t have an adapter, you will need to get Apple’s Lightning to USB Camera Adapter ($29) or Lightning to USB 3 Camera Adapter ($39). Either of these will work, but the cheaper one is good enough for use with your computer mouse.
- Buy the $29 adapter from Amazon, Apple, Best Buy, Walmart
- Buy the $39 adapter from Amazon, Apple
 Image by Justin Meyers/Gadget Hacks
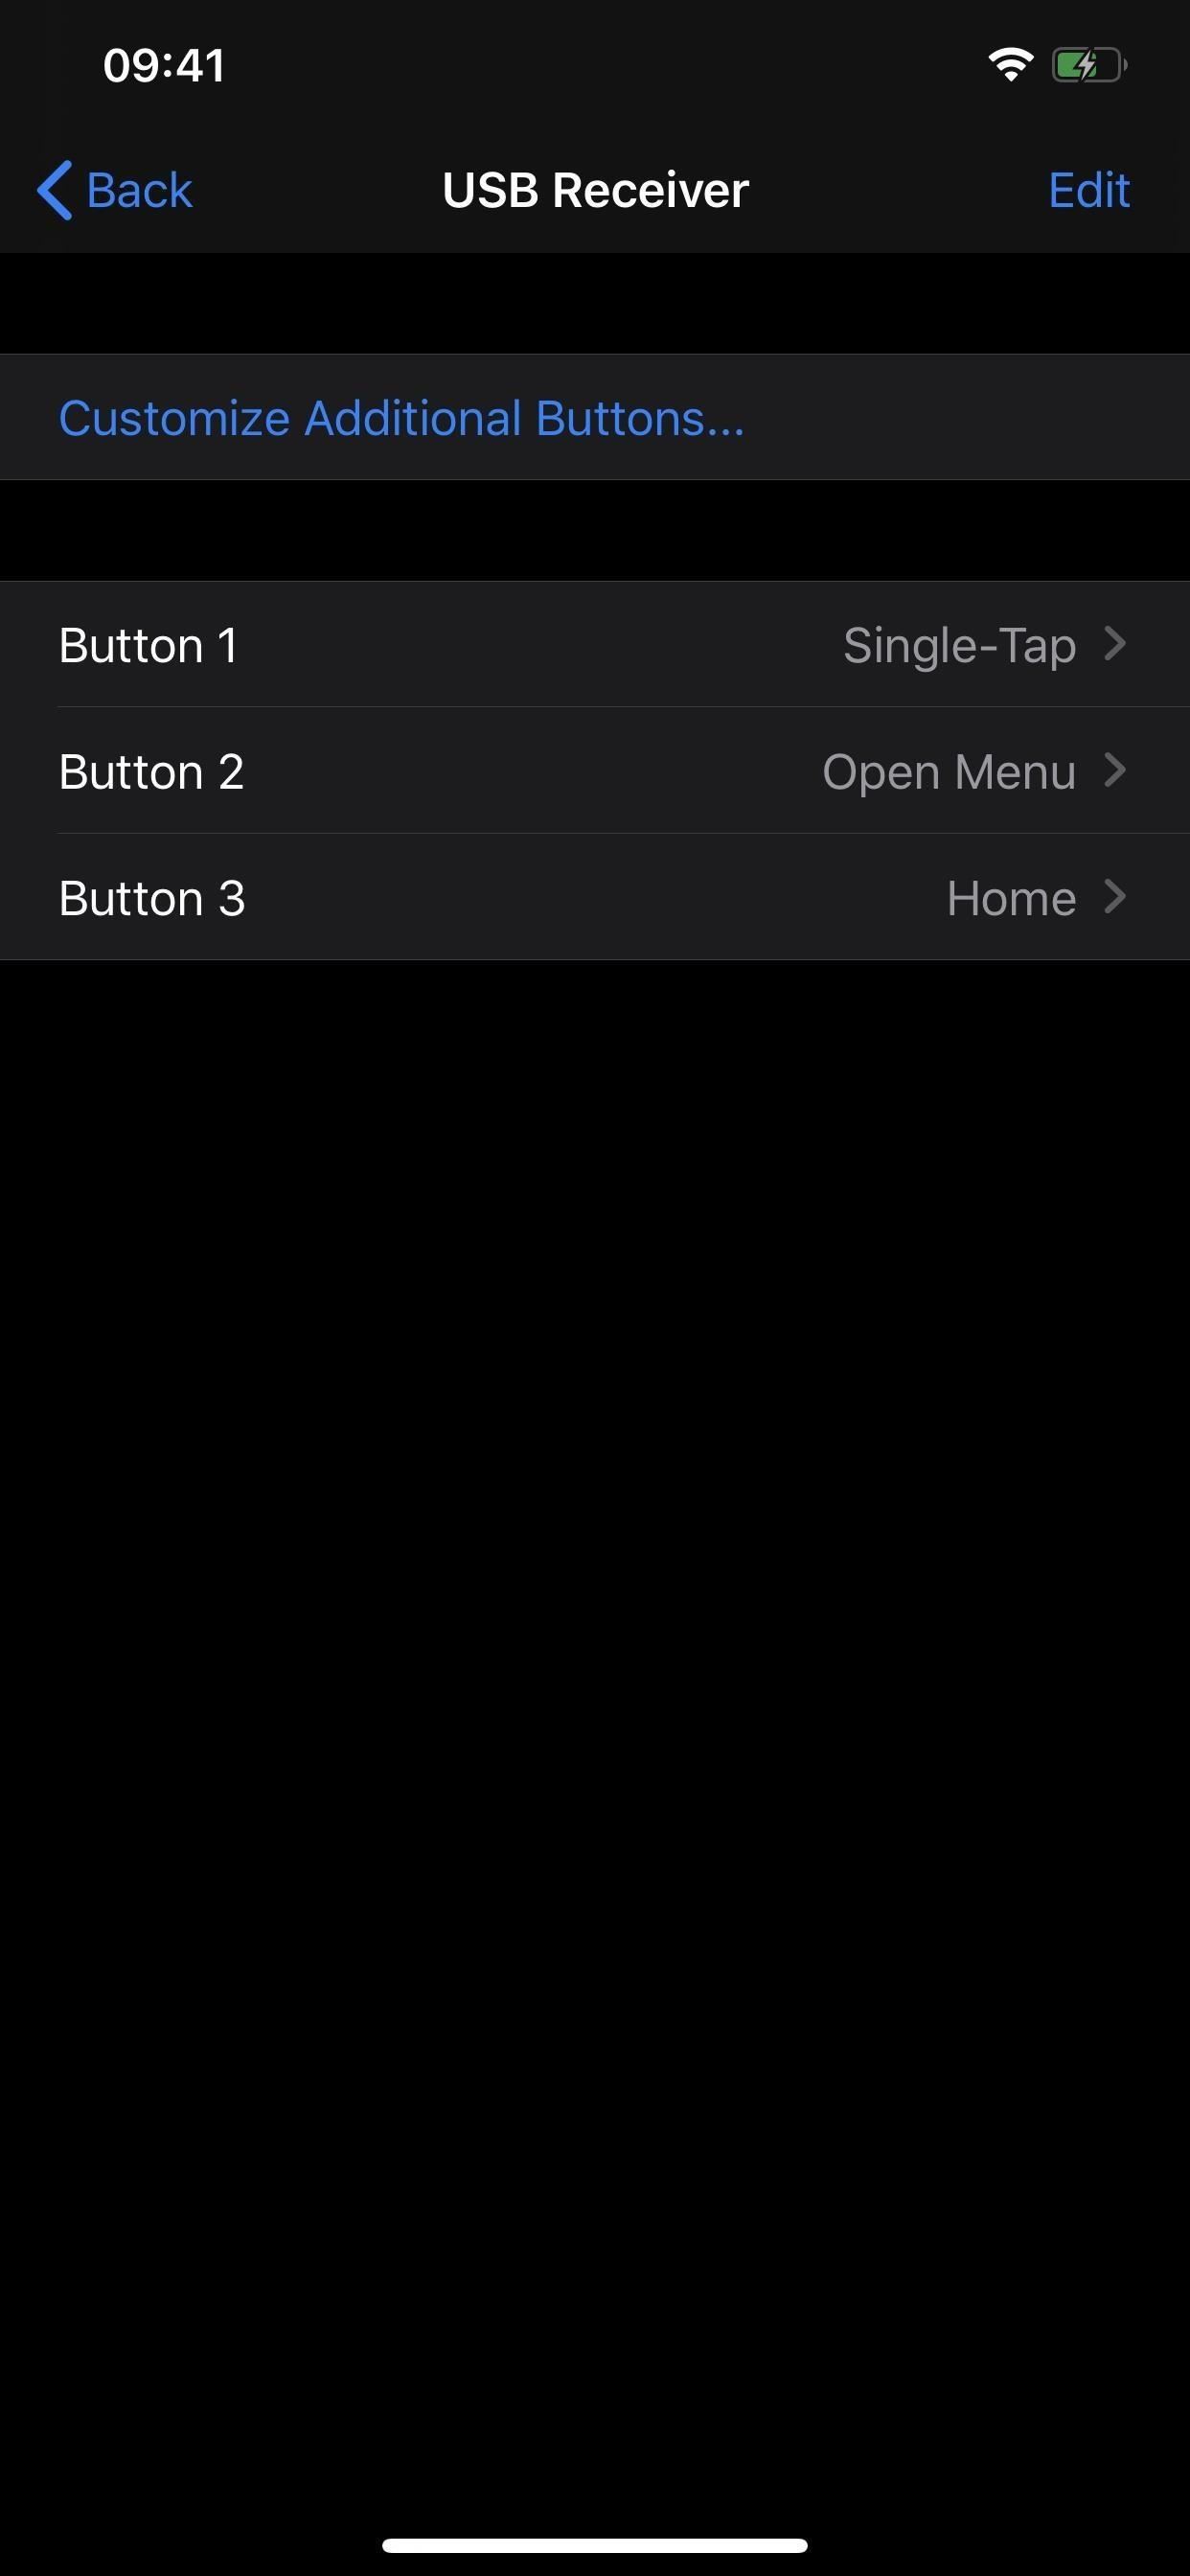
When you have one, make sure your mouse is turned on, then connect the USB receiver or USB cable for the mouse to the USB end of the adapter. Next, plug in the adapter to the iPhone’s Lightning port. Immediately, you should see an option appear for „USB Reciever“ under Connected Devices. Tap that, then proceed to Step 3.

Step 3: Customize Your Mouse Clicks
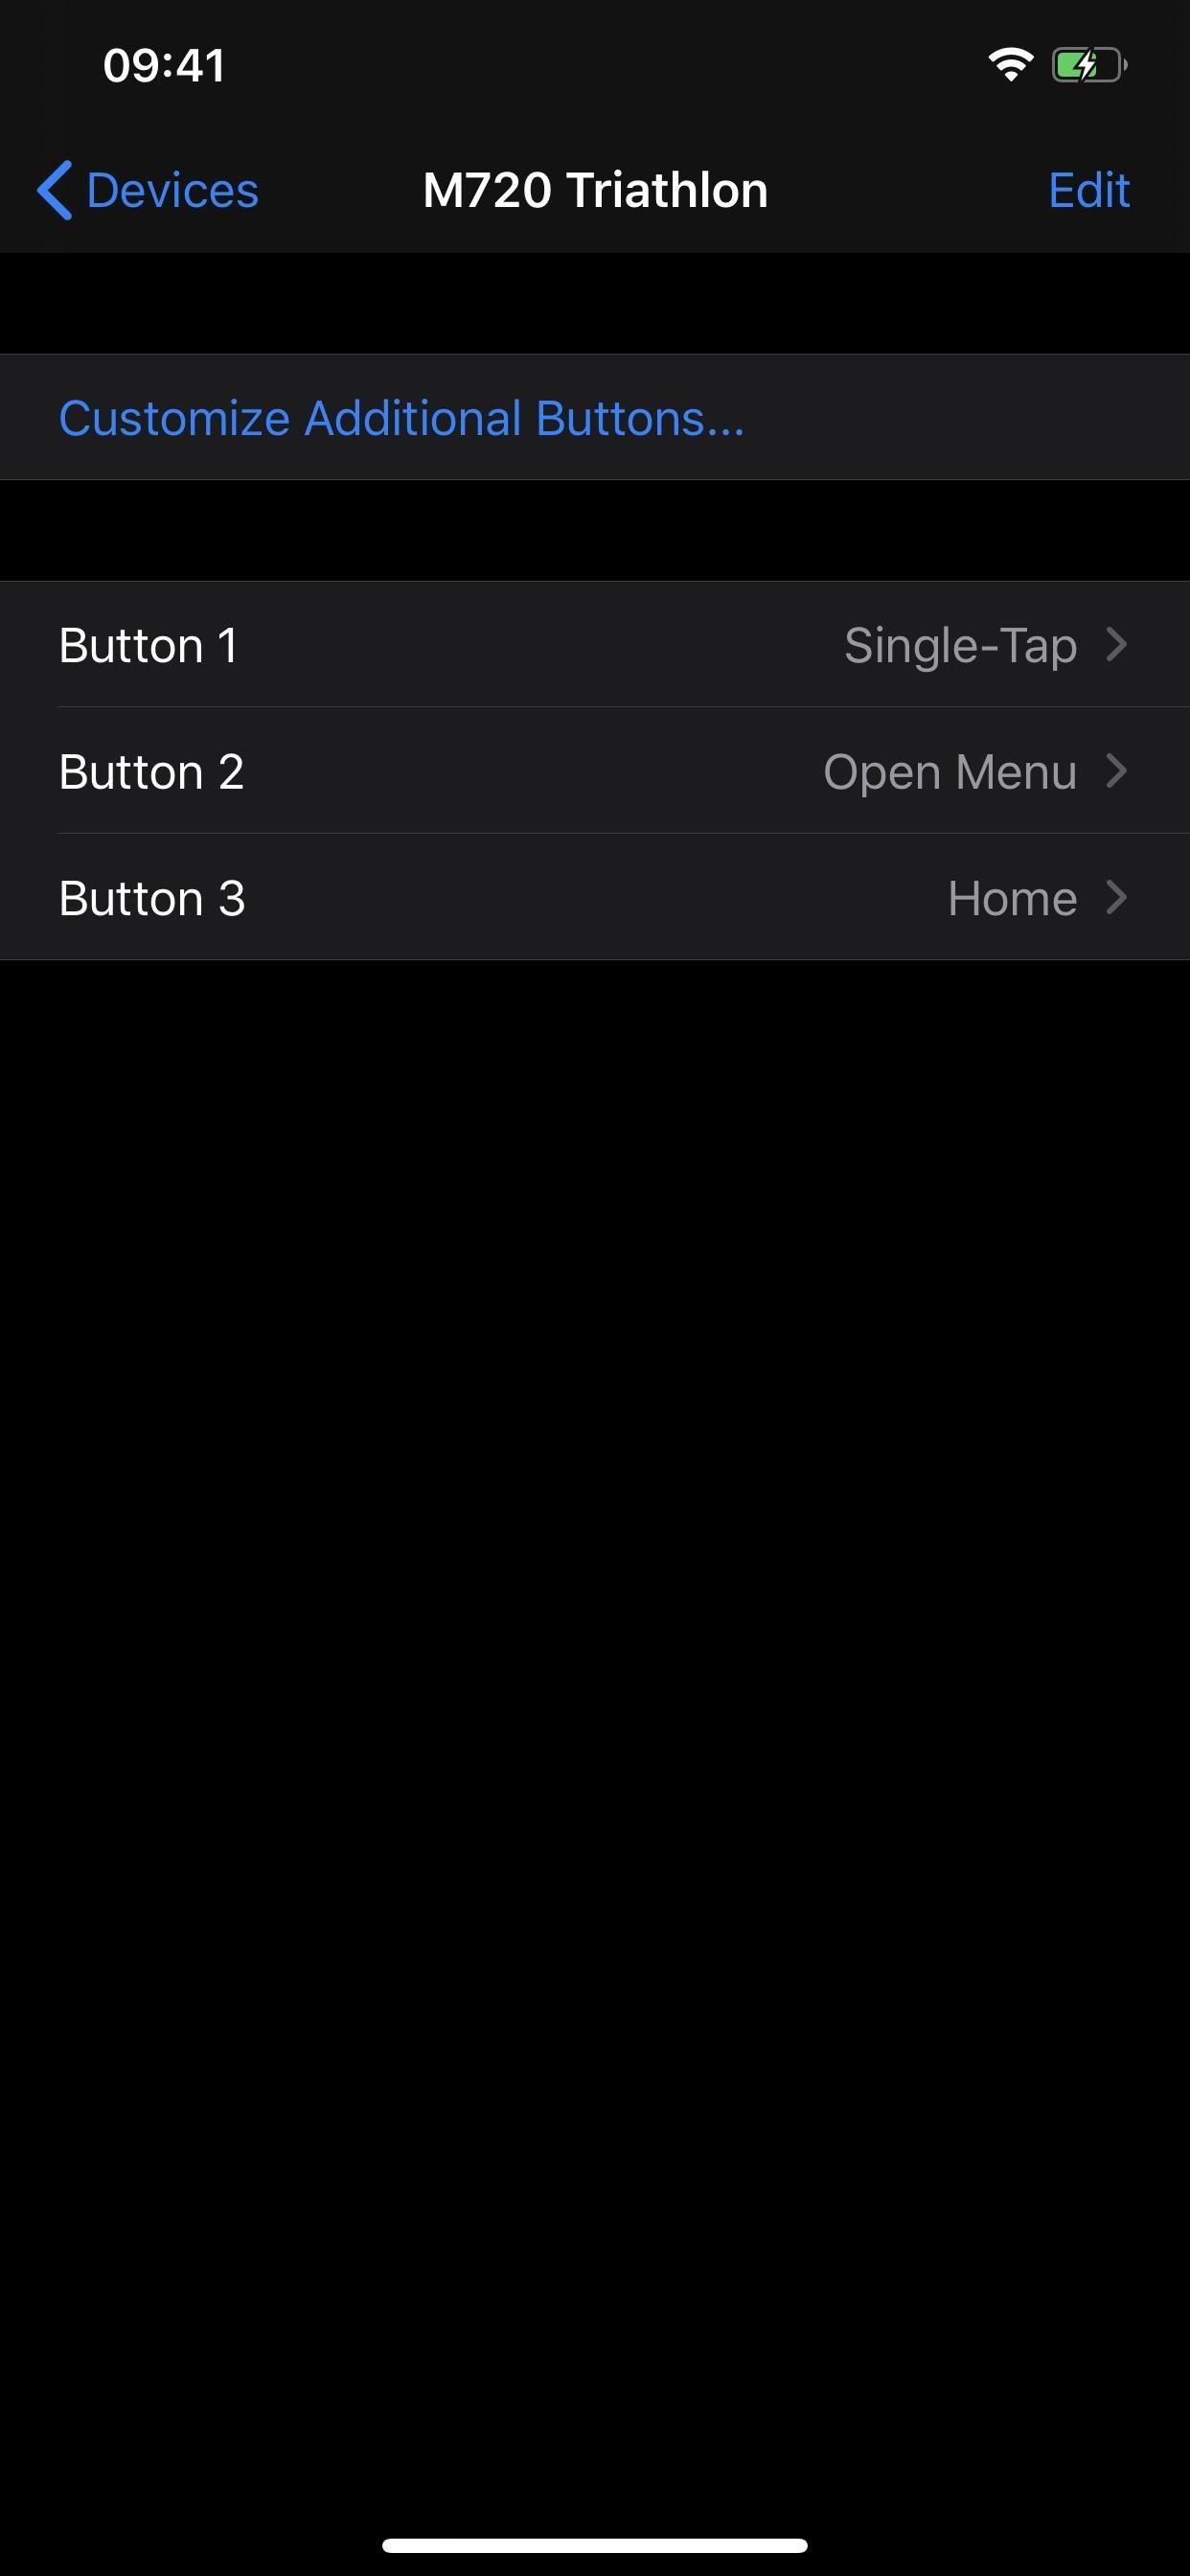
No matter what type of computer mouse you have, after you select it in the „Devices“ menu (go back there if you paired the mouse from the Settings app), you’ll have options to customize what buttons do what. Depending on your mouse, some buttons may already be assigned. On a three-button mouse, the defaults seem to be „Single-Tap“ for the left-click, „Open Menu“ for the right-click, and „Home“ for scroll-click. You can tap any of these buttons and change the action to something different.
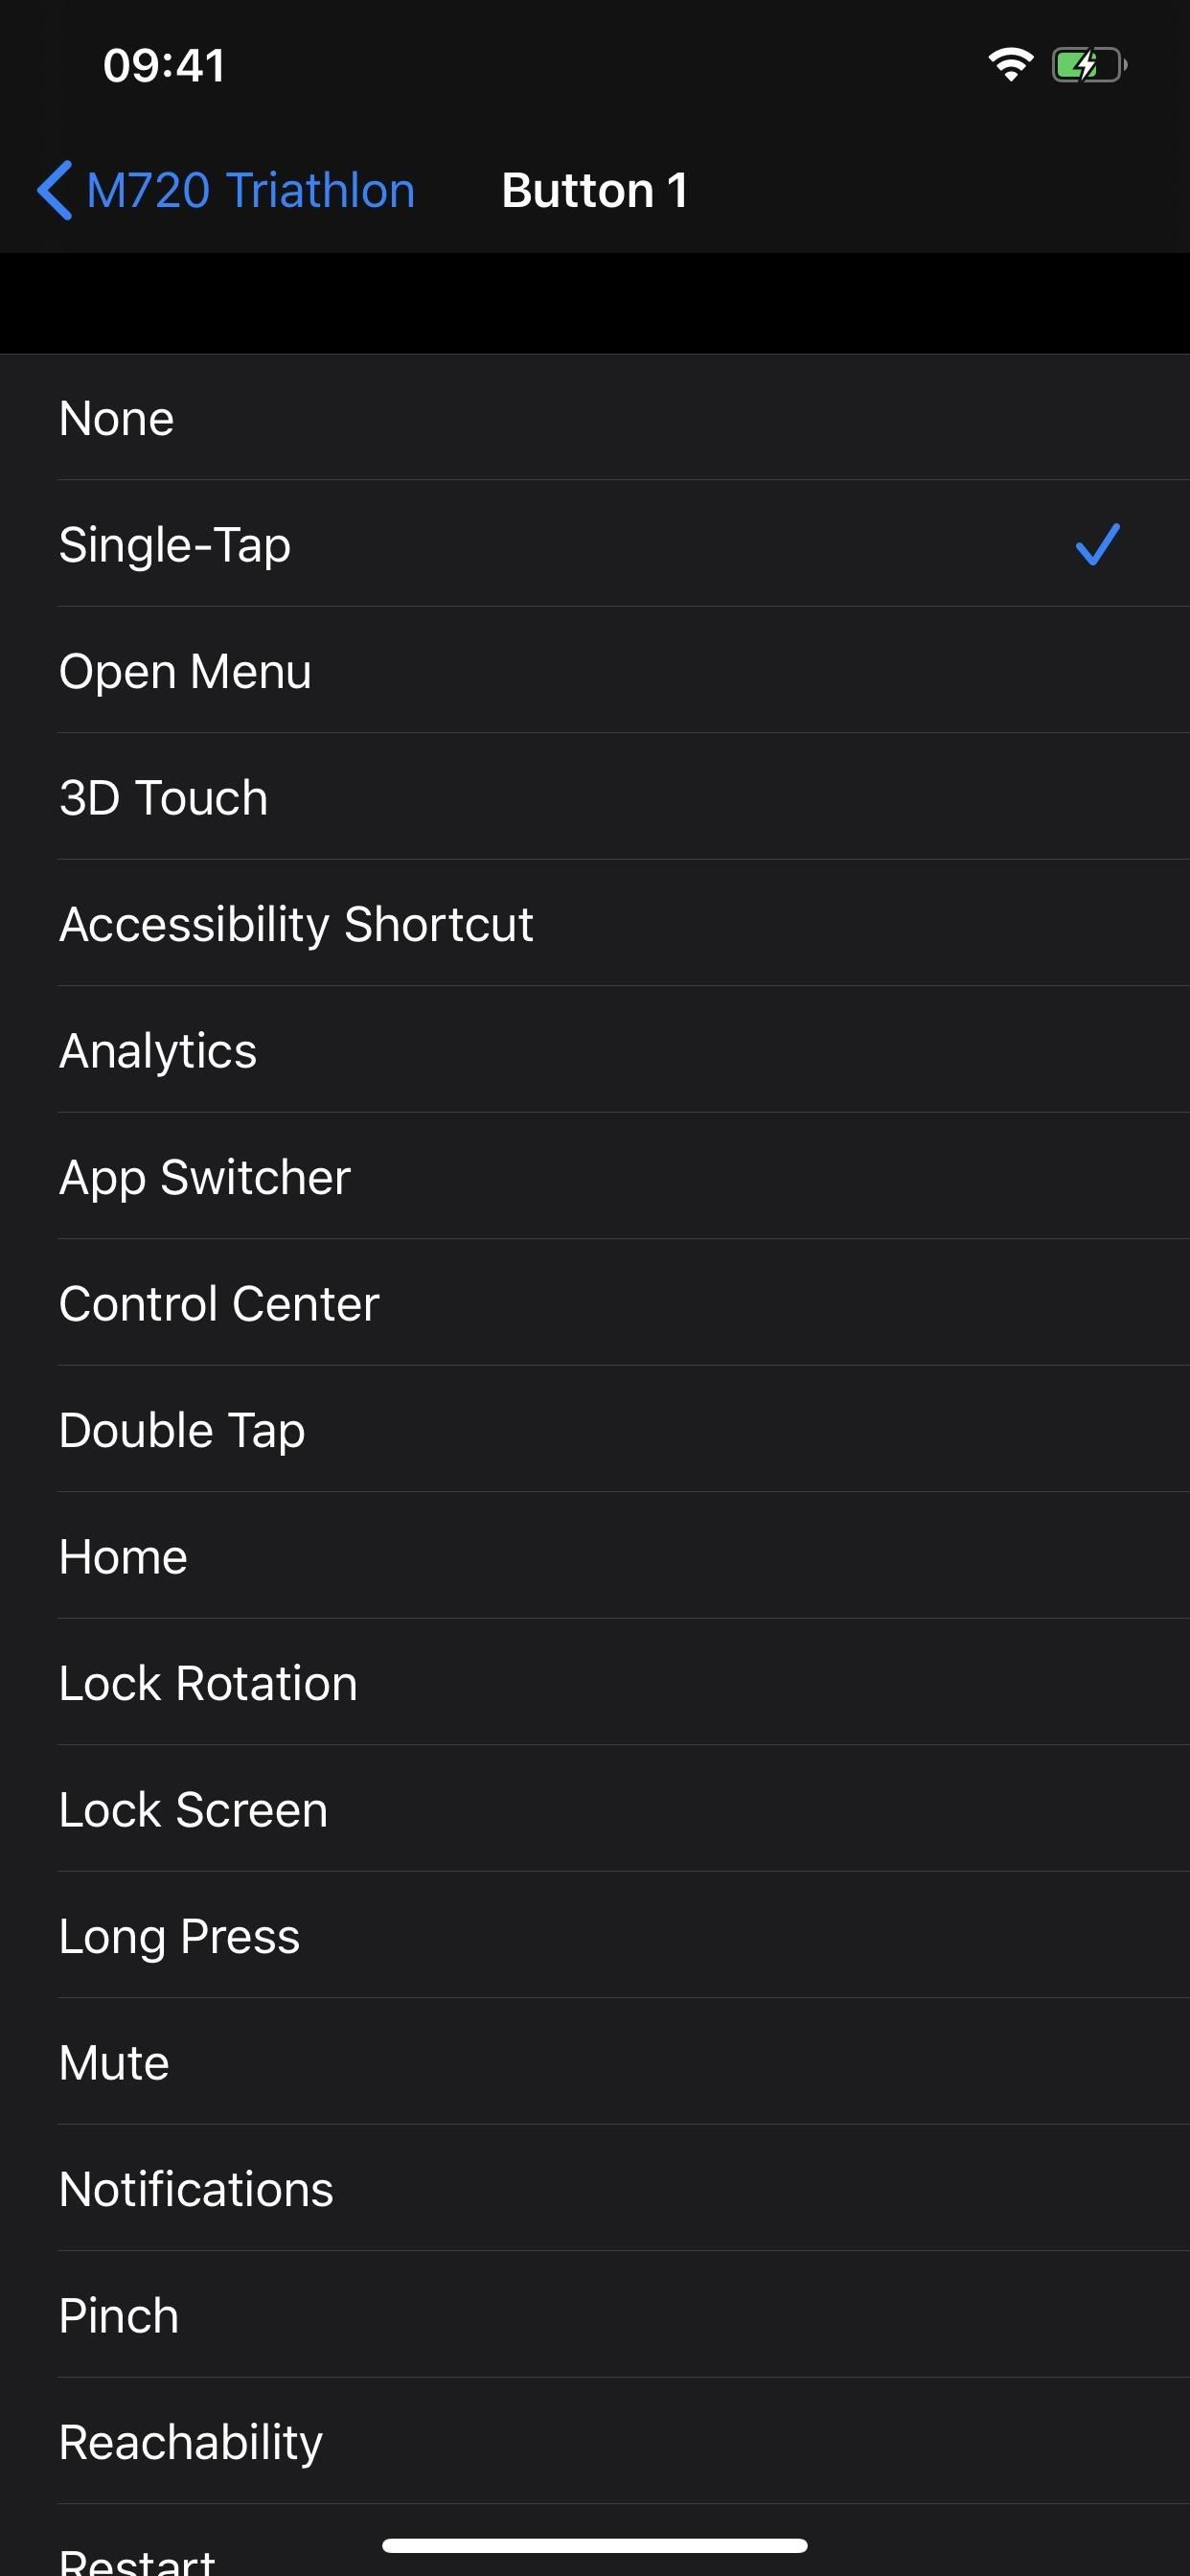
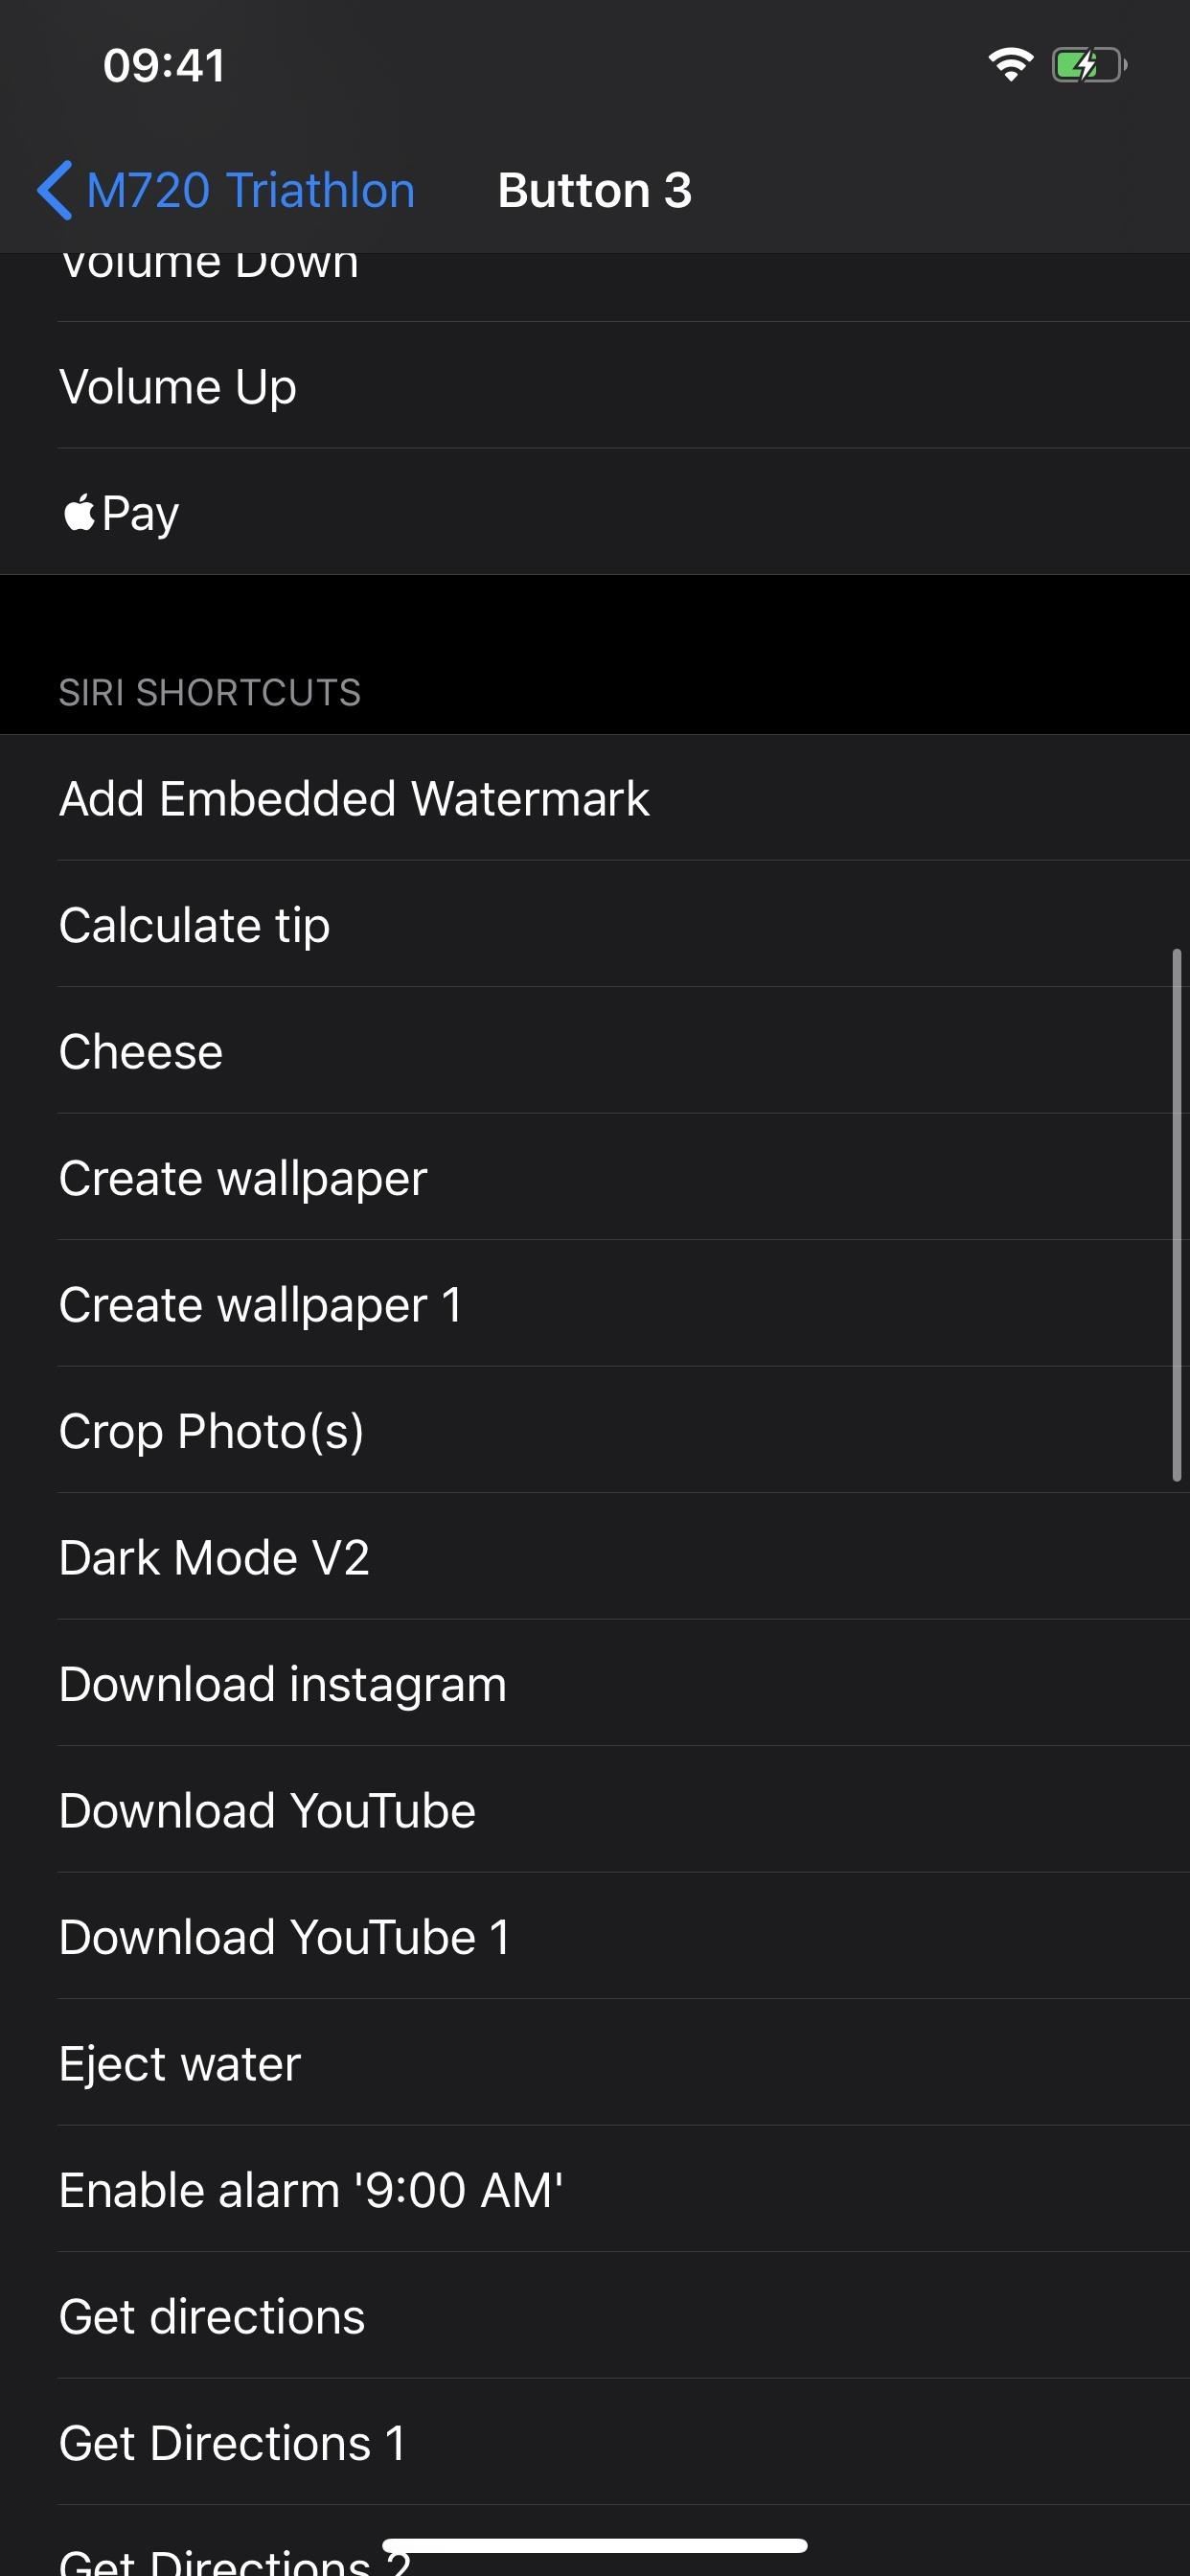
All of the actions include None, Single-Tap, Open Menu, 3D Touch (if your iPhone supports it), Accessibility Shortcut, Analytics, App Switcher, Control Center, Double Tap, Home, Lock Rotation, Lock Screen, Long Press, Mute, Notifications, Pinch, Reachability, Restart, Screenshot, Shake, Siri, SOS, Speak Screen, Spotlight, Voice Control, Volume Down, Volume Up, and Apple Pay.
Additionally, you can assign any button to any of your Siri Shortcuts.
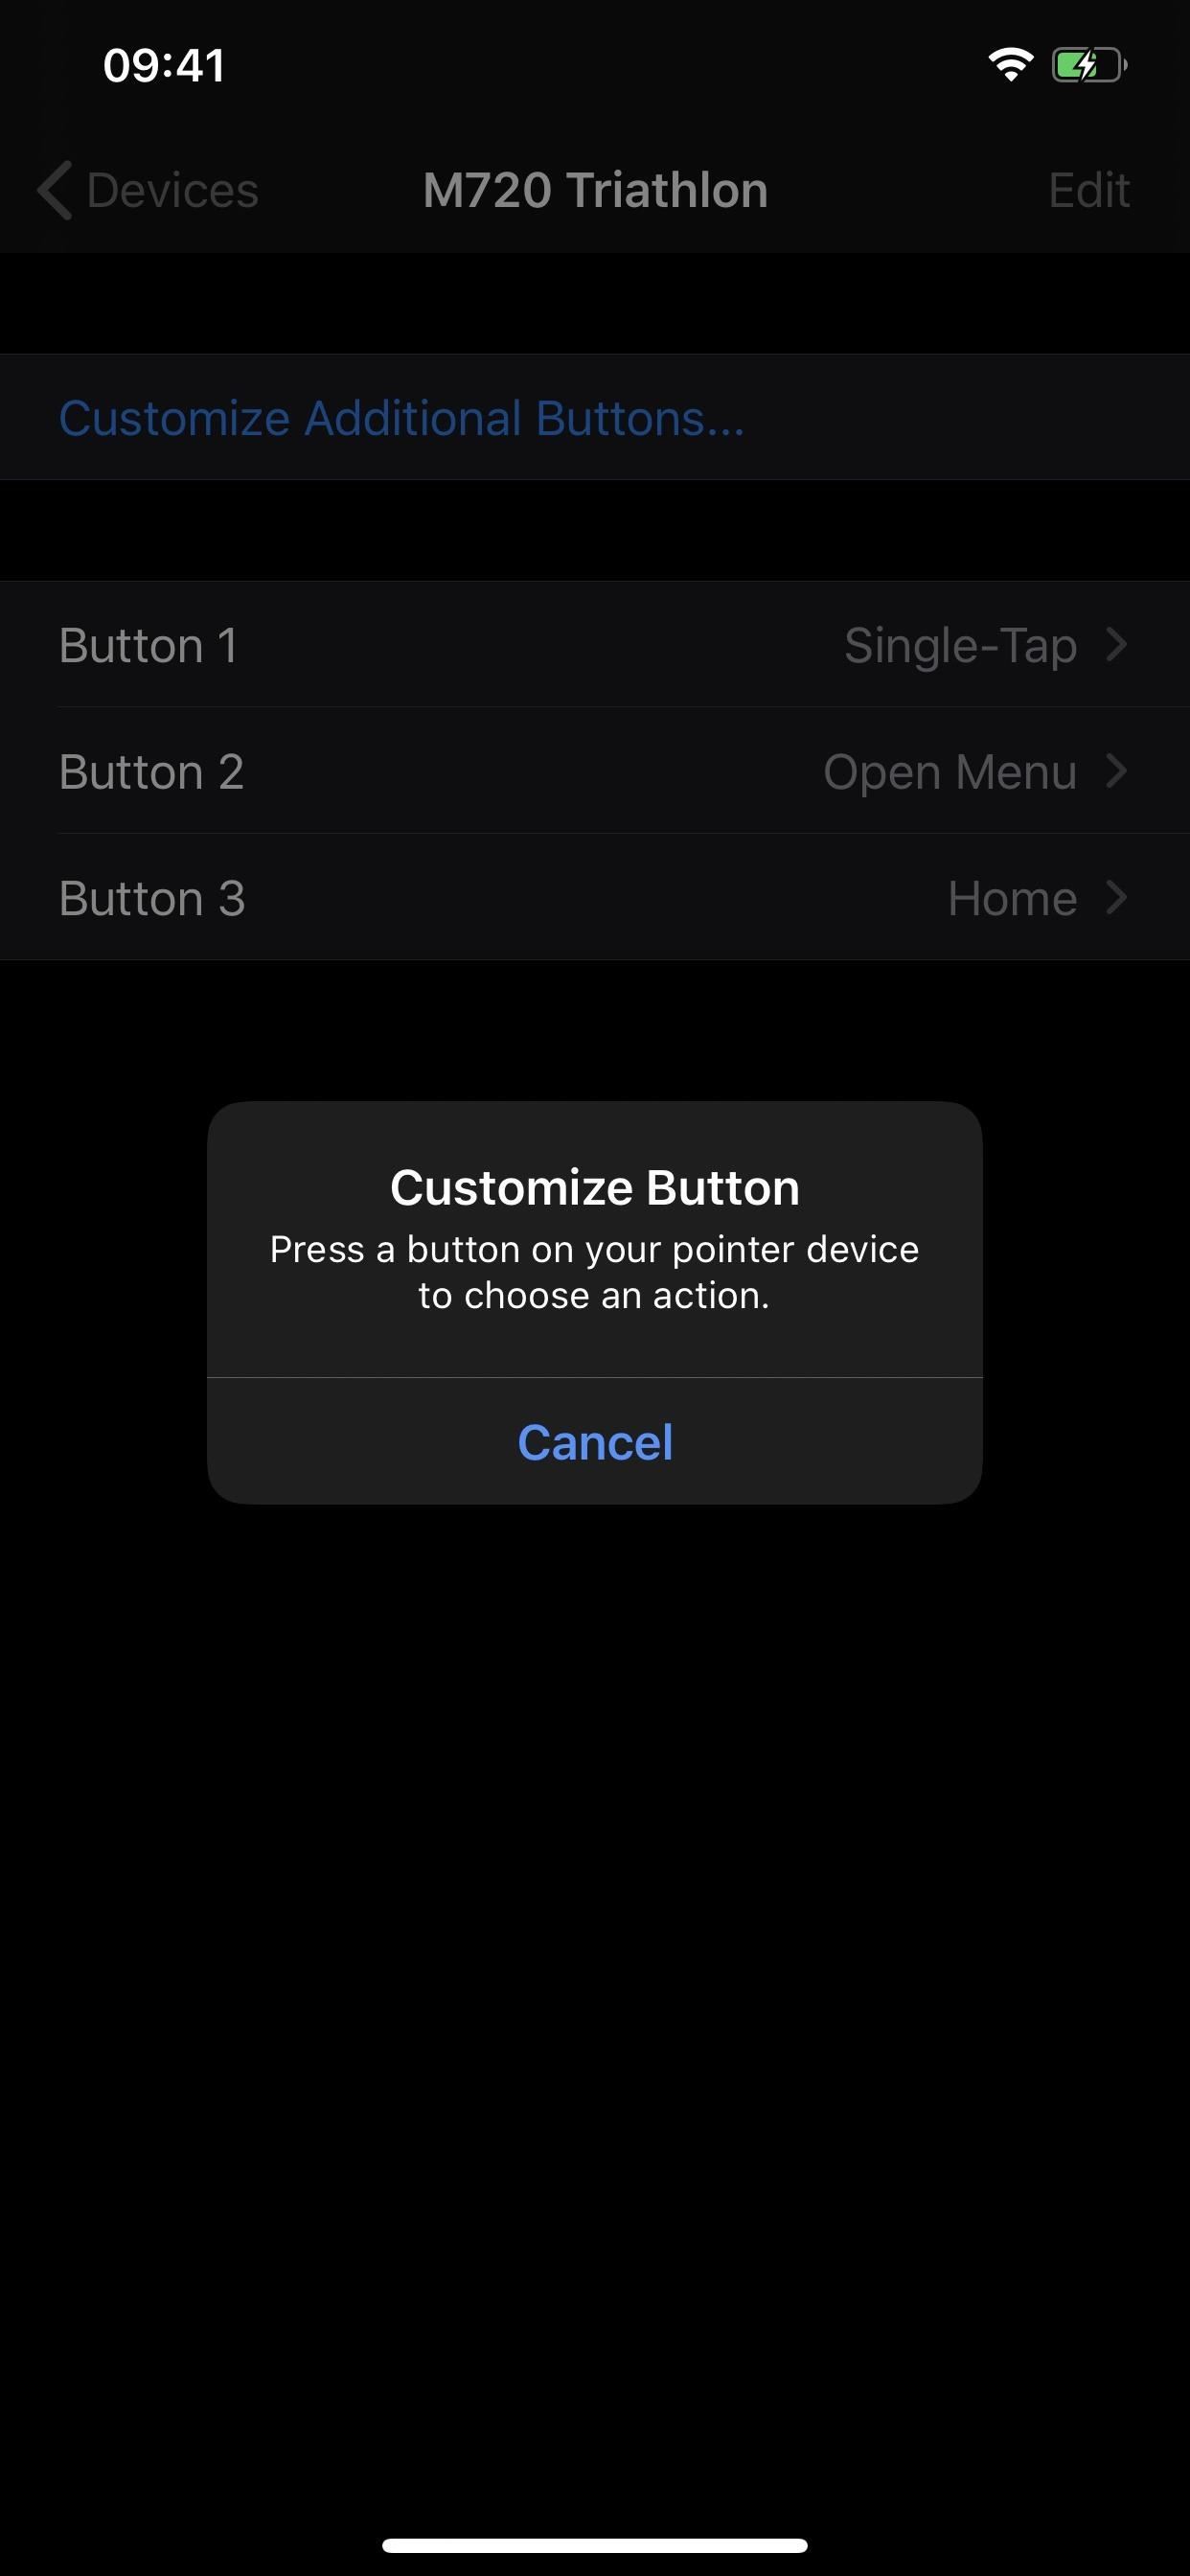
If you don’t see any buttons already available to set up, or if not all of your mouse’s buttons are present, you can force your iPhone to recognize the other buttons. To do so, tap „Customize Additional Buttons“ at the top. A prompt will appear asking you to press a button on your pointing device to choose an action. When you do, the button should appear in the list which you could associate with any of the available options seen above.

Step 4: Use the Computer Mouse on Your iPhone
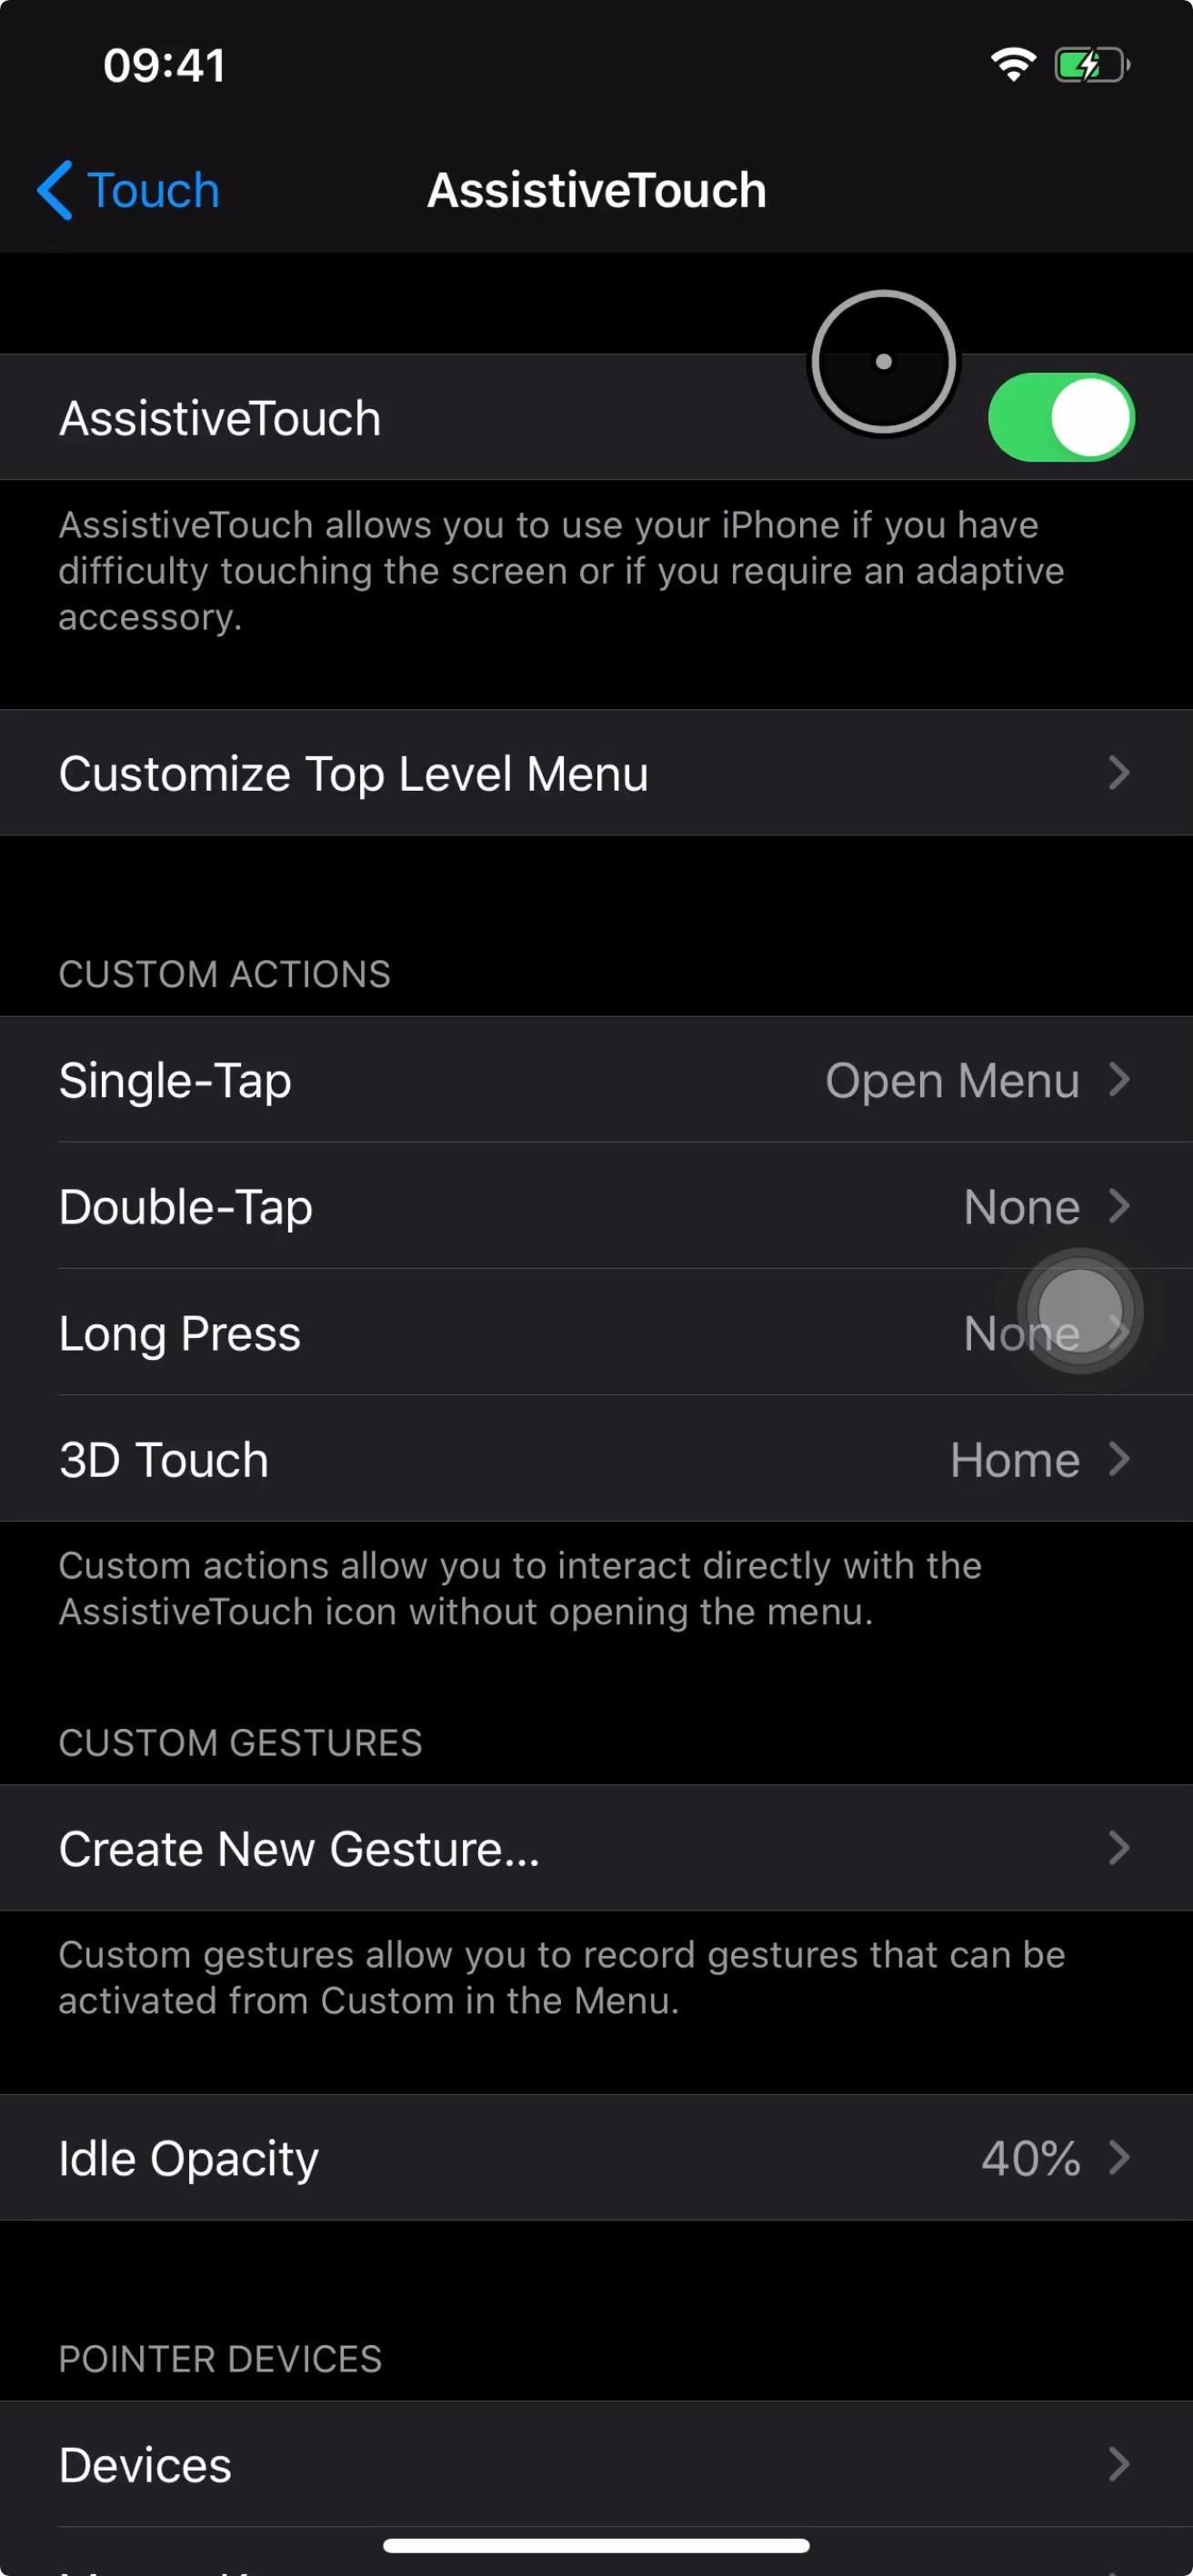
Now for the big moment — actually using the mouse with your iPhone. Since this is an AssistiveTouch feature, you need to turn AssistiveTouch on. So back out of the Devices settings until you’re on the AssistiveTouch screen again, then toggle on „AssistiveTouch“ at the top. Alternatively, you can use the triple-click Home or Side button shortcut if you have that enabled for AssistiveTouch.
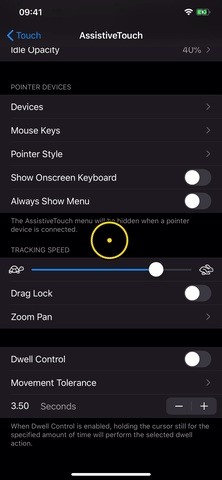
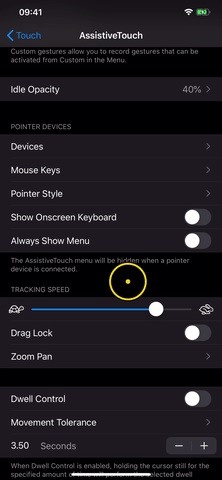
The circular AssistiveTouch menu icon will appear, as well as the circular mouse cursor. You can disable the AssistiveTouch icon when a pointer is active by toggling off „Always Show Menu“ in the AssistiveTouch settings.
Depending on what actions you chose for each button, mouse use will vary from person to person. But if you stuck with the defaults as I did above, left-clicking will select things. Left-clicking and holding it down will grab items or let you perform swipes like to open the Control Center or Notification Center.
Right-clicking will open the AssistiveTouch menu. And clicking the middle button will take you to the home screen. It’s relatively intuitive and easy to use — just like a mouse on your computer.
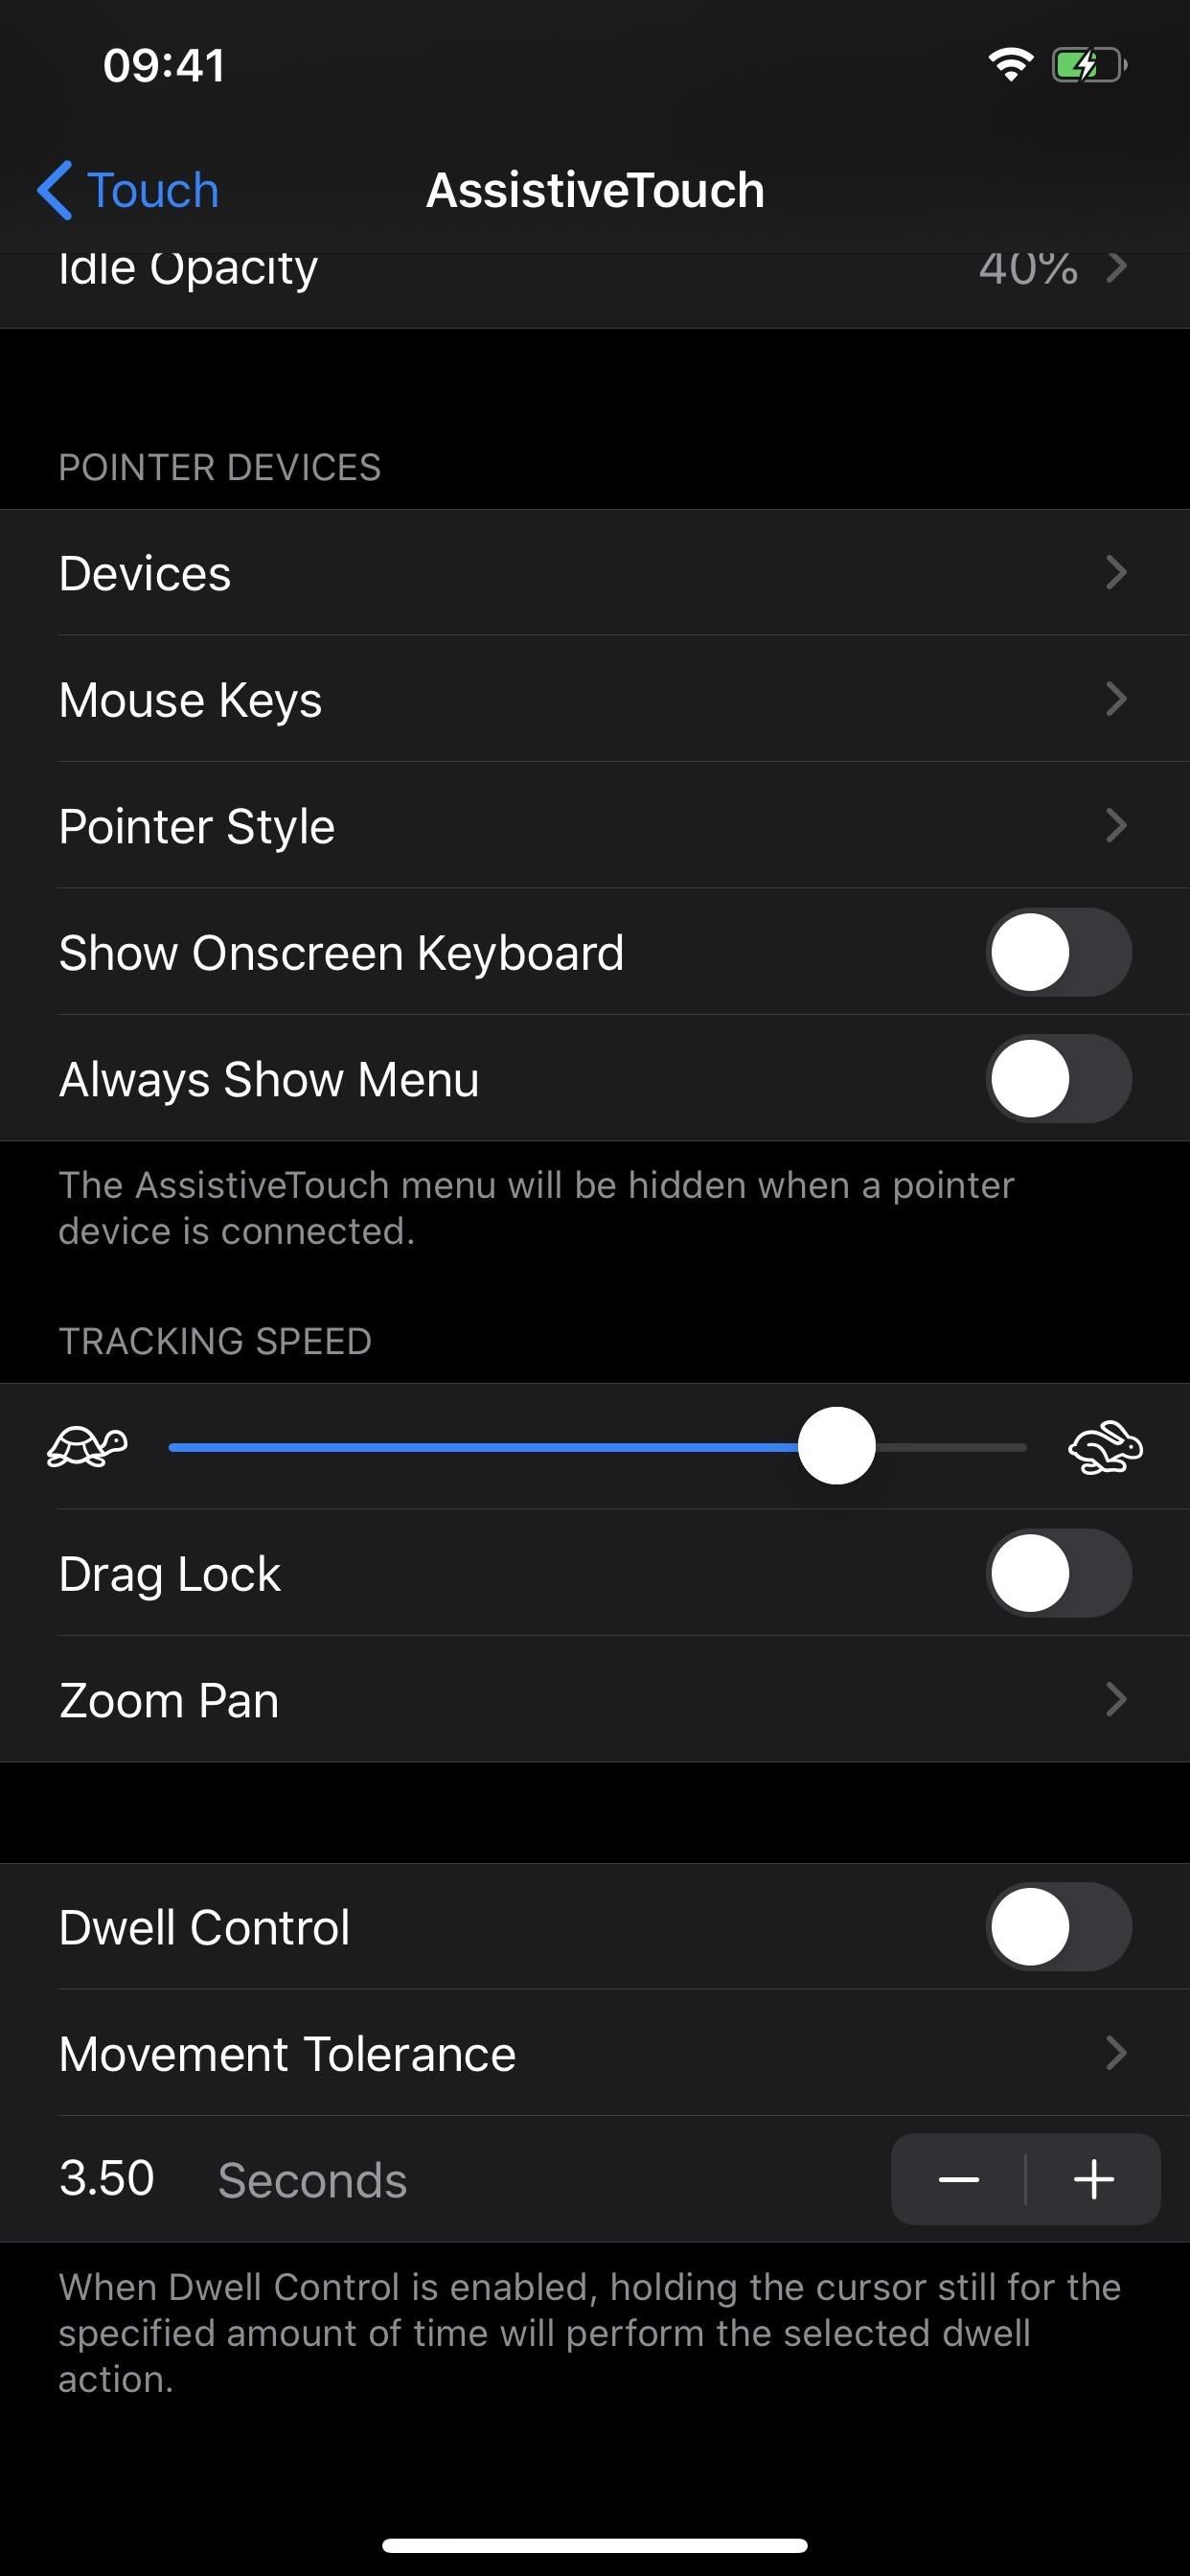
Step 5: Change the Tracking Speed of the Cursor (Optional)
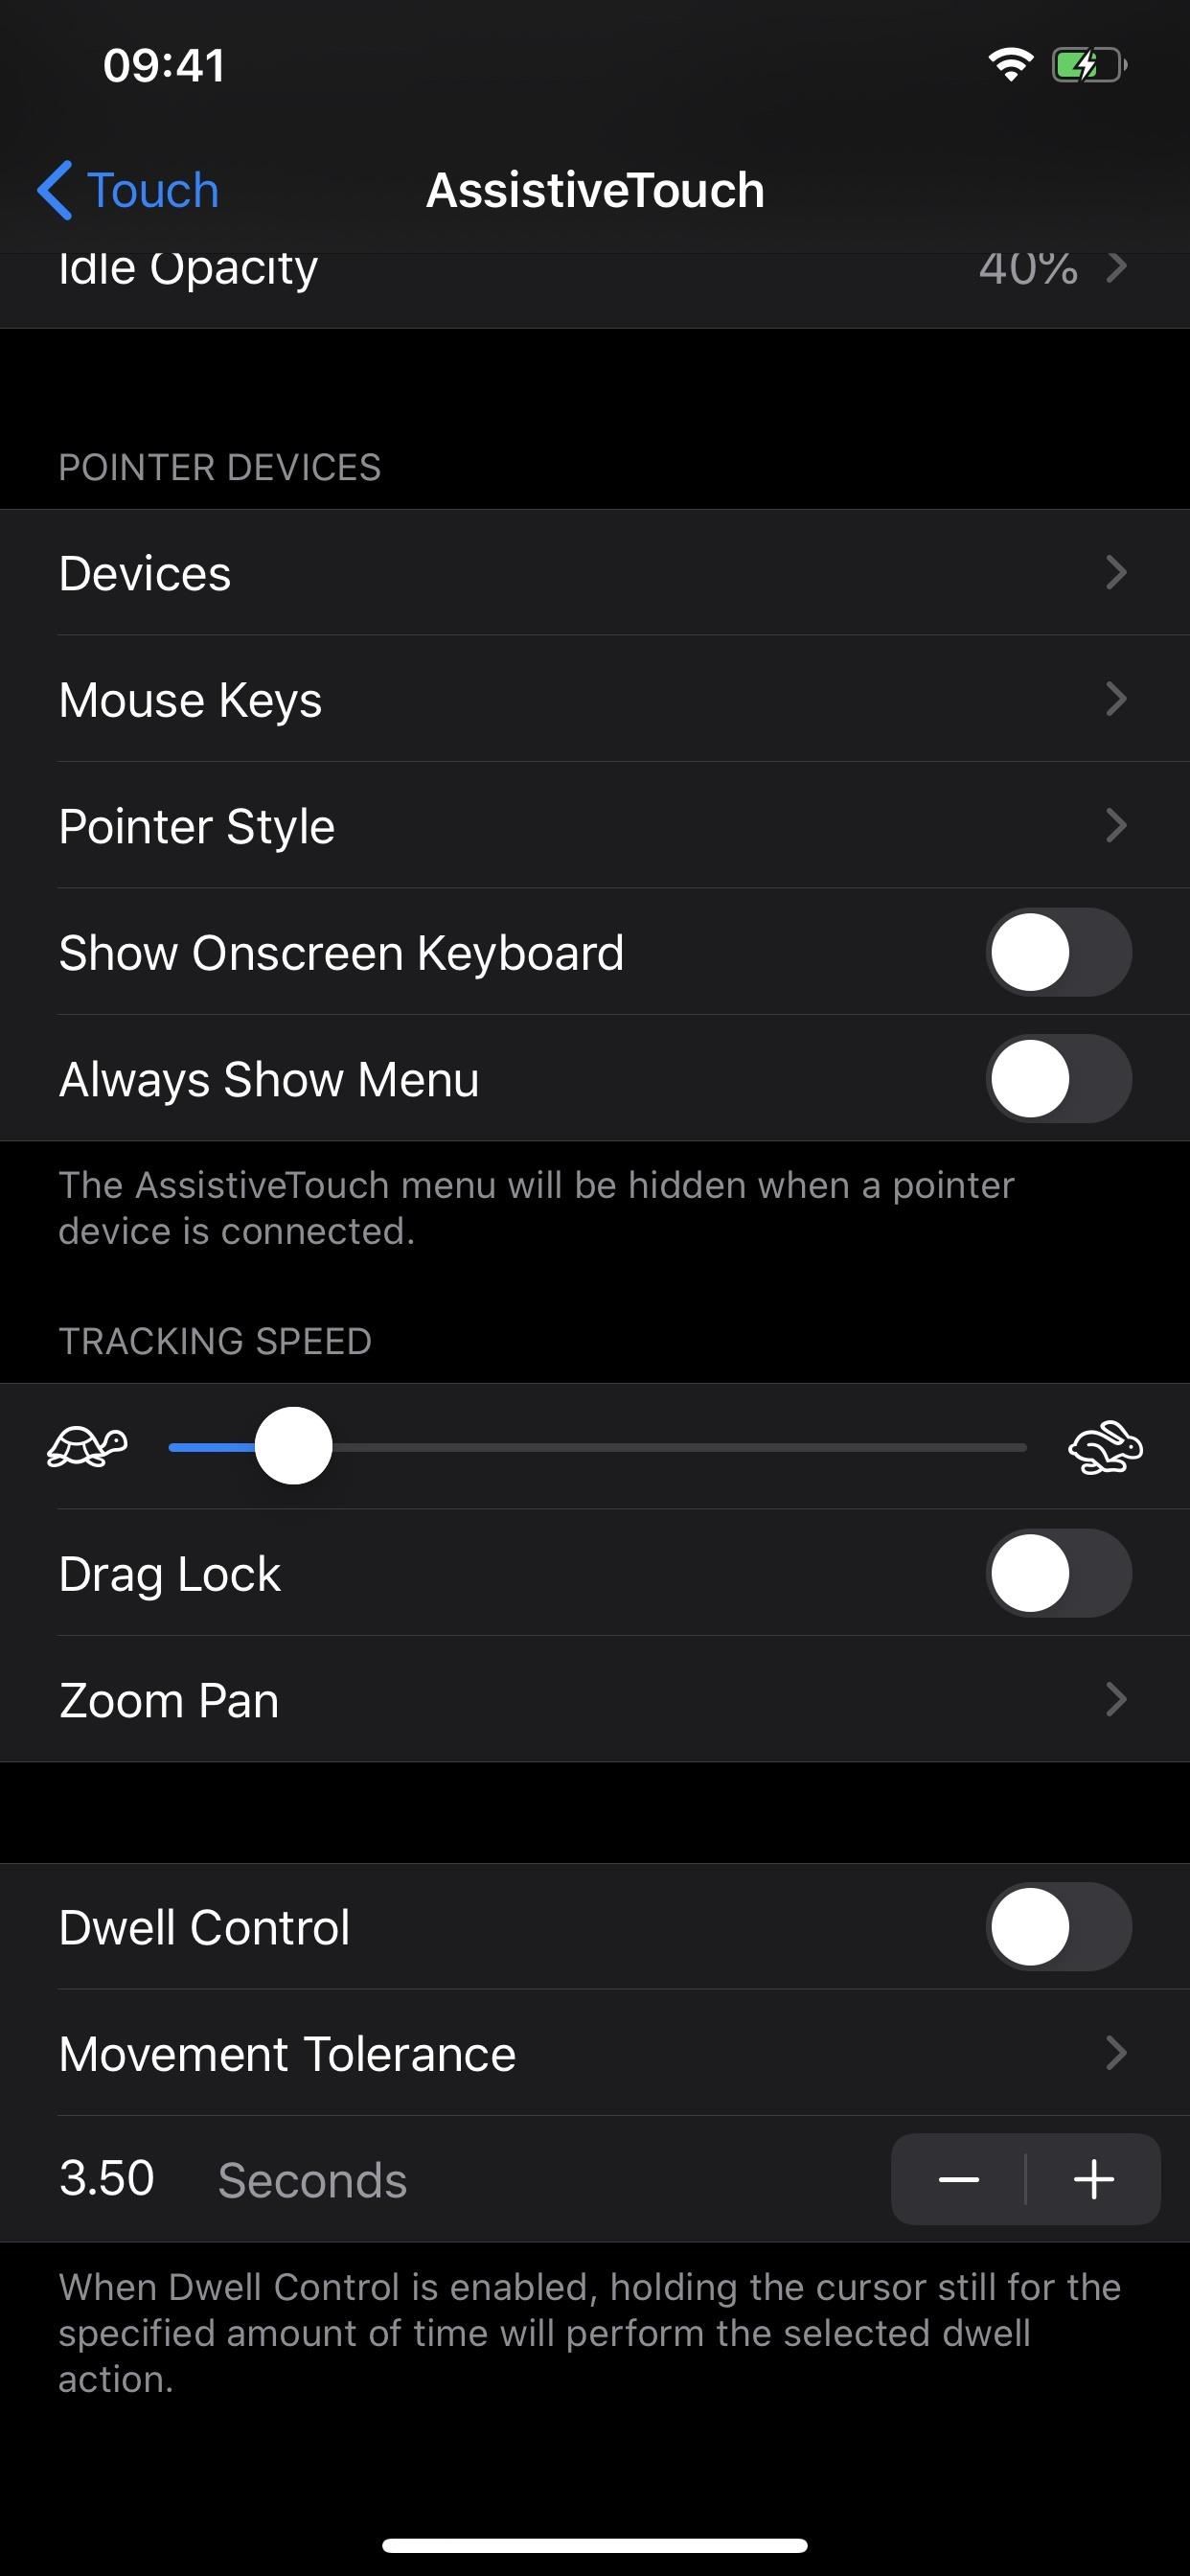
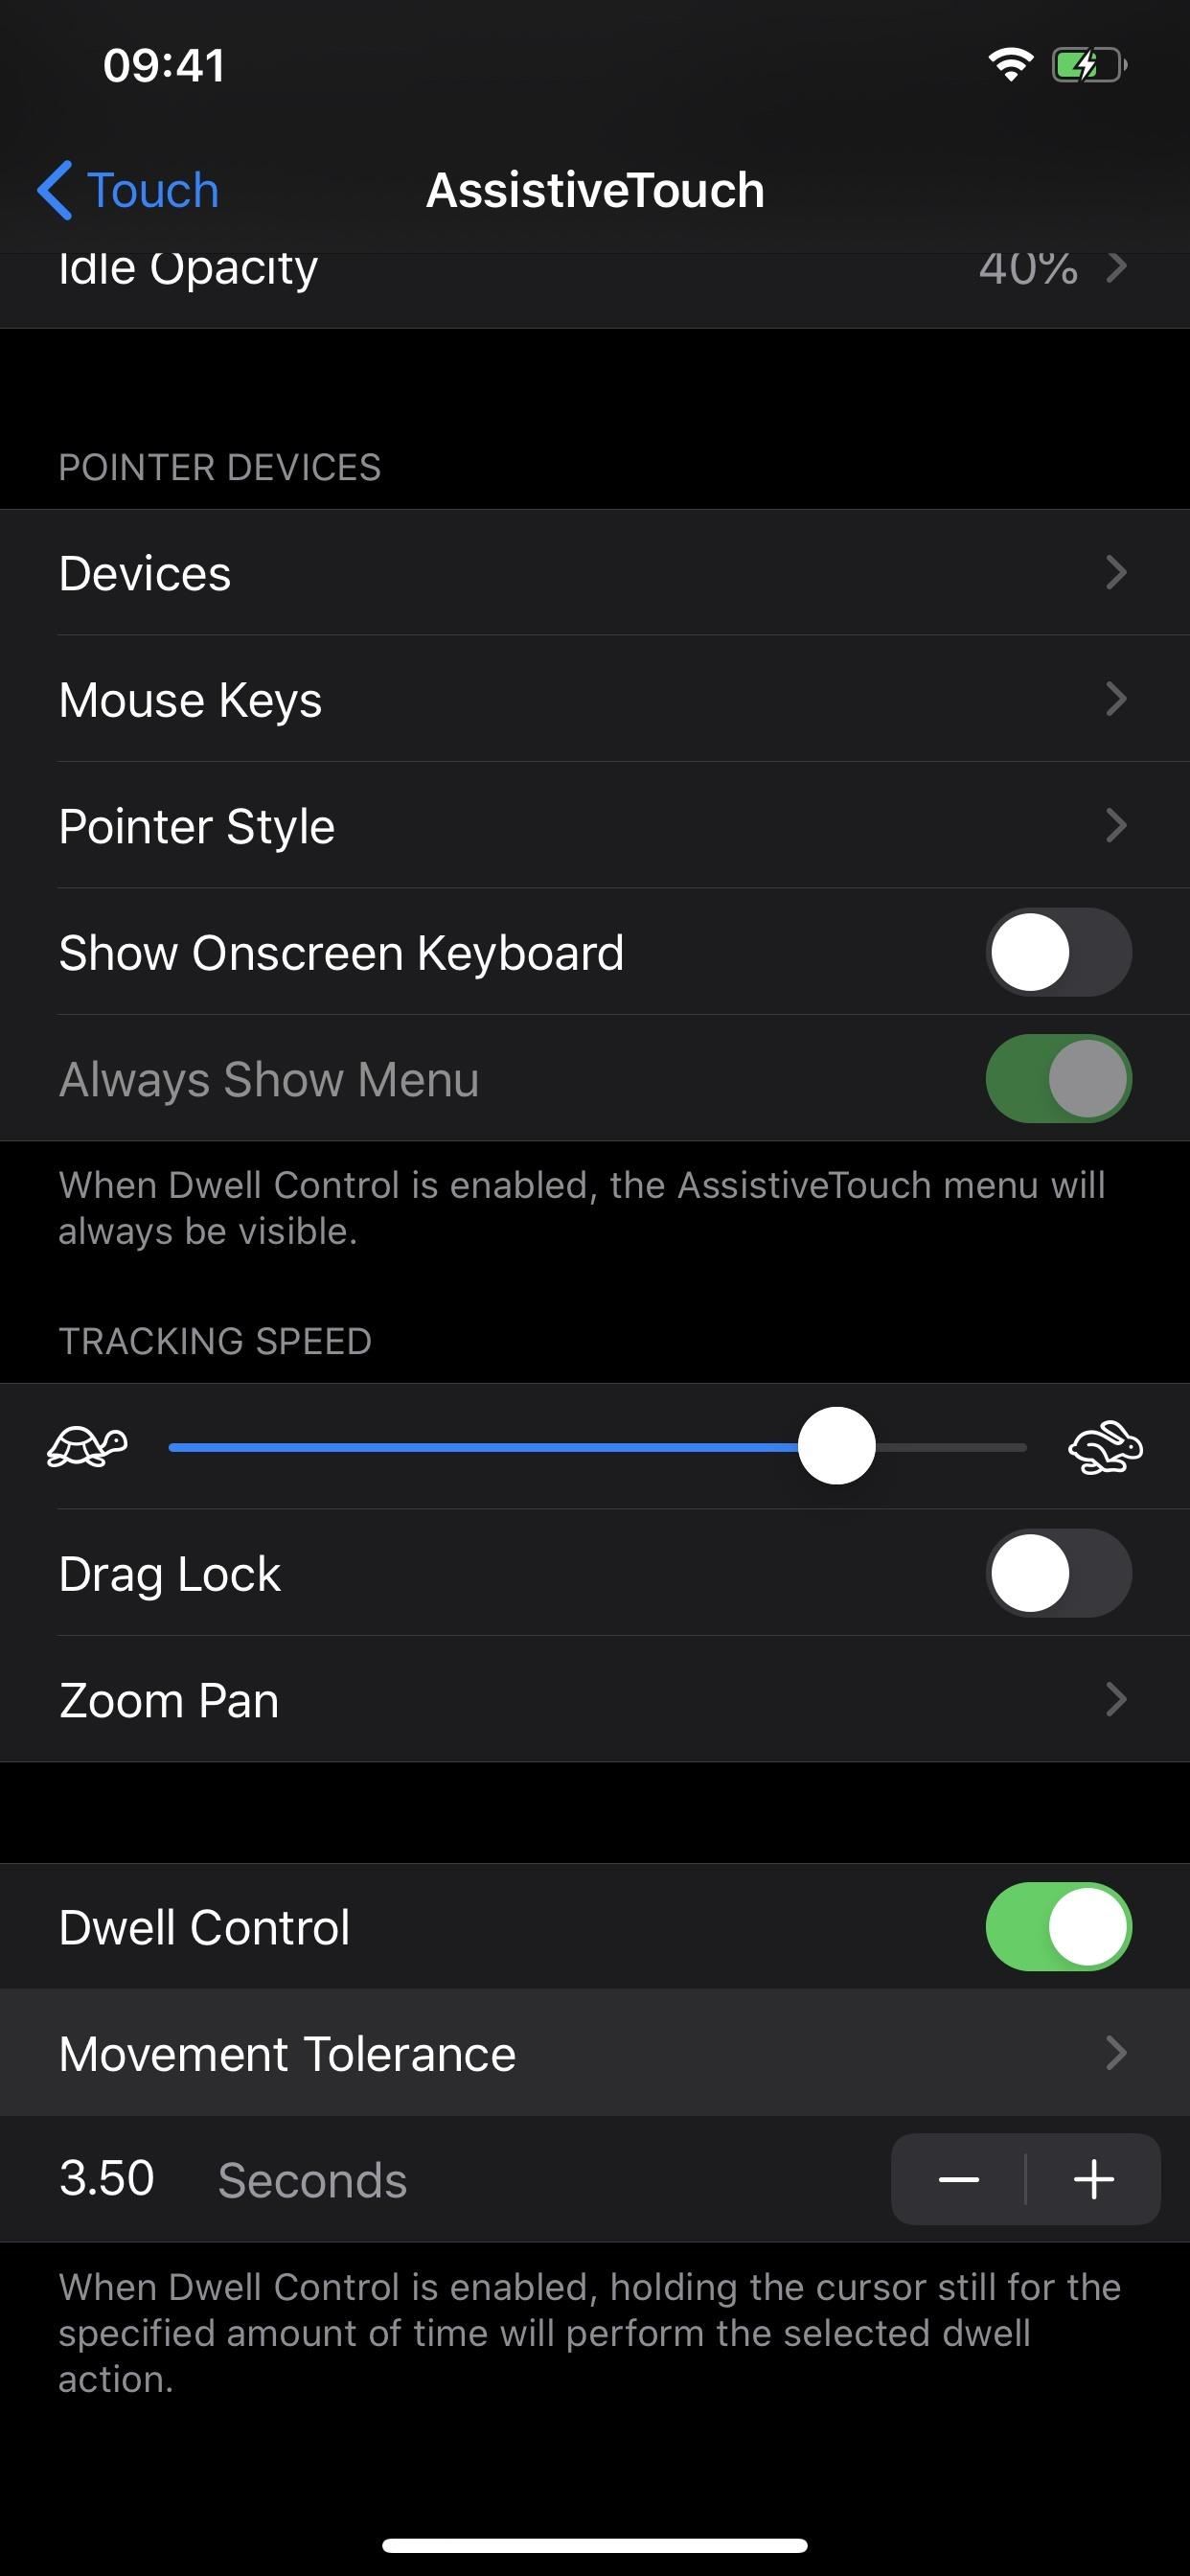
I found that the cursor was going too fast on the screen, so I had to turn the tracking speed down. If you’re in a similar situation, or if your cursor is moving too slow on the screen, you can adjust it. In the same AssistiveTouch menu, find the Tracking Speed section. In it, there’s a slider which you can adjust — left toward the turtle slows it down, right toward the rabbit speeds it up.
Step 6: Change the Cursor Size, Color & Visibility (Optional)
If you’re using iOS 13’s new Dark Mode feature, the default gray color of the cursor may be hard to see, but you can change it. In the AssistiveTouch menu, tap on „Pointer Style“ Then, select „Color,“ where you’ll find options for gray, white, blue, red, green, yellow, and orange.
Back in the „Pointer Style“ menu, there are options to choose the how big the circular cursor is under the Size section. There are ten available cursor sizes on the slider. Also, you can tap „Auto-Hide“ to disable the feature to see the cursor always or to change the amount of time the cursor will hide after.


Step 7: Enable Drag Lock for Scrolling (Optional)
By default, when you left-click-and-hold, then move the mouse up or down on a page, it will let you scroll. Let go, and it acts just like your finger was removed from the screen, and if you want to scroll more, repeat the process. When you left-click-and-hold for one second, release, then move the mouse, the pointer just moves.
However, you can lock the cursor to the place where you left-clicked-and-held, so you can only scroll up and down as much as the cursor can appear on the screen. To try this out, turn on the „Drag Lock“ toggle in the AssistiveTouch menu. Then, left-click-and-hold somewhere on a page, give it a second, release the button, then move the mouse around, and you’ll immediately notice the cursor „locked“ to that spot on the page. To get rid of the lock, just left-click to disable it.
 Without the drag locked (left) and with it locked (right).
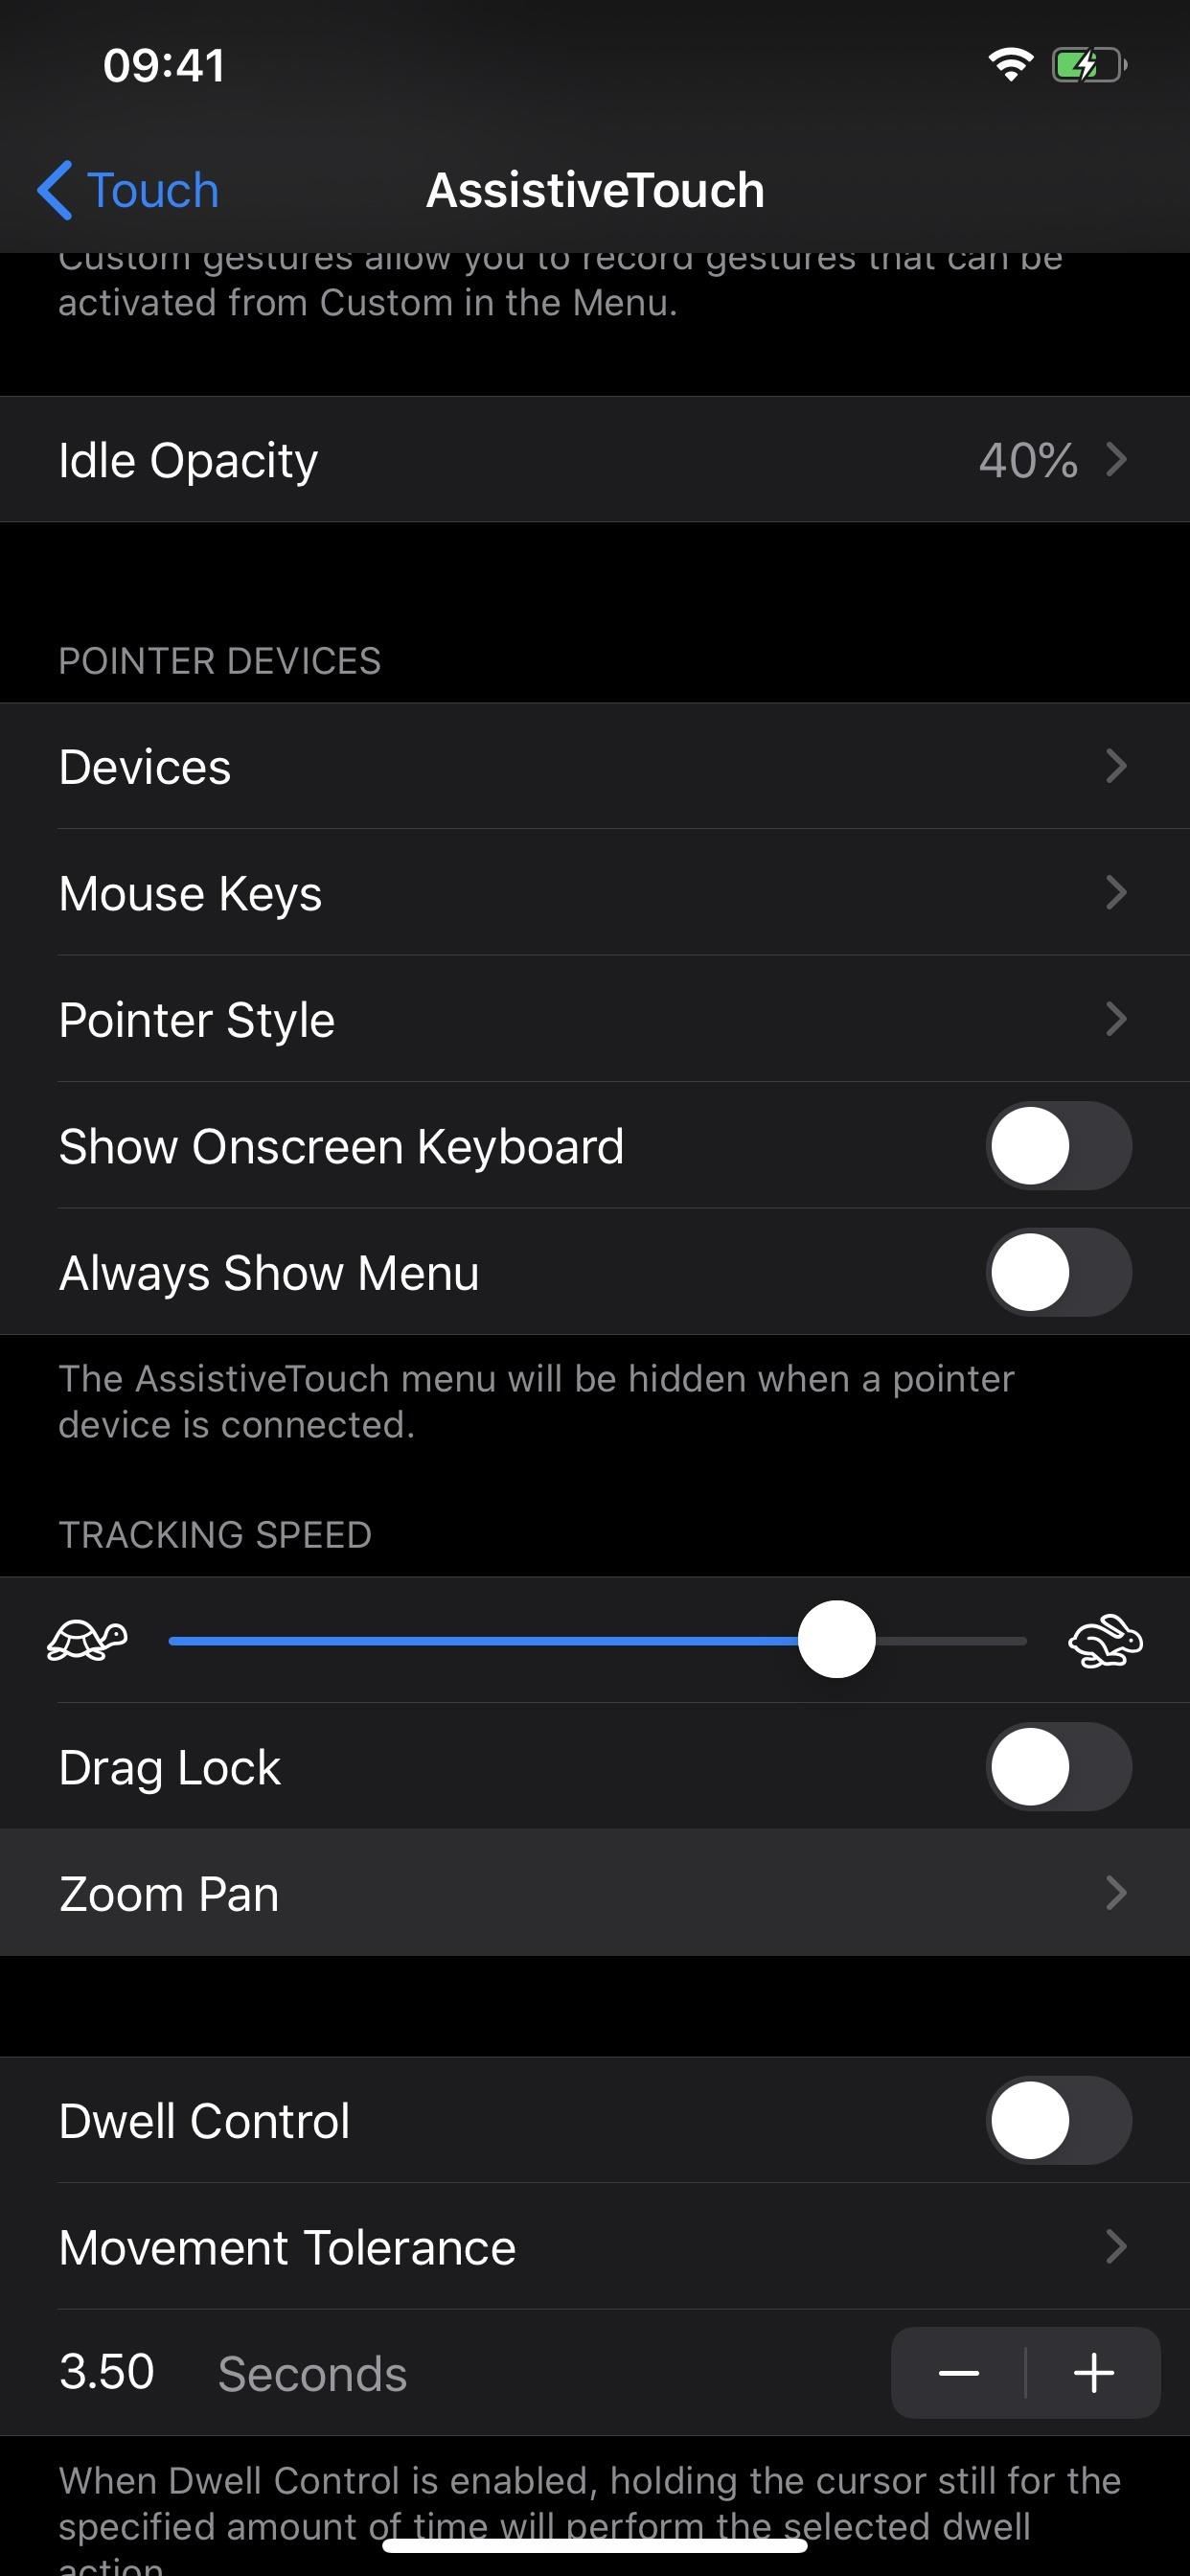
Step 8: Adjust the Zoom Pan Options (Optional)
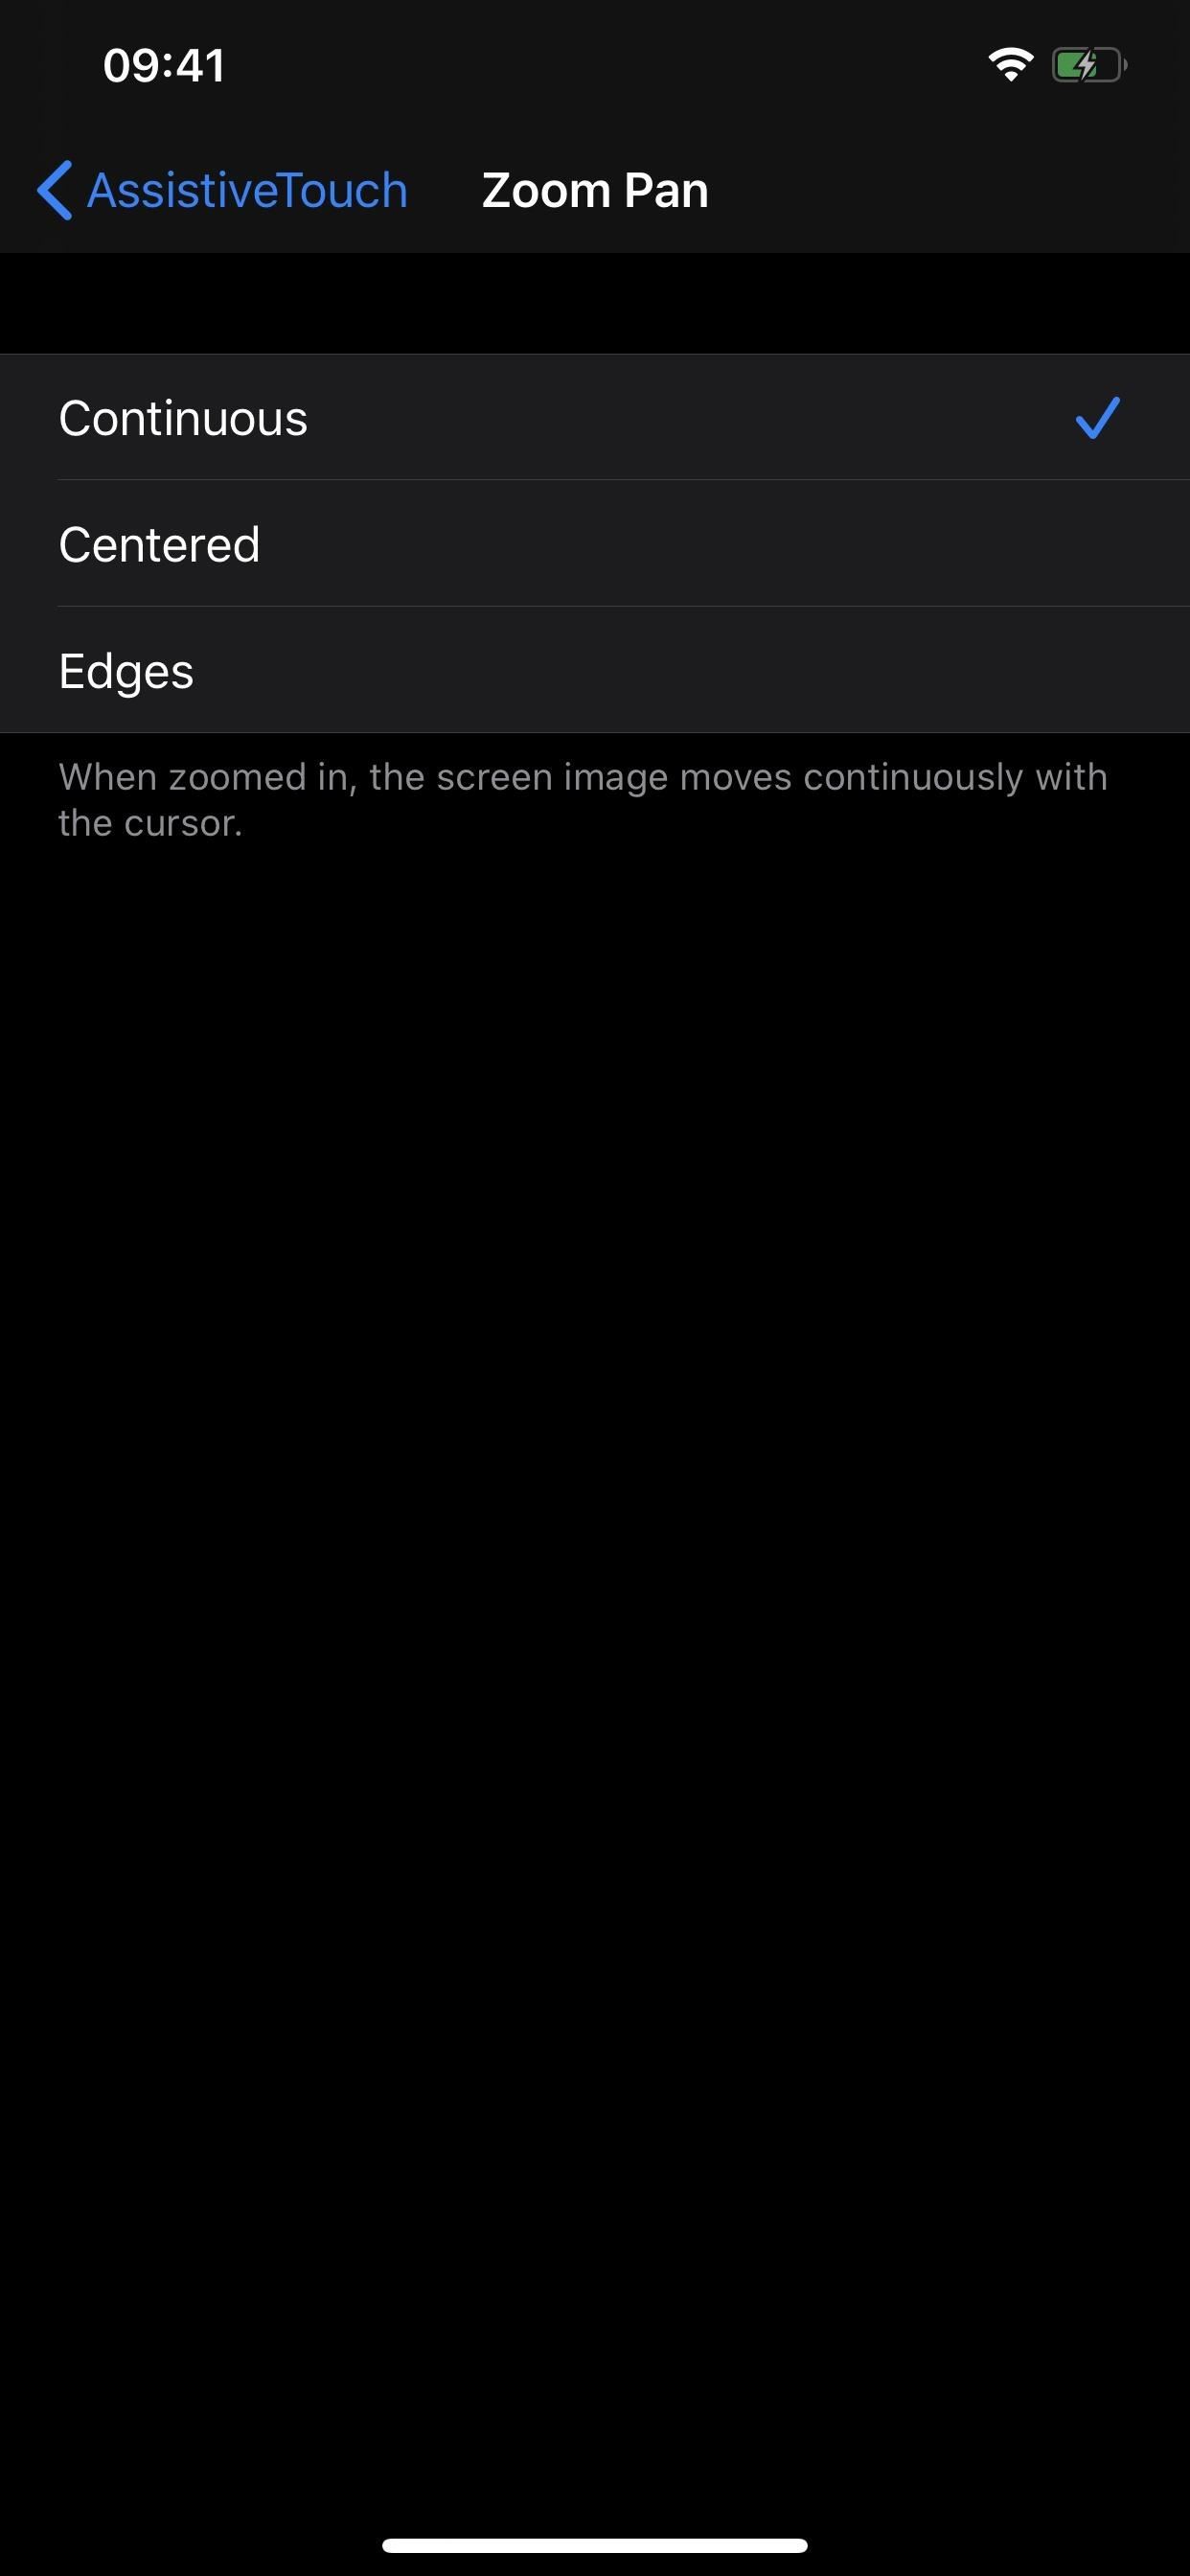
If you use the „Zoom“ feature at all with your iPhone, this is an excellent setting to check out. In the AssistiveTouch options in the Tracking Speed section, tap on „Zoom Pan.“ There are three options to choose from:
- Continuous: When zoomed in, the screen will always move with the cursor.
- Centered: When zoomed in, the cursor will stay in the middle of the screen with the page moving accordingly.
- Edges: When zoomed in, the screen only moves when the cursor moves around the edges of the display.
Step 9: Enable the Dwell Setting (Optional)
If you don’t like clicking at all, you can minimize it with the „Dwell Control“ setting in the AssistiveTouch menu. Toggle it on, and whenever you hover over something on the screen, and in a few seconds, it will perform that action for you. Note: with this option enabled, the AssistiveTouch menu icon needs to be on, and it will turn it on automatically for you.
You can adjust the time frame for when the action will be initiated, so if you’re hovering over a menu icon, you can change how long the hover is before it will open that menu icon up. Use the plus and minus signs next to „Seconds“ to adjust it from 0.25 seconds to 4.25 seconds in 0.25-second increments.
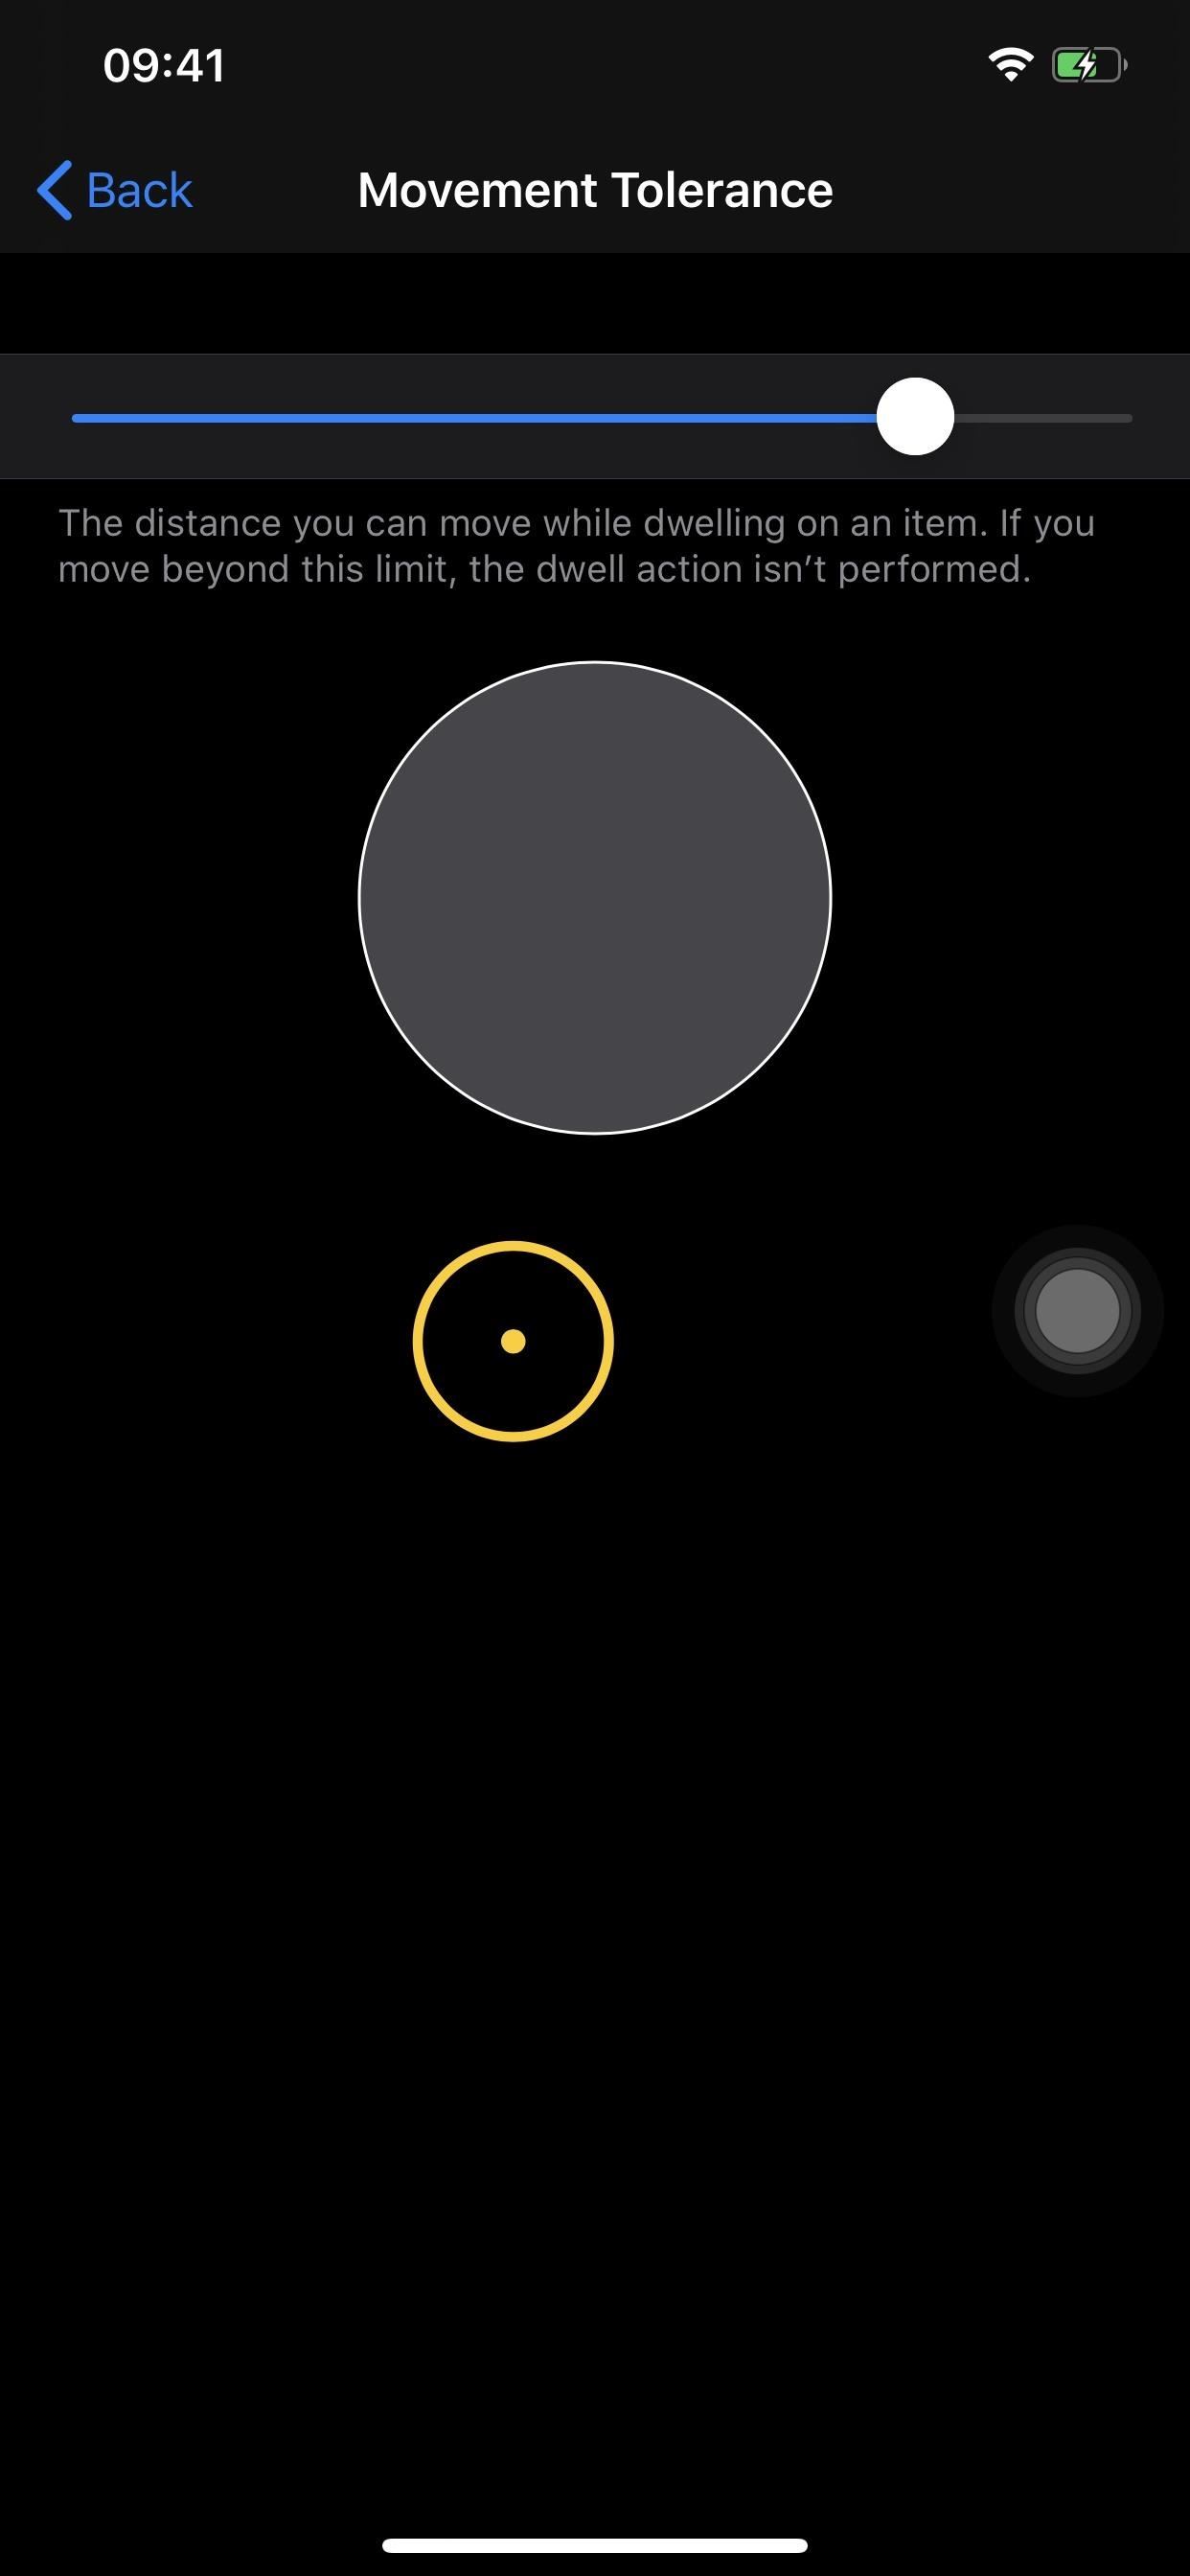
The „Movement Tolerance“ setting provides a slider you can adjust for the distance you can move while dwelling on an item. Move beyond the limit, and the action won’t happen. Sliding the white dot left decreases the radius while moving right increases the radius.
So far, this is an excellent attempt at incorporating computer mice into iOS. It’s likely more useful in iPadOS 13 since you can use that as a real computer, but it’s still beneficial on iPhone. However, there’s one thing I wish were included in the pointer settings — a way to change how the scroll wheel works.
To me, it’s unnatural the way scrolling works in the „natural“ setting, similar to the natural setting on macOS, but it may not be to you. When scrolling on the iPhone, when you scroll the wheel toward you, the page scrolls up, and scrolling the wheel away makes it scroll down. I prefer the approach where scrolling the wheel toward you makes the page scroll down, and away makes it go up.
Don’t Miss: How to Enable Apple’s True Dark Mode in iOS 13 for iPhone
Just updated your iPhone? You’ll find new features for TV, Messages, News, and Shortcuts, as well as important bug fixes and security patches. Find out what’s new and changed on your iPhone with the iOS 17.6 update.
Cover photo, screenshots, and GIFs by Justin Meyers/Gadget Hacks