Jabra true wireless earbuds impressed us with their remarkable noise reduction and customizable audio output. Jabra’s earbuds compete with the finest active noise-canceling true wireless products on the market. If you purchased a set of Jabra earphones and are unsure how to connect them, this article is for you. In this guide, we will show you how to connect Jabra earbuds to your devices, be it an iPhone, a Mac, Windows, or an Android phone.
Table of Contents
Jabra Earbuds
When it comes to earbuds, Jabra earbuds are a great option. You get superb ANC and audio performance that is customizable to your needs. However, most Jabra earbuds are water-resistant at best, making them excellent for runners and anybody else who needs tough ANC earpieces. Here are some of the best Jabra earbuds on the market:
Jabra Elite 75t
The Jabra Elite 75t earbuds include four microphones that efficiently decrease noise and are useful for clear phone conversations and video conferencing. The smaller size of the Jabra Elite 75t earbuds makes them more comfortable to use than many true wireless earbuds, yet they still feel secure in your ears. You can receive up to 7 hours of battery life on a single charge, and the tiny charging case is also easy to carry. They are also IP55-rated (water and dust-resistant), so you can rely on them to give you musical stimulation at the gym.
Jabra Elite 85t
The Jabra Elite 85t earbuds include a comfortable fit, excellent sound quality, and active noise cancellation. These earphones produce a full-bodied, precise, and balanced sound with a wide dynamic range. Active noise cancellation, on the other hand, is similarly impressive. It muffles speech sounds and reduces rumbling and other noise. With ANC switched on, the battery lasts more than five hours of continuous play and over seven hours when turned off. The case can charge the earbuds 3.5 times, bringing the total battery life to 25 hours with noise cancellation and 31 hours without.
Jabra Elite 7 Pro
The Elite 7 Pro earbuds are small, come with three pairs of ear tips, and fit comfortably even without ear fins. In addition, the charging case is compact. The Elite 7 Pro earpieces are completely waterproof and practically dust-proof, and they can be submerged underwater for up to a meter for up to 30 minutes. The Elite 7 Pro earbuds will last up to eight hours per charge, although your results will vary based on your volume level and ANC usage. The case holds an additional 22 hours of charge.
Jabra Elite 3
The Jabra Elite 3 is great for anybody searching for a low-cost set of earbuds that don’t skimp on sound quality, comfort, functionality, or, most crucially, battery life. The Elite 3 is the most affordable earbud in Jabra’s current lineup, offering exceptional sound quality in comfortable and attractive packaging. The buds include a helpful HearThrough function that keeps you aware of your surroundings and some of the best battery life of any earbuds.
Connect Jabra earbuds to your devices (Windows, Android, iOS, and macOS)
Now that you know everything there is to know about the Jabra (Elite 75t, Elite 85t, Elite 7 Pro, and Elite 3) earbuds and how amazing they are, it’s time to learn how to pair them with your devices.
Note
You can also download the Jabra Sound+ App to unlock the full potential of your earbuds, including access to special features accessible only through the app and the most recent firmware upgrades to keep your earbuds performing at their best.
1. Pair Jabra earbuds with a Windows PC or laptop
You can connect your Jabra (Elite 75t, Elite 85t, Elite 7 Pro, and Elite 3) earbuds with your Windows 11 or Windows 10 computer by following the below steps:
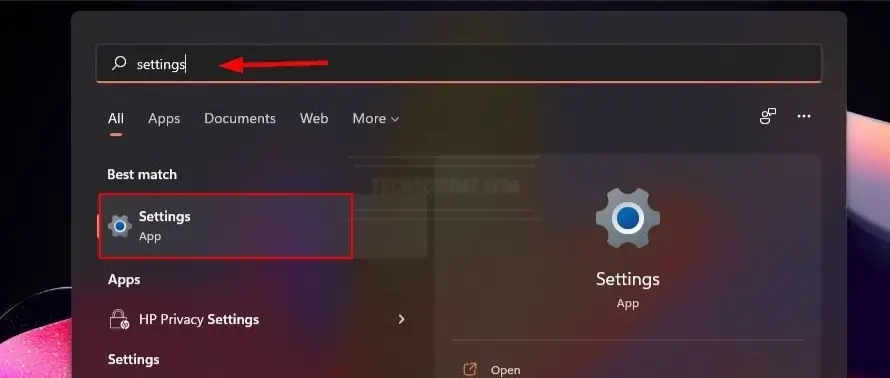
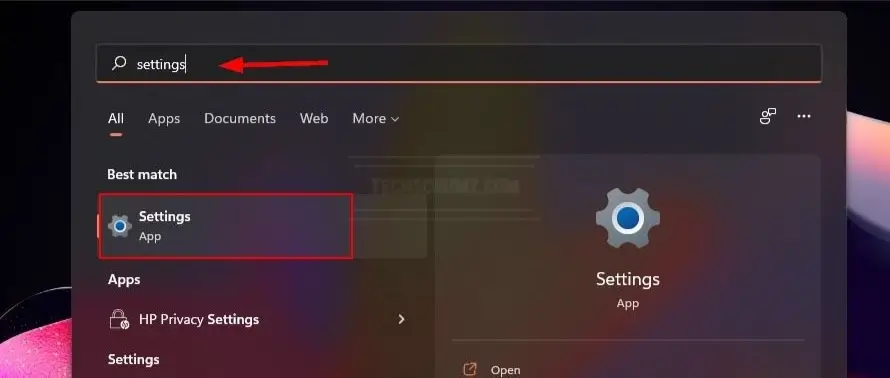
Step 1. Open the Settings app by searching for it in the Start Menu or by pressing the “Windows key + I” keyboard shortcut.
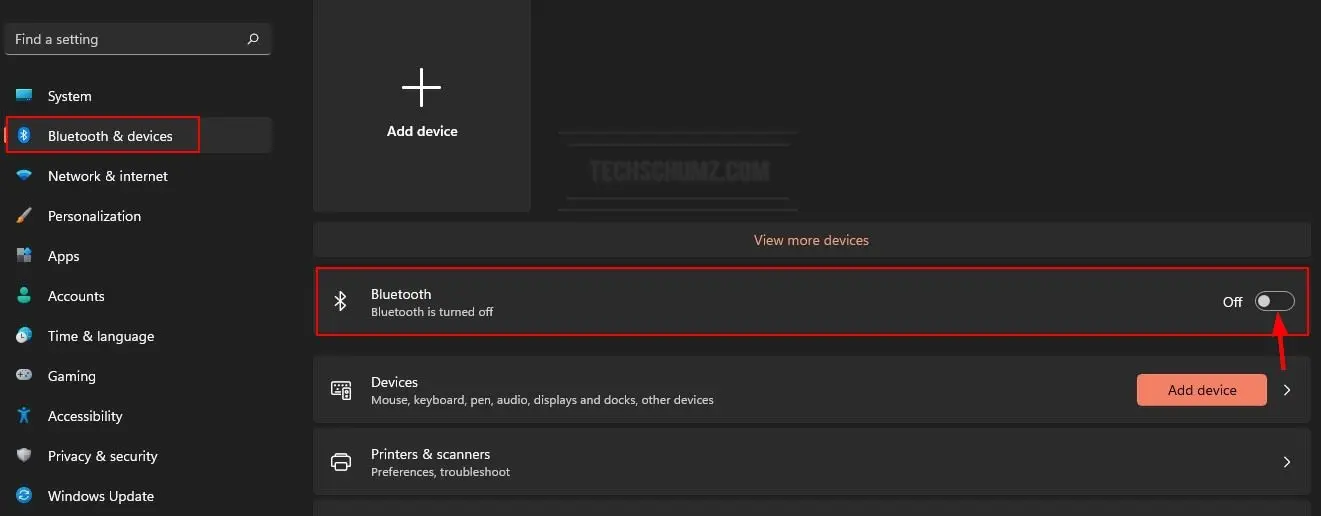
Step 2. On the right pane, click “Bluetooth & devices,” then flip the Bluetooth switch to enable it.
Step 3. After you’ve turned on Bluetooth, put your Jabra earbuds in pairing mode. To do so, take them out of the charging case and press and hold the Left and Right buttons on the earbuds at the same time until the LED on the right earbud flashes blue.
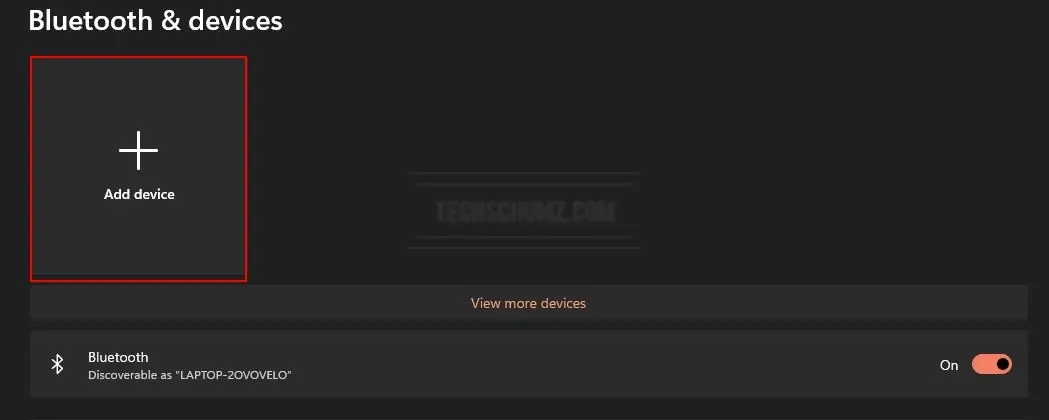
Step 4. Now, tap on the “Add device” option.
Step 5. Select “Bluetooth” from the three available selections.
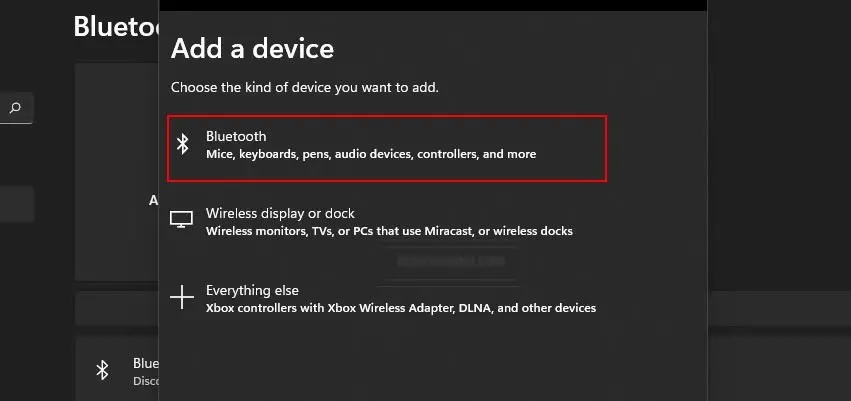
Step 6. Now, you need to wait for your Windows 11 PC to search for available devices and then click on your Jabra earbuds when they appear in the list.
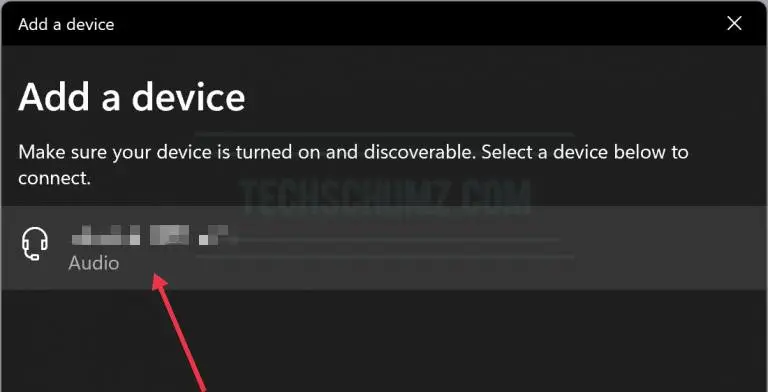
To disconnect the Jabra earbuds from your Windows 11/10 PC or laptop, return to the Bluetooth menu, click the three-dot menu next to the Jabra headphones, and then click Disconnect.
Read also: How To Connect Beats Earbuds To Your PC Or Smartphone
2. Connect your Jabra earbuds to your MacBook and Mac (MacBook Pro, MacBook Air, & iMac)
To pair your Jabra (Elite 75t, Elite 85t, Elite 7 Pro, and Elite 3) earbuds with your MacBook or Mac, follow these steps:
Step 1. First, make sure that your Jabra earbuds (Elite 75t, Elit 85t, Elite 7 Pro, and Elite 3) are powered on and in pairing mode. To do so, remove them from the charging case and press and hold the Left and Right buttons on the earbuds at the same time until the LED on the right earbud flashes blue.
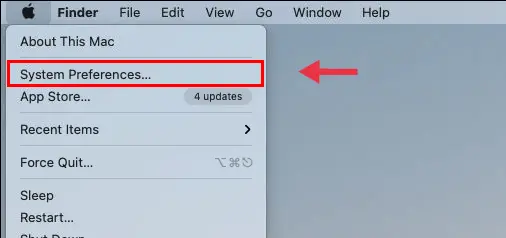
Step 2. On your Mac, go to “System Preferences“.,
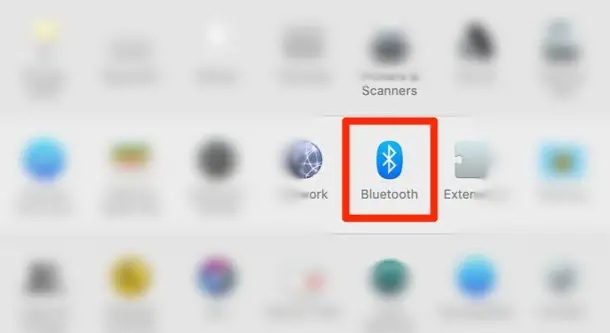
Step 3. Now, find and tap “Bluetooth” to open it.
Step 3. Next, on the left side, click “Turn Bluetooth On” to enable Bluetooth on your Mac.
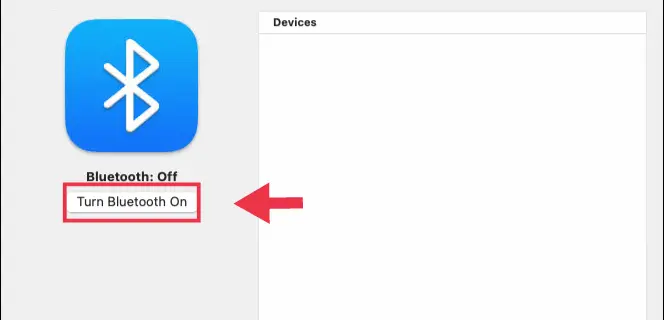
Step 5. All nearby, discoverable devices will be shown under “Devices” on the right side of the Bluetooth window. When you see your Jabra earphones, tap “Connect.”
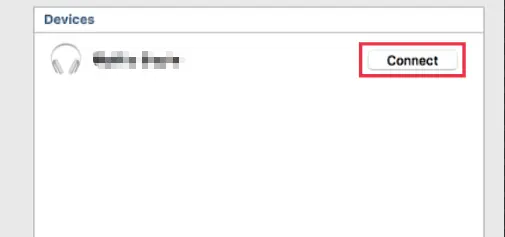
Step 6. Congratulations, you have successfully connected your Jabra earphones to your Mac or MacBook.
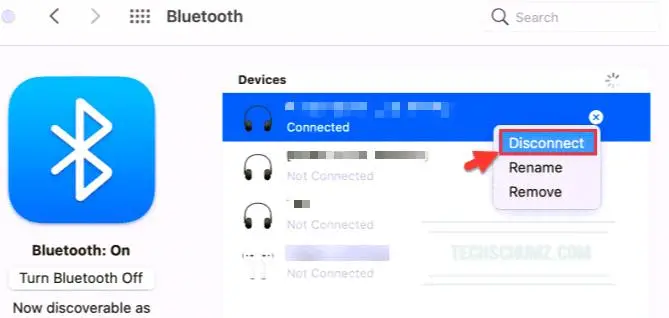
To unpair or disconnect the Jabra earbuds from your Mac or MacBook, go to System Preferences > Bluetooth and click the “x” or right-click and select “Disconnect” next to the earbuds.
Read also: How to Pair JBL Earbuds with Your Smartphone or PC
3. Pair Jabra earbuds with your Android device
To connect Jabra (Elite 75t, Elite 85t, Elite 7 Pro, and Elite 3) earbuds to Android phones (Samsung, Xiaomi, and Google Pixel), follow the steps below:
Step 1. On your Android device, go to “Settings.”
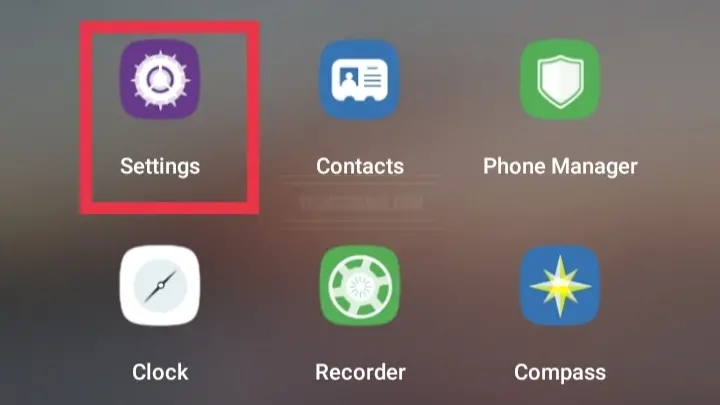
Step 2. Next, navigate to the “Bluetooth” settings page and enable Bluetooth.
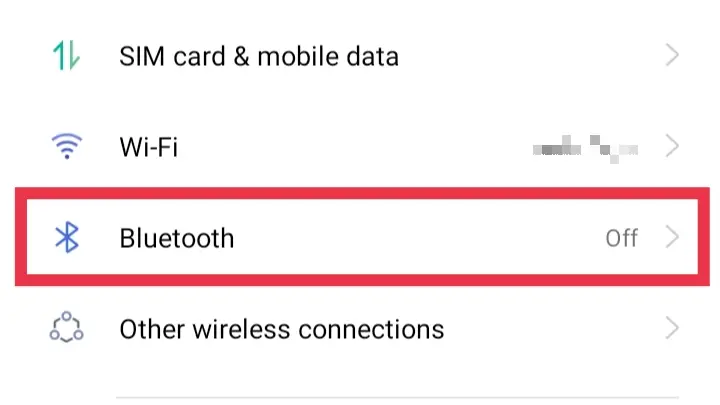
Step 3. Now, put your earbuds into pairing mode. to do that, take them from the charging case, and press and hold the Left and Right buttons on the earbuds at the same time until the LED on the right earbud flashes blue.
Step 4. Finally, find and select your Jabra earphones from the list of available devices to connect them to your phone.
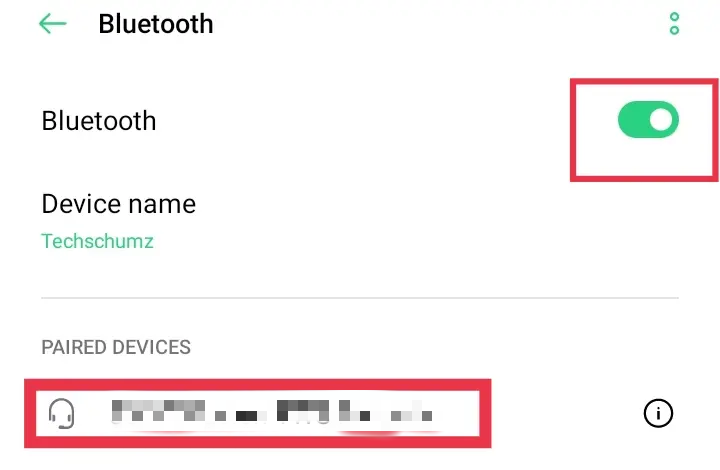
That’s all! Your Jabra earbuds have been successfully connected to your Android phone. Play your music and enjoy listening to it now.
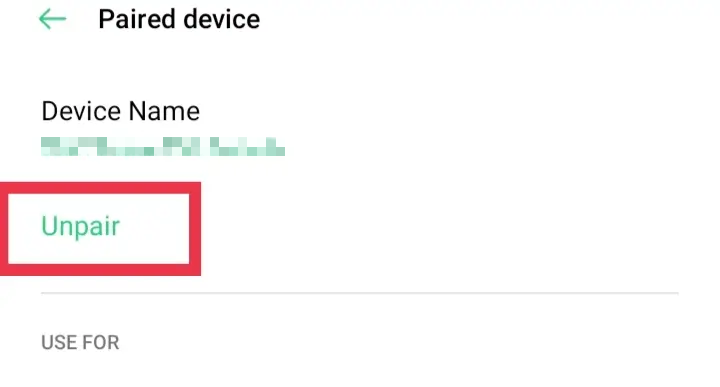
Read also: How to Connect or Pair Bose Earbuds With Your Devices
4. Connect your Jabra earbuds with an iPhone
To pair your Jabra (Elite 75t, Elite 85t, Elite 7 Pro, and Elite 3) earbuds with your iPhone, follow the steps below:
Step 1. To begin, remove them from the charging case and press and hold the Left and Right buttons on the earbuds at the same time until the LED on the right earbud flashes blue.
Step 2. After you’ve set your earphones into pairing mode, launch the “Settings” app on your iPhone.
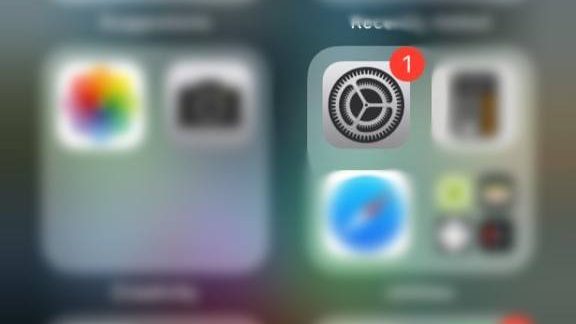
Step 3. On the Settings screen, tap on “Bluetooth“.
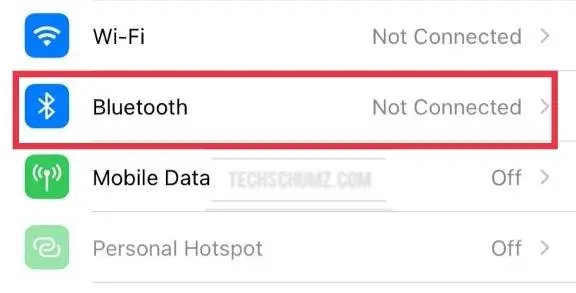
Step 4. Now enable the Bluetooth option. If the buds are in pairing mode, they will appear in the device list.
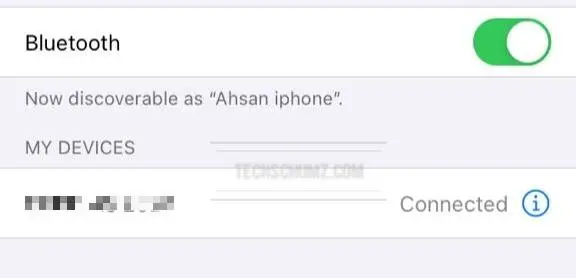
Step 5. Finally, find and select your earbuds from the list of devices, and they will connect to your iPhone instantly.
If you want to disconnect the Jabra earbuds from your iPhone device, simply go to Bluetooth, click on your earbuds, and choose “Disconnect” or “Forget this device.”
Read also: How to Connect Google Pixel Buds With Your Devices
FAQs
Q. How can I reset my Jabra true wireless earbuds?
To reset your Jabra earbuds, first ensure that your right earbud is fully charged and turned on. Then, on the right earbud, push and hold the power/Bluetooth button until the LED momentarily flashes purple. Your earbuds have now been reset.
Q. Why is my Jabra earbud blinking red?
When the charging case flashes red after a firmware update, it means the charging case was not properly updated. It is recommended that you attach the charging case to a power source. Then, take the earphones out of the case, reinstall them, and close the lid.
Q. Can I use just one of my Jabra earbuds?
Yes! But you can only use the right earbud alone for mono music or phone calls. You can’t use the left earbud alone because it only connects to the right earbud and not to the mobile device.
Q. How do you turn off Jabra HearThrough?
When not on a call, double-press the multi-function button on the right earbud to toggle on/off HearThrough.
Q. How can I mute the microphone during a call?
During a call, you can mute the microphone by using the mute control on the connected device, such as your smartphone. The earbuds do not have a mute button.
Final Words
This Techschumz article showed you how to pair or connect Jabra earbuds to your devices (Windows, Android, the iPhone, and the Mac). In addition, we reviewed some Jabra earphones and addressed some Jabra earbuds-related questions. Finally, if you have any suggestions or queries, please leave them in the comments section below.
